background image

Downloading & Viewing Images

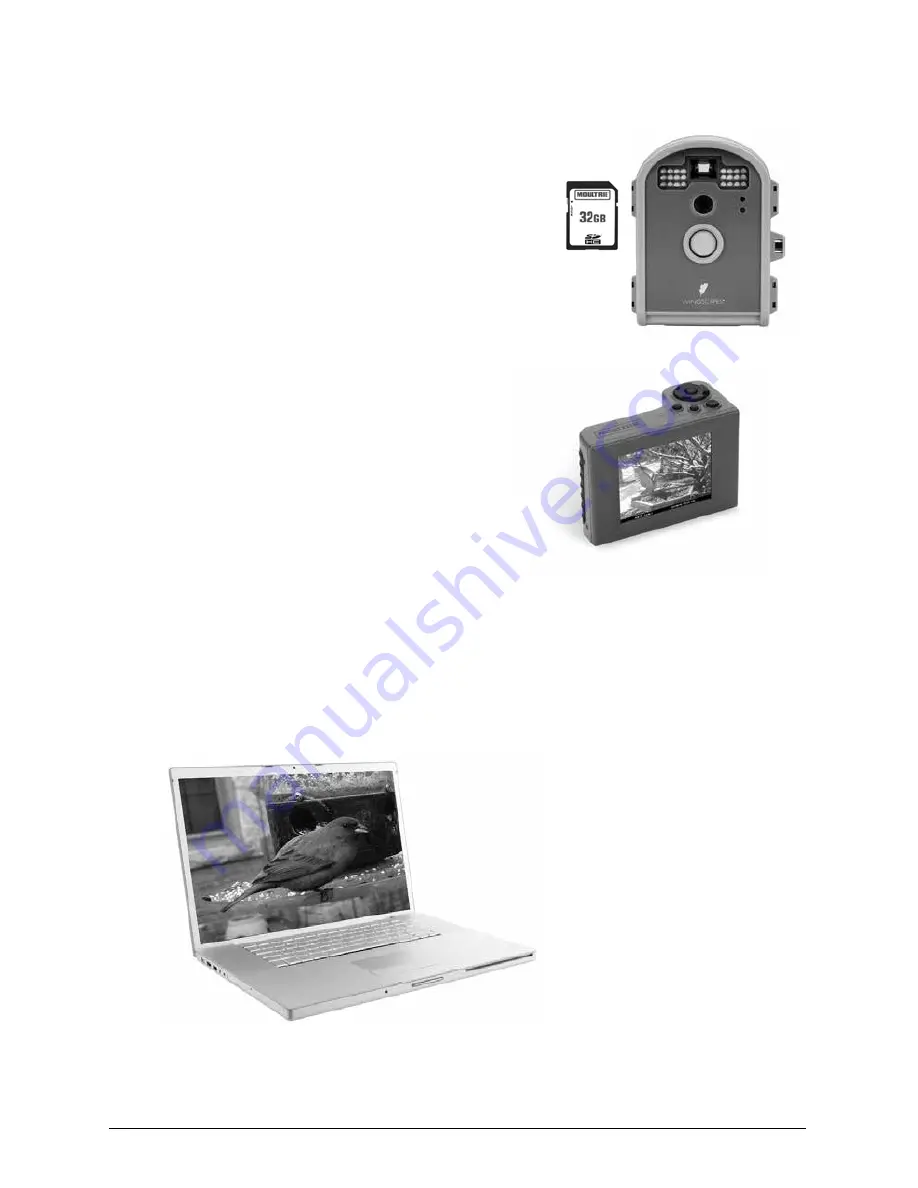
There are a number of ways for you download and view 

the pictures, videos in the field or at another location.

Important

Make sure that the camera is in the OFF position 

before removing SD card.  

Removing the SD Card

To remove the SD Memory Card, open the camera cover 

and push gently on the SD card and it will pop out slightly

allowing you to remove it. Load the SD card into the 

player or card reader to view or move stored images to 

another location.

ln the Field

You can download the pictures, videos, and time lapse 
pictures with the aid of external devices. To download,
use an external player or card reader that is
supported by 12V DC or Mini USB Jack.   

At Home

Remove the entire camera and transport to another location to download images. To connect 
the camera to a PC computer, turn the camera ON, press the OK button once to change to 
SETUP Mode. Connect the USB cord (not included) between the USB out port and the PC 
computer. The computer will recognize the camera as a removable drive. The unit works 
with Windows XP/Vista/7. Copy the images and videos from the camera onto your PC for 
further editing or printing. When the USB cable is disconnected, the camera will go back 
to SETUP mode.

See the full line of Wingscapes camera accessories at 

www.wingscapes.com

Page 23

BirdCam PRO User Guide

Содержание WCB-00116

Страница 1: ...rved Made in China This product is covered by one or more of the following US Patents 6735387 6768868 6834162 Other patents pending WARNING This product may contain lead a chemical known to the state of California to cause cancer birth defects and other reproductive harm ...

Страница 2: ...BirdCam Pro User s Guide For Models WCB 00116 BirdCam Pro 6 6 13 ...

Страница 3: ...apes com support Address Wingscapes 150 Industrial Road Alabaster AL 35007 Photogallery wingscapes com photogallery YouTube youtube com wingscapes Blog wingscapes com blog Facebook facebook com Wingscapes Twitter wingscapes or tweet with hashtags birdcam or plantcam Find Us Online Page 2 BirdCam PRO User Guide ...

Страница 4: ...he aid of external devices To download use an external player or card reader that is supported by 12V DC or Mini USB Jack At Home Remove the entire camera and transport to another location to download images To connect the camera to a PC computer turn the camera ON press the OK button once to change to SETUP Mode Connect the USB cord not included between the USB out port and the PC computer The co...

Страница 5: ...he following two conditions 1 This device may not cause harmful interference and 2 this device must accept any interference received including interference that may cause undesired operation NOTE THE MANUFACTURER IS NOT RESPONSIBLE FOR ANY RADIO OR TV INTERFERENCE CAUSED BY UNAUTHORIZED MODIFICATIONS TO THIS EQUIPMENT SUCH MODIFICATIONS COULD VOID THE USER S AUTHORITY TO OPERATE THE EQUIPMENT NOTE...

Страница 6: ...Guide Mounting Your BirdCam Pro Default Settings Specifications Product Overview Definitions Camera Setup Setup and Programming 1 Playback 2 Setup 3 Motion 4 Timelapse 5 Motion T L Memory Storage Warnings Regulations Downloading Viewing Images Connecting to a Computer Page 3 BirdCam PRO User Guide 4 5 6 8 9 10 11 12 13 14 17 19 21 22 23 ...

Страница 7: ...ance Do not touch the lens with fingers Use a soft lens cloth to clean lens Important Battery lnformation Only use Alkaline batteries We recommend the use of Duracell or Energizer batteries Do not mix old and new batteries Always replace ALL the batteries at the same time When the camera is not in use please remove the batteries Wingscapes Limited Warranty This product has been thoroughly tested an...

Страница 8: ...RT Use the RIGHT button to move through the menu MOTION T L ACTIVE window will appear in the TFT display It will reflect Battery Est Days Taken Capacity status If there is no activity for several seconds depending on Timelapse interval setting the camera will automatically turn off the display to conserve power Use the LEFT buttons to STOP the action 5 1 TEST PHOTO Press OK button to take test pho...

Страница 9: ...OGRAMS 1 STOP Press LEFT button Press or buttons to choose between 24 different settings 12am midnight 11pm 10pm 9pm 8pm 7pm 6pm 5pm 4pm 3pm 2pm 1pm 12pm noon 11am 10am 9am 8am 7am 6am 5am 4am 3am 2am 1am Press the OK button to save changes 4 4 START Use the RIGHT button to move through the menu TIMELAPSE ACTIVE window will appear in the TFT display It will reflect Battery Est Days Taken Capacity ...

Страница 10: ...e time and date by pressing the LEFT button until TIME DATE appear on screen Press OK to begin entering the Time and Date using buttons to adjust the values and LEFT RIGHT to move between fields STEP 3 Mount Camera in desired location using a mounting strap or other accessories offered by Wingscapes visit www wingscapes com for more information on mounting accessories Switch the camera to Laser Ai...

Страница 11: ...hould never be hung from above or mounted to an object that moves in the wind If the BirdCam is moving it will cause the motion sensor to trigger incorrectly 2 Focus Note that the BirdCam Pro lens can be focused manually This is a snap Use the included measuring tape to measure the distance between the BirdCam Pro and its target Set the lens accordingly 3 Lighting As with all cameras it is best to...

Страница 12: ...n 4 3 RESET TIMELAPSE OPTIONS Select this option to reset Timelapse options to factory defaults 4 1 TEST PHOTO Press OK button to take test photo with current settings The display will show a countdown and then capture a photo This photo will then appear on the display for review until the OK button is pressed again 4 3 1 TIMELAPSE INTERVAL Press LEFT button Press or buttons to choose between 12 d...

Страница 13: ...otos or videos with the motion detect mode The MOTION DETECT ACTIVE window will appear in the display This screen will show battery percentage estimated days of battery life based on current settings and number of images taken capacity stored on SD card If there is no button activity for several seconds the camera will turn off the display to conserve power Press the LEFT button to Stop the MOTION...

Страница 14: ... or piece of bark between the BirdCam Pro and the tree to facilitate aiming Mounting Arm Accessories Wingscapes offers two optional mounting accessories for the BirdCam Pro BirdCam Mounting Arm WSBR01 and Outdoor Camera Mounting Bracket WSBR02 Both accessories allow you to easily mount the BirdCam to a common bird feeder pole a post a stake a wall or a tree The primary difference between these two...

Страница 15: ...CAMERA NAME BIRDCAM RESET IMAGE NUMBERING NO WIFI SD CARD NO ERASE ALL MEMORY NO UPGRADE FIRMWARE NO Page 8 BirdCam PRO User Guide MOTION DETECT SETTINGS DEFAULT RESET MOTION DECTION OPTIONS NO SENSITIVITY MEDIUM NO OF SHOTS PER DELAY 4 DETECTION DELAY 10 MINUTES TIME LAPSE SETTINGS DEFAULT RESET TIMELAPSE OPTIONS NO TIMELAPSE INTERVAL 1 MIN T L PROGRAMS PER DAY 1 PROGRAM T L PROGRAM 1 START 6 AM ...

Страница 16: ...to the option 3 1 TEST PHOTO Press OK button to take test photo with current settings The display will show a countdown and then capture a photo This photo will then appear on the display for review until the OK button is pressed again 3 2 1 RESET MOTION DETECT OPTIONS Select this option to reset Motion Detect options to factory defaults 3 2 2 SENSITIVITY Select desired sensitivity setting of the ...

Страница 17: ... wireless network 2 2 11 ERASE ALL MEMORY Select option to delete all photos and videos from the SD card and format the card in the camera 2 2 12 UPGRADE FIRMWARE Only use this option when performing a required upgrade to the camera s firmware Please contact customer service before performing any upgrades 2 3 EASY SETUP Press the RIGHT button to enter the Easy Setup menu The EASY SETUP window will...

Страница 18: ... Output USB OUT SD Card TV Out TFT Display Housing Weather resistant and lockable Display Thin Film Transistor TFT SD Memory Card Up to 32 GB SD card not included Format JPEG Still pictures AVI Video clips USB Output Requires PC MS Windows XP Vista 7 Picture Delay Variable 10 sec 30 sec 1 5 10 30 mins 1 2 6 12 hrs Time Lapse lnterval 10 sec 30 sec 1 5 10 15 30 mins 1 3 6 12 24 hrs Time Lapse ON OF...

Страница 19: ...s 10 Viewfinder 11 Water Resistant Seal 12 Laser 13 Microphone 14 Up Down Buttons 15 OK Select Button 16 Left Right Buttons 17 TFT Display 18 Battery Chamber Release Button 19 Rotary Dial 20 Mounting Strap Slot 21 SD Card Slot 22 TV Out 23 Cord Strain Relief 24 USB Out Port 25 Tripod Socket 26 Battery Chamber Holder 27 12V DC Power Port Page 10 BirdCam PRO User Guide ...

Страница 20: ...he percentage of total flash power 2 2 5 LIGHT SOURCE Select light source option Use Fluorescent when capturing images indoors under this lighting type as the camera will optimize the image sensor accordingly For all other light types including outdoor use select OTHER 2 2 6 IMPRINT INFO Selection option to imprint info on strip on bottom of images such as Time Date and Camera Name 2 2 7 TIME DATE...

Страница 21: ...PHOTO VIDEO OR BOTH Select option to capture a photo video or both when camera is triggered 2 2 ADVANCED SETUP Press the LEFT button to enter the Advanced Setup options Once in the Advanced Setup Menu press LEFT to move between the option windows To change the options press or to change the value and LEFT and RIGHT to move between fields Press OK to confirm changes to the option Page 14 BirdCam PR...

Страница 22: ...ttings or moving to the next setting or field 17 TFT Display Shows important operational information such as battery level picture count camera features and setting options and image review 18 Battery Chamber Release Button Press the button to release the battery holder 19 Rotary Dial Depending on the position of the dial there are 5 possible functions PLAYBACK SETUP MOTION TIMELAPSE MOTION T L 21...

Страница 23: ...atteries DO NOT use lithium batteries Insert SD Card Camera needs to be powered off when installing and removing SD card You will need to open the front cover to insert an SD memory card You can insert an SD Card up to 32 GB Insert the SD Card in the direction indicated on the card until you hear an audible click Note Camera will not operate without an SD memory card installed Power ON Slide the P...

Страница 24: ...n and selection window will appear in the TFT display Press to play Video Press to Delete File Press to go to Previous Press to go to the Next option Press OK go to Single Matrix View window 1 2 Press button DELETE PHOTO Window will appear on the display Press or buttons to choose between Yes or No and OK button to execute the action Page 13 BirdCam PRO User Guide ...

Отзывы: