6
PPA T46 Personal PA 72-76 MHz Transmitter
Basic Setup
The Basic Setup Menu allows the user
to change the most frequently used
settings easily. The User can change the
transmitting channel (or frequency), the
master volume level, and the auxiliary
volume level.
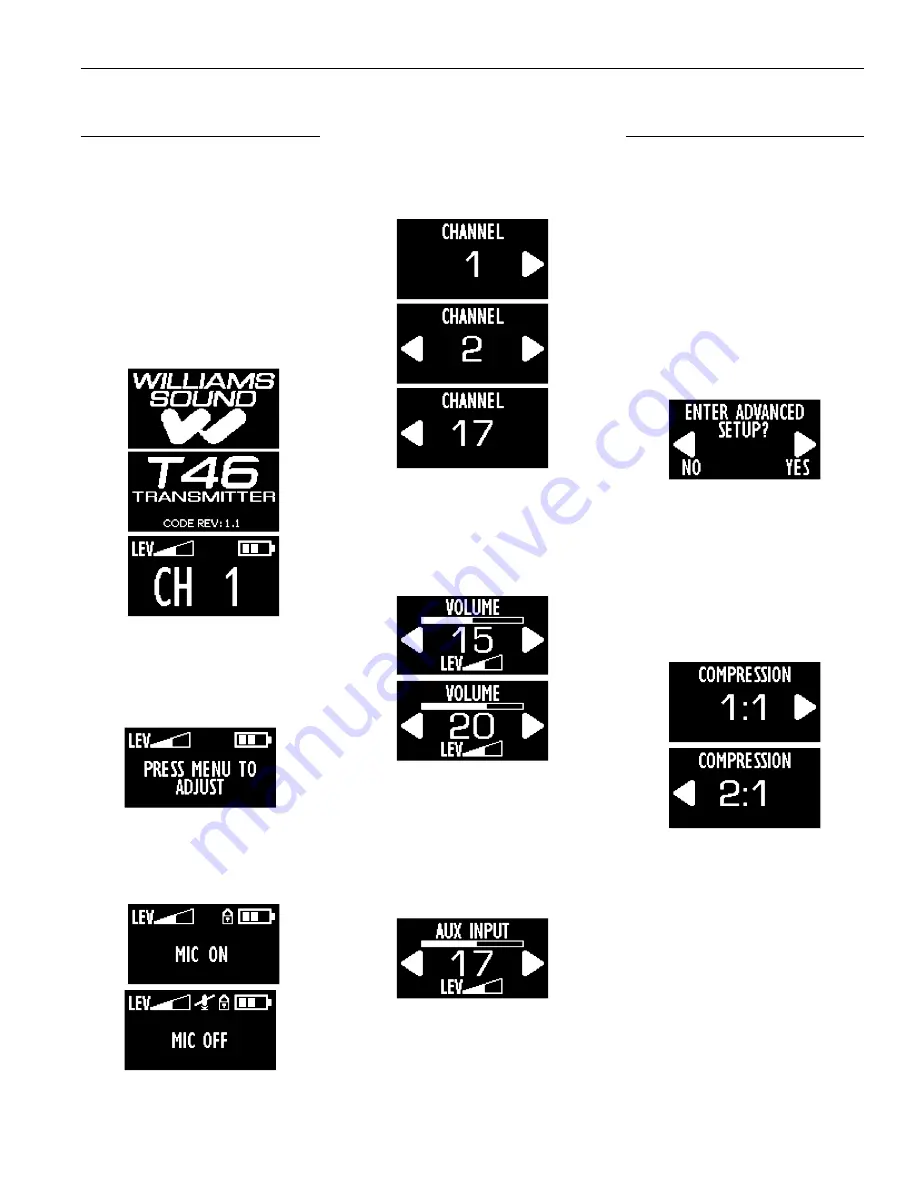
1. Turn on the transmitter by pushing
and holding the power button for 3
seconds. The transmitter will start up
and show the following three screens.
Note: While on the main screen, if the
left or right arrow button is pushed, the
following screen will show, indicating
that you need to enter the menu in
order to change any settings.
2. To mute the microphone, push and
release the power button on the top of
the transmitter. To unmute, push and
release the power button again.
3. To set the transmit channel, push
the menu button until you see the
channel set screen, below. Use the
arrow buttons to select one of the 17
channels (see Channel Selection Chart
in Quick Setup, Fig. C).
4. To set the Master Volume Level (this
is the micr auxiliary input
volume), push the menu button until
you see the master volume screen,
below. Use the arrow buttons to
adjust the volume level (1-30).
5. To set the Auxiliary Volume Level (this
is the auxiliary input volume before it
is mixed with the microphone), push
the menu button until you see the
auxiliary volume screen, below. Use
the arrow buttons to adjust the volume
level (1-30).
Advanced Setup
The Advanced Setup Menu allows the
user to turn compression on/off, change
between channel and frequency display
mode, change the transmitter to 8 or
17-channel mode, change the amount
of time for display time-out, set screen
brightness, and restore factory default
settings.
1. To access the Advanced Setup Menu,
push the Menu button repeatedly to
toggle through all of the basic settings,
until you see the following screen.
Push the right arrow to enter the
advanced setup menu.
2. Audio Compression reduces the
volume difference between loud
and quiet sounds. To set the audio
compression ratio, push the menu
button until you see the compression
screen, below. Use the left,
right arrow buttons to toggle the
compression (1:1 = compression off,
and 2:1 = compression on).
3. To change the display to show
either frequency (72.1-75.9MHz) or
channel number (1-17), push the menu
button until you see the frequency
display mode screen, below. Use
the arrow buttons to toggle between
“FREQUENCY” or “CH NUMBER” .


