


7131GDRC Northgate Queen Storage Bed
Parts list
7131GDRC — Page 5 — 09/11
7133GDRC Queen/King Bed Rail Kit (x1)
Part Description
Quantity
C
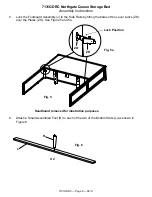
Left Bracket (attached)
4
D
Right Bracket (attached)
4
F
#6 x 3/4" Brass Flat Head Screw (inserted)
4
G
#8 x 1" Black Screw (inserted)
32
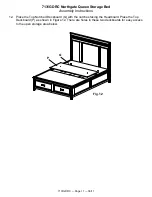
ZM
Left Side Rail
1
ZN
Right Side Rail
1
ZO Plate
(attached)
2


