


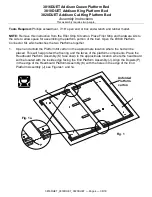


3816DUET Addison Queen Platform Bed
3818DUET Addison King Platform Bed
3820DUET Addison Cal-King Platform Bed
Assembly Instructions
This assembly requires two people.
3816DUET_3818DUET_3820DUET
— Page 6 — 08/18
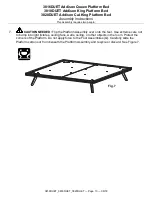
3.
Place the Foot Assemblies (Q) onto the Platform Assembly so that the holes in the metal
brackets align over the predrilled holes. The legs should angle outward toward the corner of the
platform. Attach the Foot Assemblies (Q) with 1/4" X 35mm Hex Bolts (E) and 18mm Flat
washers (B). See Figures 3 and 3a.
Fig. 3
E
Fig. 3a
B
Q
B
E
x 16
x 16
Hardware bag step 3


