

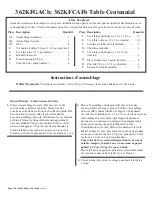

362KFGACb_362KFCAFb — Page 3 — 10/13
362KFGACb; 362KFCAFb Centennial Table
Assembly Instructions
Tools Required:
Phillips screwdriver, 9/16" Wrench, Drill and Drill bits, Mallet or Padded hammer, Wood glue
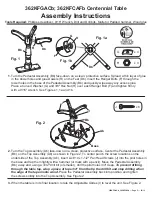
1.
Turn the Pedestal Assembly (Bb) face-down on a clean, protective surface. Spread a thin layer of glue
in the dowel holes and glue Dowels (R) on the Feet (Db). Insert the Hanger Bolts (F) through the
lower holes in the base of the Pedestal Assembly (Bb) and quickly wipe away any excess glue.
Place a Curved Washer (G) and 3/8" Hex Nut (H) over each Hanger Bolt (F) and tighten firmly
with a 9/16" wrench. See Figures 1, 1a and 1b.
2.
3.
Turn the Top Assembly (Ab) face-down on a clean, protective surface. Center the Pedestal Assembly
(Bb) on the Top Assembly (Ab) as shown in Figure 2. To center punch the screw locations on the
underside of the Top Assembly (Ab), insert six #10 x 1-1/2" Pan Head Screws (J) into the pilot holes in
the base and tap them lightly with a hammer (or mark with a pencil). Move the Pedestal Assembly
(Bb) away and, using a 3/32" drill bit (or smaller), drill the pilot holes 3/4" deep.
To prevent drilling
through the table top, wrap a piece of tape 3/4" from the tip the drill bit and stop drilling when
the edge of the tape meets wood.
Place the Pedestal Assembly back into position and tighten
the screws solidly into the Top Assembly. See Figure 2.
Fig. 1
Db
Fig. 1a
Fig. 2
Db
F
x 4
G
x 4
H
x 6
J
R
F
H
G
Fig. 1b
When the table is in its final location, rotate the Adjustable Glides (I) to level the unit. See Figure 2.
Base
Ab
Bb
I
I
J
J
Bb


