11
Cutting Height Adjustment Lever (Model 960 Thru 969)
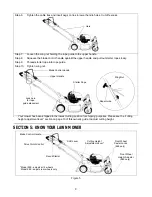
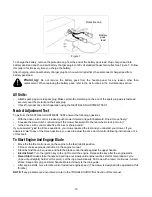
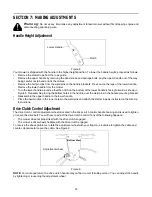
The rear wheel cutting height adjustment lever is located above the left rear wheel. To adjust the cutting height, pull
the lever out and away from the mower. Move it forward or backward to the desired cutting height. See Figure 5.
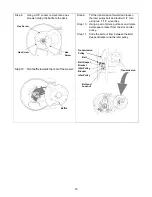
The front wheel cutting height is determined by the selection of one of six positions in each caster assembly.To
adjust, remove the wing nut from the axle bolt. Slide the axle bolt and spring washer from the assembly and select a
cutting height. With the spring washer placed on the axle bolt, reinsert the axle bolt in the square hole desired,
through the wheel assembly, and secure with the wing nut previously removed. Remember that higher the position,
lower the cut.
IMPORTANT:
All wheels must be placed in the same relative position. For rough or uneven lawns, raise the cutting
height of your mower. This will help stop scalping.
Caster Lock (Models 960 Thru 969)
Warning:
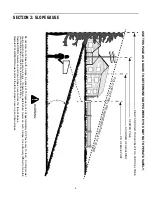
When operating mower on hills, front wheels should be locked in the straight ahead position.
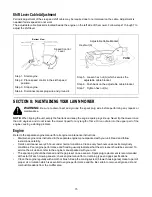
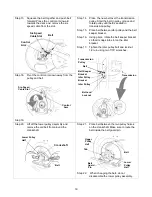
The casters can be locked in a straight ahead position or can be left to swivel freely. Lift and place the lock pins in
the larger holes for locked, straight ahead operation, place pins in smaller holes to allow casters to rotate freely.
Engine Controls
See the engine manual for the location and function of the controls located on the engine.
SECTION 6: OPERATING YOUR LAWN MOWER
W a r n i n g :
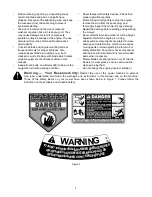
Keep hands and feet away from the chute area on the cutting deck. See Section 4. The
operation of any lawn mower can result in foreign objects being thrown into the eyes, which can result in
severe eye damage. Always wear safety glasses or eye shields.
NOTE: For best results raise the cutting position until it is determined which height is best for your lawn. See
CUTTING HEIGHT ADJUSTMENT LEVER in the CONTROLS section.
Gas And Oil Fill Up
Service the engine with gasoline and oil as instructed in the separate engine manual. Read all instructions carefully.
W a r n i n g :
Never fill fuel tank indoors, with engine running or until the engine has been allowed to
cool for at least two minutes after running.
Each Time Before You Start Your Mower
Electric Start Units Only:
W a r n i n g :
The battery contains corrosive fluid and toxic material—HANDLE WITH CARE. Keep
away from children. Do not puncture, disassemble, mutilate or incinerate the battery. Explosive gases
could be vented during charging or discharging. Use in a well ventilated area, away from sources of
ignition.
Charging Instructions
Charge battery for 16 hours before initial use. Do not charge longer than 20 hours.
IMPORTANT:
Use only the battery charger supplied with this mower.


