background image

GETTING STARTED

- Check that voltage of the appliance is the same as that indicated on the technical information

plate of the appliance.

- Place  the appliance on a flat surface, ensuring that suction cups stick firmly to the surface.
- Fill the tank with cold water, taking care that it is correctly re-inserted in its housing.
- Insert the plug into the A/C outlet, which must be grounded.
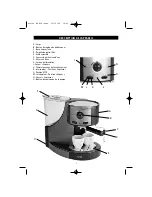
- Now the power light (J) is red.
- Press the switch (M) to right (expresso mark L) to turn on the machine. The internal boiler has

begun to heat up. Till the indicator light (N) is green, press the expresso supply switch pump (O)
and then water is seen coming from the filter basket.

- If you are starting the machine for the first time or after a period of non-use, it is recommended

that at least one cup of water be allowed to pass through the boiler’s hydraulic circuit. This can be
achieved by turning knob (B) in an anti-clockwise direction after placing a cup under the nozzle of
the maxi cappuccino attachment (C), turn on switch (O) until seeing the clean water out of the
cappuccino attachment. Then close the knob (B) turning it in a clockwise direction and switching
off the switch (O) to stop water from being emitted.

THE MACHINE IS READY TO MAKE COFFEE WHEN THE INDICATOR LIGHT (N) GOES ON.

HOW TO MAKE COFFEE

- Measure out the coffee into the filter. For a double expresso shot, use two full measuring scoops

and for a single expresso shot, use one scoop.

- Insert the filter basket into position. Turn the filter basket anti-clockwise 40 to 45 degrees, or as far

as possible without using excessive pressure.

- A pre-heating time of 8/10 minutes is recommended, with the filter basket inserted to ensure a nice

hot first shot of expresso. For subsequent shots, this will not be necessary.

- The warning light (N) will go on and off from time to time, indicating that the boiler thermostat  is

keeping the water at the correct temperature. We suggest that both first and subsequent shots be
made only when this light is green. Press button pump (O).

- Coffee will begin to flow through the filter basket nozzle.
- To stop the flow, press button (O) again.

- As with commercial-grade coffee machines, do not remove the filter basket when the supply

switch (O) is turned on. After having made the expresso, gradually loosen the filter basket by 
turning it in a clockwise direction in order to reduce the internal pressure.

- If you cannot loose the handle, turn steam controller (B) to release the pressure and then turn

steam controller clockwise, you could succeed in loosening the filter basket.

- No special operation is necessary when the water in the tank runs out as the machine is equipped

with a special self-priming device. Just unplug the machine, pull out the tank and fill it with water
again.

12

notice EX 824-reso  12/12/05  10:49  Page 12

Содержание EX 824 Tosca

Страница 1: ...MODE D EMPLOI MODE D EMPLOI USER MANUAL USER MANUAL EXPRESSO CAPPUCCINO ESPRESSO CAPPUCCINO EX 824 Tosca notice EX 824 reso 12 12 05 10 49 Page 1...

Страница 2: ...peur avec pr caution pour ne pas vous br ler Ne jamais d placer ou d brancher l appareil en tirant sur le cordon d alimentation Avant de ranger ou de nettoyer l appareil s assurer qu il est bien d bra...

Страница 3: ...savoureux Ne jamais faire fonctionner avec le r servoir vide Cela pourrait ab mer la pompe Pendant le fonctionnement l appareil peut vibrer et mettre un peu de bruit Ceci est parfaitement normal LE F...

Страница 4: ...ble F Couvercle du r servoir d eau G R servoir d eau H Cordon d alimentation I Voyant Vapeur J T moin lumineux de fonctionnement K Interrupteur Position Expresso L Position STOP M Interrupteur Positio...

Страница 5: ...lev e puis est pouss e rapidement au travers de la masse de caf par une forte pression Elle extrait le nectar de la mouture et puise les par fums essentiels du caf Pour r aliser un d licieux caf utili...

Страница 6: ...n rer de la vapeur NOTE de petits jets de vapeur peuvent sortir du porte filtre C est tout fait normal Mettre une tasse ou un verre sous la buse vapeur C et tourner le bouton de r glage de vapeur B v...

Страница 7: ...obl me persiste consulter un technicien agr 3 Le caf d borde du porte filtre Il est probable que le filtre soit trop rempli emp chant le porte filtre de s embo ter parfaitement dans son logement Laiss...

Страница 8: ...5 Le caf est froid ou insipide Le filtre n a pas t correctement rempli Pour obtenir un caf plus concentr et plus chaud il faut utiliser une mouture plus fine Si le probl me persiste consulter un techn...

Страница 9: ...th abrasive chemicals Regularly check the cord Never use the appliance if cord or appliance show any sign of damage All repairs made by a non qualified person can be dangerous in this case guarantee c...

Страница 10: ...A slight noise and some vibrations when the coffee maker is working is absolutely normal THE MANUFACTURER WILL NOT ASSUME ANY RESPONSIBILITY IN CASE OF NON ADHERENCE TO THESE RECOMMENDATIONS SAVE THE...

Страница 11: ...ttachment D Filter holder handle E Tray grid F Water tank cover G Water tank H Power cord I Steam indicator J Power indicator K Expresso switch L Stop mark M Steam switch N Expresso indicator O Pump s...

Страница 12: ...t the coffee into the filter For a double expresso shot use two full measuring scoops and for a single expresso shot use one scoop Insert the filter basket into position Turn the filter basket anti cl...

Страница 13: ...urn the steam supply knob B in an anti clockwise direction At first a little water will come out immediately followed by a strong jet of steam Turn knob B in a clockwise direction still stop it and pl...

Страница 14: ...ivate the pump Repeat the operations described in the section Getting started If the supply is not re established after performing the above mentioned process go to an Authorized Service Centre 2 The...

Страница 15: ...e water does not flow uniformly from all holes it means that the disc is clogged Take the machine to the closest Authorized Service Centre to have it cleaned The tank is not inserted well Fit the tank...

Страница 16: ...r utilisation des appareils usag s Veuillez vous adresser votre municipalit pour conna tre la d chetterie comp tente Instructions on environment protection Do not dispose of this product in the usual...

Отзывы: