background image

10  

Whistler WGPX-635/650 


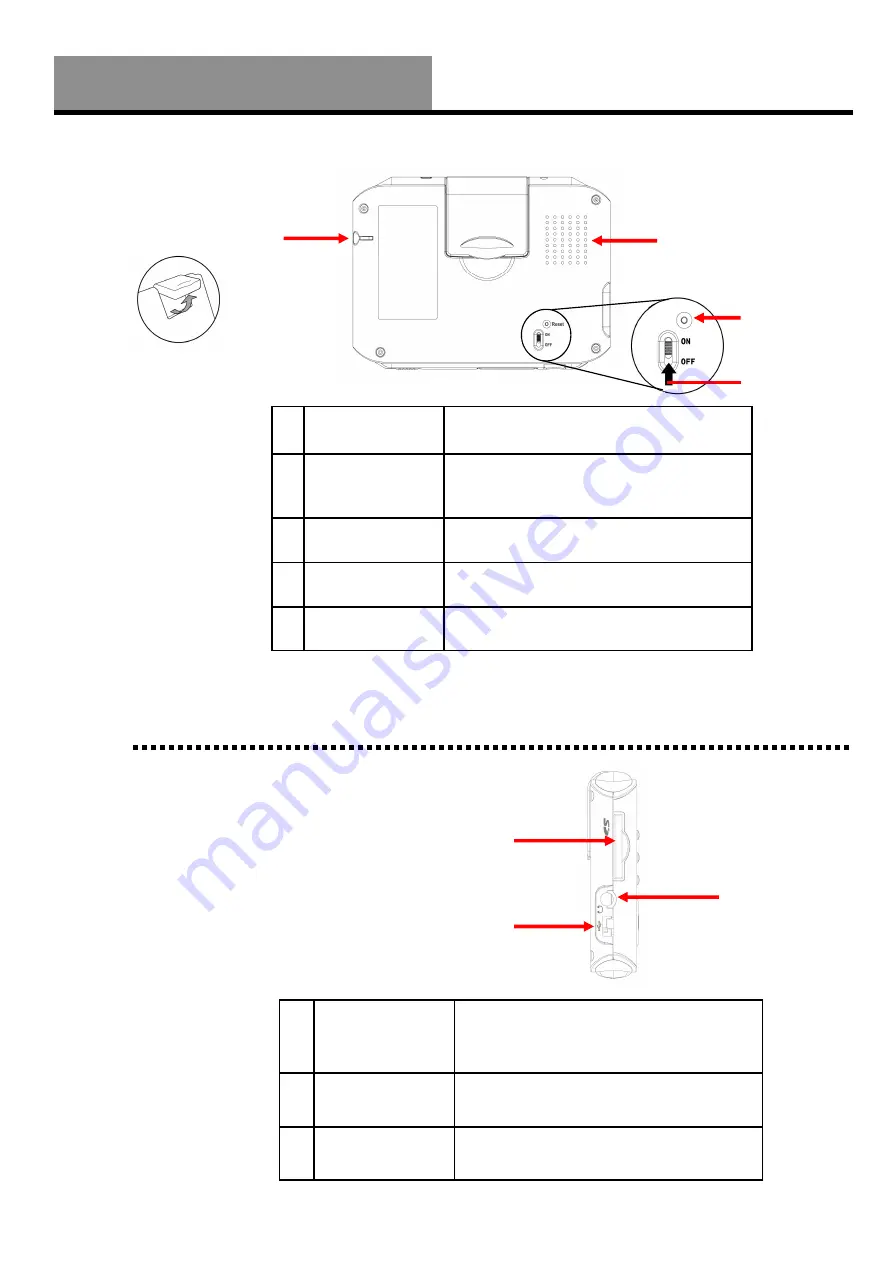
Retractable Flip 
up Antenna 

Receives satellite signals– flip up 90 
degrees to use 

External 
Antenna 
Connector 

For connection of an external antenna - 
(MMCX type) 

Speaker 

Audio output 

Main Power 
Switch 

Disconnects power to the unit 

Master Reset 

Clears unit’s memory and resets it 

Rear View 

Features  


SD/MMC Card 
Slot 

Location for the preloaded SD memory card. 
The maps are saved on this memory card. 
Do not remove this card while in use. 

Headphone 
Jack 

Connection to external headphones. 

USB Connection 

Allows connection to a PC. 

Left View 

1


3


2


1


2


3


4


5


Note: 

Remember 

to flip up antenna 
for best 
performance. 

All manuals and user guides at all-guides.com

Содержание Whistler WGPX-635

Страница 1: ...0 WGPX 635 WGPX 650 Hardware User Manual Turn by Turn GPS Receiver Note Contents of this manual and product specifications can change without notice Rev 2 All manuals and user guides at all guides com a l l g u i d e s c o m ...
Страница 2: ...t in a safe place You may register your WGPX online at www whistlergroup com If the unit is returned without a dated store receipt an out of warranty service charge applies Note Your warranty period begins at the time of purchase The warranty is validated only by a copy of the original store receipt Now is the time to record the serial number of the unit in the space provided in the warranty secti...
Страница 3: ...nd wMap Mapping software were designed for ease of use to make your experience a pleasant one Both manuals and our Whistler Customer Service Representatives are here to assist you For more general GPS information or frequently asked questions please see our FAQ page at www whistlergroup com or call customer service 800 531 004 M F 8AM to 5PM CST Before using the WGPX for the first time make sure t...

Страница 4: ...Battery In Car 13 Secure Digital SD Card Information 14 Inserting the SD card 14 Removing the SD card 14 Installation 15 16 Assembling the Windshield Bracket 15 16 Power Connection 16 Operation 17 29 Startup 17 Shutdown 17 Using the Function Buttons 18 Using the Stylus 19 Functions of the Stylus 19 Using the Remote Control 19 20 System Reset 21 Care Maintenance and Storage 22 Troubleshooting 23 Wa...

Страница 5: ...ure that the unit is secure does not block the driver s field of vision and will not become a hazard in case of an accident Do not mount or place the GPS unit on an air bag equipped steering wheel or passenger area In case of an accident this can be deadly The Global Positioning System GPS is operated by the government of the United States which is solely responsible for its accuracy and maintenan...

Страница 6: ...oftware may be updated frequently If the descriptions in this manual are different from your software version please follow the software version currently on hand Software Use Terms Copyright laws protect the WGPX s operating system and internal mapping software Whistler s wMap mapping software is copyrighted by their respective owners Please carefully review the software agreement information enc...

Страница 7: ...equency energy and if not installed and used in accordance with the instructions may cause harmful interference to radio communications However there is no guarantee that interference will not occur in a particular installation If this equipment does cause harmful interference to radio or television reception which can be determined by turning the equipment off and on the user is encouraged to try...

Страница 8: ...United States and Canada WGPX with color TFT LCD touch screen display 1 WGPX Unit 7 SD Memory Card 2 Windshield Mount 8 DVD 3 Mounting Cradle 9 Quick Start Guide 4 DC Power Cord 10 Stylus 5 AC Power Cord 2 pcs 11 Remote WGPX 650 only 6 USB Power Cable Note Actual accessory appearances may differ from the drawings pictured WGPX Feature Highlights 11 All manuals and user guides at all guides com ...

Страница 9: ...ut Button Zooms out of the map view 6 Zoom In Button Zooms in on the map view 7 Volume Down Lowers the volume 8 Volume Up Raises the volume 9 Directional Button Press up down left right keys to change page views or press the center of button to select items 10 Touch Screen Anti Glare Displays system status Use stylus to directly input data or select items on the screen Front View Note The unit has...

Страница 10: ...ower to the unit 5 Master Reset Clears unit s memory and resets it Rear View Features 1 SD MMC Card Slot Location for the preloaded SD memory card The maps are saved on this memory card Do not remove this card while in use 2 Headphone Jack Connection to external headphones 3 USB Connection Allows connection to a PC Left View 1 3 2 1 2 3 4 5 Note Remember to flip up antenna for best performance All...

Страница 11: ...e 12 volt power cord 2 Keyboard Lock Switch Prevents accidental button presses when switched on Switch to Unlock before use Right View 1 Stylus Use Stylus to directly input data or select items on the screen 2 External Antenna Connector For connection of an external antenna MMCX type 1 2 1 2 Do Not Open 2 1 All manuals and user guides at all guides com a l l g u i d e s c o m ...

Страница 12: ...r needs to be assembled prior to use Follow the diagram in figure 12C to insert the plug section to the main adapter body Main Power Battery Charging Figure 12A Turn the main power switch to the ON position Note Make sure that the HOLD switch is in the unlock position before use See page 11 bottom view for hold switch location Figure 12C Figure 12B When the calibration is done successfully tap the...

Страница 13: ... the battery The unit will charge slowly while in use with external power See page 16 for DC power connection This device uses a Lithium Poly battery please note the following Please do not charge in a hot environment or expose to direct sunlight Lithium Poly batteries do not need to be discharged Do not wait until the battery is depleted to recharge When not in use for a long period charge the ba...

Страница 14: ...oving the SD card 1 Gently press the top of the memory card and the card will eject automatically 2 Then gently pull the memory card to remove Note The included memory card contains the digital map files that are required for the GPS navigation data Please do not delete When removing the memory card please make sure the card is not reading data or it will cause a system crash Do not set the SD mem...

Страница 15: ...s to secure 2 Once the cradle is secure bend the bracket arm as shown below Remove the protective plastic that may be covering the suction cup The bracket may not adhere to the windshield with this plastic on the suction cup 3 Press the locking tab toward the windshield to secure the suction cup to the windshield as shown below 4 To remove bracket from windshield simply press in on the two release...

Страница 16: ...sion Remove the protective plastic that may be on the suction cup Power Connection While the GPS is sitting in the cradle and the included power cord is plugged into both the unit and the cigarette lighter the battery is charging 1 Insert the small plug into the power jack on the bottom of the unit 2 Insert the other end of the power cord into the cigarette lighter Installation and 12 Volt Power F...

Страница 17: ... on the power A warning page is displayed followed by the map page Note If unit does not power on make sure that the main power switch is in the on position and that the hold button is in the unlock position See page 12 for information on the main power switch Shutdown Press the power button to turn the unit off Operation Power Button All manuals and user guides at all guides com ...

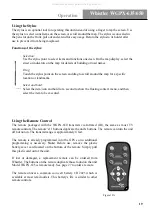
Страница 18: ...Menu Button Returns to the Menu window 2 Power Button Switches the power on off 3 Zoom Out Button Zooms out of the map view 4 Zoom In Button Zooms in on the map view 5 Volume Down Lowers the volume 6 Volume Up Raises the volume 7 Directional Button Press up down left right keys to change page views or press the center of button to select items Green LED will flash when looking for satellite signal...

Страница 19: ... floating context menu and then select the item to be executed Using the Remote Control The remote packaged with the WGPX 650 transmits via Infrared IR the same as most TV remote controls The remote s 11 buttons duplicate the unit s buttons The remote can turn the unit off but not on The transmit range is approximately 4 feet The remote is already programmed into the GPS so no additional programmi...

Страница 20: ...he tab to the right carefully slide out the battery tray 3 The battery should slide out from its holder Make note of the correct polarity Positive side of the battery is on the same side of the battery tray that has the marking 4 Insert the new battery being mindful of the correct polarity 5 Slide the battery tray back into the remote 1 Pull battery tray out to remove battery 2 3 Figure 20A Figure...

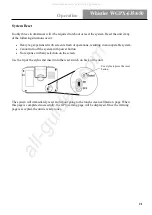
Страница 21: ...em with power button No response with any selection on the screen Use the tip of the stylus and insert into the reset switch on back of the unit The system will immediately reset and reboot going to the touch screen calibration page When this page is completed successfully the GPS warning page will be displayed Once the warning page is accepted the unit is ready to use Operation Use stylus to pres...

Страница 22: ...ure is between 32 0 C and 113 F 45 C Please do not operate under extreme temperatures Avoid exposure to sunlight Please avoid long periods of sunlight or high temperature exposure Using the stylus The LCD screen is easily scratched please use only the stylus for operation Do not use any other sharp objects on the screen to avoid damaging the LCD screen Cleaning the screen Using a soft clean cloth ...

Страница 23: ...ge of our website www whistlergroup com or call Whistler Customer Service 800 531 0004 Available Monday through Friday 8am to 5pm CT Troubleshooting Power Cannot startup or will power up but turn itself off 1 Insufficient battery charge Please connect to the power cord and restart system Screen No screen displayed After powering up if the system does not respond try the following 1 Connect cord re...

Страница 24: ...ill be repaired without charge to the purchaser when returned with a dated store receipt to the address below Units returned without a dated store receipt will be handled as described in section Service Out Of Warranty Due to the specialized equipment necessary for testing GPS units there are no authorized service stations for Whistler products other than Whistler When returning a unit for service...

Страница 25: ...rranty service rates when The unit s original warranty has expired A dated store receipt is not supplied The unit has been returned without its serial number The unit has been abused modified or had its housing removed The minimum out of warranty service fee is 160 00 U S If you require out of warranty service please return your unit as outlined in the section Service Under Warranty along with a c...

Страница 26: ... 28V Output voltage 5 1V 0 3V Battery Rechargeable 1350 mAh Li poly 8 hours battery life when backlight is inactive 3 hours to fully charge Extension Slot SD Display Anti glare 3 5 high brightness contrast ratio transflective TFT LCD 262k colors with 240 x 320 QVGA resolution LEDs Yellow Red LED for battery charging status and Green LED for GPS signal reception Audio Built in 30 mm speaker and ste...

Страница 27: ... online store at www whistlergroup com WGPX Accessories P N Item Price 506509 12 Volt Power Cord 15 95 203000 Carrying Pouch 5 95 506507 AC Power Cord 12 95 506511 Windshield Bracket Kit Includes cradle 22 95 506502 USB Cable 5 95 506512 Remote Control 14 95 506510 Stylus 3 95 506510 3 Stylus 3 pack 9 95 Accessories All manuals and user guides at all guides com ...

Отзывы: