background image

8

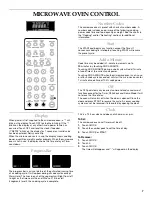
Tones

Tones are audible signals, indicating the following:

One tone

Valid entry (short tone)

End of Timer countdown (long tone) (on some models)

Two tones

End of stage in multistage cooking

Reminder, repeat each minute after the end-of-cycle tones

Hidden feature has been entered or exited

Three tones

Invalid entry

Child Lock active

Four tones

End of cycle

To Turn Off/On Valid Entry Tones: Touch and hold the number 
pad “1” for 5 seconds until 2 tones sound. Repeat to turn tones 
back on.

To Turn Off/On All Tones: Touch and hold the number pad “2” 
for 5 seconds until 2 tones sound. Repeat to turn tones back on.

Timer

The Timer can be set in minutes and seconds, up to 99 minutes 
99 seconds, and counts down the set time.

NOTE: The Timer does not start or stop the microwave oven.

When the Timer is in use, the microwave oven can also operate. 
To see the time countdown for 5 seconds when the microwave 
oven is in use, touch TIMER SET/OFF.

To Set:

1. Touch TIMER SET/OFF.

If no action is taken after 1 minute, the display will return to 
the time of day mode.

2. Touch the number pads to set the length of time.

3. Touch TIMER SET/OFF or START.

If not touched within 5 seconds, “START?” will appear on the 
display. If not touched within 1 minute, the display will return 
to the time of day mode and the programmed function will be 
canceled.

When the set time ends, “END” will appear on the display and 
1 tone will sound.

If the Timer is active in the display, touch TIMER SET/OFF to 
cancel timer. If the Timer is not active in the display, touch 
TIMER SET/OFF to make the Timer active in the display, then 
touch TIMER SET/OFF again or OFF to cancel the Timer.

Remember, touching OFF while a cook function is active in 
the display will cancel the cook function, not the Timer.

The time can be reset during the countdown by repeating the 
above steps.

Child Lock

The Child Lock disables the control panel pads to prevent 
unintended use of the microwave oven.

When the control is locked, only the Vent Fan and Light buttons 
will function. If any pad on the Control Panel is touched, “LOCK” 
will appear in the display and 3 short tones will sound.

To Lock/Unlock Control: Before locking, make sure the 
microwave oven and Timer are off. Touch and hold OFF for 
5 seconds until 2 tones sound and a padlock icon appears in the 
display. Repeat to unlock and remove the padlock icon from the 
display.

Vent Fan

The vent fan has 5 speeds ranging from 5 (fastest) to 1 (slowest). 
Zero (0) is off.

To protect the microwave oven, if the temperature from the range 
or cooktop below the microwave oven gets too hot, the vent fan 
will automatically turn on at speed 5. It may stay on for up to 
1 hour to cool the microwave oven. When this occurs, the Vent 
Fan pad will not function.

To Turn Vent Fan On/Off: Repeatedly touch the VENT FAN 
5 SPEEDS pad to cycle through the speeds 5, 4, 3, 2 and 1 and 
off, 0. “FAN” and the selected number will appear on the display 
for 2 seconds.

Cooktop Light

The cooktop light has 3 settings: on, night and off.

To Turn On/Night/Off: Touch LIGHT ON/NIGHT/OFF repeatedly 
to cycle through settings.

Demo Mode

The Demo Mode is ideal for learning how to use the microwave 
oven. When set, functions can be entered without actually turning 
on the magnetron. The microwave oven light will come on, the 
fan will run and, if on, the turntable will rotate.

To Turn On/Off: The microwave oven and Timer must be off. 
Touch and hold TIMER SET/OFF for 5 seconds until 2 tones 
sound and “d” appears on the display. Repeat to turn off and 
remove “d” from the display.

Содержание YKHMS175M

Страница 1: ...sit our website at www KitchenAid ca ENSEMBLEFOURÀMICRO ONDES HOTTE Guided utilisationetd entretien Au Canada pour assistance composez le 1 800 461 5681 pour installation ou service composez le 1 800 807 6777 ou visitez notre site web à www KitchenAid ca Table of Contents Table des matières 2 Model Modèle YKHMS175M 8185489 4619 652 62291 ...

Страница 2: ...23 PIÈCES ET CARACTÉRISTIQUES 24 Système de micro ondes Technologie OPTIMAWAVE 24 Revêtement de la cavité du four 25 Plateau rotatif 25 Grille de cuisson 25 Poêle à brunir et poignée 25 COMMANDE DU FOUR À MICRO ONDES 26 Affichage 26 Barre de progression 26 Codes de chiffres 26 Mise en marche 26 Ajouter une minute 26 Arrêt 26 Horloge 26 Signaux sonores 27 Minuterie 27 Verrouillage des commandes 27 ...

Страница 3: ...ome products such as whole eggs in the shell and sealed containers for example closed glass jars are able to explode and should not be heated in the microwave oven Use the microwave oven only for its intended use as described in this manual Do not use corrosive chemicals or vapors in the microwave oven This type of oven is specifically designed to heat cook or dry food It is not designed for indus...

Страница 4: ...se overheating of the oven Do not store anything directly on top of the microwave oven when the microwave oven is in operation To reduce the risk of injury to persons Liquids such as water coffee or tea are able to be overheated beyond the boiling point without appearing to be boiling Visible bubbling or boiling when the container is removed from the microwave oven is not always present THIS COULD...

Страница 5: ...INSTRUCTIONS For all cord connected appliances The microwave oven must be grounded In the event of an electrical short circuit grounding reduces the risk of electric shock by providing an escape wire for the electric current The microwave oven is equipped with a cord having a grounding wire with a grounding plug The plug must be plugged into an outlet that is properly installed and grounded WARNIN...

Страница 6: ...display The turntable will turn back on automatically when cooking is over or OFF is touched CookingRack The cooking rack is ideal for two level cooking It provides extra cavity space for cooking 2 or more containers at the same time Insert the rack securely into the rack supports on the side walls of the oven See Assistance or Service section to reorder rack Rack will become hot Always use oven m...

Страница 7: ...y or weight See the charts in the Cooking and or Reheating sections for additional information Start The START pad begins any function except the Timer If nonsensor cooking is interrupted touching START will resume the preset cycle AddaMinute Cook time may be added in 1 minute increments up to 99 minutes by touching ADD A MINUTE Touching ADD A MINUTE during a cook cycle will add 1 minute of cook t...

Страница 8: ...ng OFF while a cook function is active in the display will cancel the cook function not the Timer The time can be reset during the countdown by repeating the above steps ChildLock The Child Lock disables the control panel pads to prevent unintended use of the microwave oven When the control is locked only the Vent Fan and Light buttons will function If any pad on the Control Panel is touched LOCK ...

Страница 9: ...n larger pieces and uniformly shaped foods cook more evenly than irregularly shaped food Starting Temperature Room temperature foods will heat faster than refrigerated foods and refrigerated foods will heat faster than frozen foods Composition and Density Foods high in fat and sugar will reach a higher temperature and heat faster than other foods Heavy dense foods such as meat and potatoes require...

Страница 10: ... High Use the following chart as a general guide for the suggested cooking power of specific foods MATERIAL RECOMMENDATIONS Aluminum Foil Metal See Aluminum Foil and Metal section Browning Dish Bottom must be at least in 5 mm above the turntable Follow manufacturer s recommendations Ceramic Glass Glass Acceptable for use China Earthenware Follow manufacturer s recommendations Melamine Follow manuf...

Страница 11: ...pads The microwave oven will automatically turn on The Progress Bar will show the approximate time remaining If more or less time is required for BAKED POTATO and DINNER PLATE only touch COOK POWER after the microwave oven starts to cook When the cycle ends END will appear in the display 4 end of cycle tones will sound and then reminder tones will sound every minute 2 Touch OFF or open the door to...

Страница 12: ... Touch the number pad s using the Cooking Power chart to set the cooking power for the 1st stage 5 Repeat steps 1 4 for the 2nd and 3rd stages 6 Touch START The display will count down each of the cook times A 1 2 and 3 will appear on the display during their respective stages When the cycle ends END will appear in the display 4 end of cycle tones will sound and then reminder tones will sound ever...

Страница 13: ...rough foods 3 Touch the number pads to enter the weight Meats and Poultry can be set from 2 to 6 6 lbs 90 g to 3 kg Fish can be set from 2 to 4 4 lbs 90 g to 2 kg Bread can be set from 1 to 2 0 lbs 45 to 900 g Defrost time may be adjusted at this time by touching COOK POWER 4 Touch START The display will count down the defrost time When the cycle ends END will appear in the display 4 end of cycle ...

Страница 14: ...inder tones Boil Simmer The Boil Simmer function can be used for simmering rice and pasta and for foods such as soups casseroles stews and other liquid food Boil Simmer is a sensor function Cover dish with its lid not plastic wrap Do not remove lid or covering while container is in oven The large amount of steam released will disrupt sensor settings To Use Boil Simmer 1 Place dish containing water...

Страница 15: ... preheated 4 tones will sound and ADD FOOD will appear in the display Use handle to remove the hot pan from the oven See Browning Pan and Handle section 6 Place food in a single layer evenly spaced in the heated Browning Pan Place the pan on the turntable and remove the handle Close the door 7 Touch START The display will count down the cook time During cooking the oven will stop and prompt for th...

Страница 16: ...Replace turntable immediately after cleaning Do not operate the microwave oven without the turntable in place Mild cleanser and scouring pad Dishwasher COOKING RACK Do not use abrasive cleansers or scrubbers Mild cleanser water and washcloth Do not place in dishwasher RACK SUPPORTS Clean often to avoid soil buildup Soil buildup may lead to arching and cause damage to the oven Do not attempt to rem...

Страница 17: ...ring cotton gloves Do not touch bulb with bare fingers 5 Replace bulb cover and mounting screw 6 Plug in oven or reconnect power ReplacingOvenLight The microwave oven light is a 10W low voltage halogen capsule bulb It will automatically come on when the door is opened and when the oven is operating See Assistance or Service section to reorder To Replace 1 Unplug microwave oven or disconnect power ...

Страница 18: ...rections This is normal and depends on motor rotation at beginning of cycle Display shows messages Is the display showing an Oven Status screen with a letter number code and instruction to inform KitchenAid The oven has detected an internal problem It has run a self checking program and displayed the error Call for service See Assistance or Service section Display shows time countdown but is not o...

Страница 19: ...id Canada Customer Interaction Center toll free 1 800 461 5681 Monday to Friday 8 00 a m 6 00 p m EST Saturday 8 30 a m 4 30 p m EST Our consultants provide assistance with Features and specifications on our full line of appliances Referrals to local dealers For parts accessories and service in Canada Call 1 800 807 6777 KitchenAid designated service technicians are trained to fulfill the product ...

Страница 20: ...on acts of God or use of products not approved by KitchenAid Canada 5 Repairs to parts or systems resulting from unauthorized modifications made to the appliance 6 Replacement parts or repair labor costs for units operated outside Canada 7 In Canada travel or transportation expenses for customers who reside in remote areas 8 Any labor costs during the limited warranty periods KITCHENAID CANADA SHA...

Страница 21: ...onvenablement reliée à la terre Voir les INSTRUCTIONS DE LIAISON À LA TERRE présentées dans cette section et dans les instructions d installation fournies Installer ou placer le four à micro ondes uniquement selon les instructions d installation fournies Certains produits comme les oeufs entiers dans leur coquille et les récipients fermés par exemple les bocaux en verre fermés peuvent exploser et ...

Страница 22: ...d un comptoir Ne pas faire le montage au dessus d un évier Ne pas couvrir les grilles ou autre partie du four avec du papier métallique Cette action causera un surchauffage du four Destiné à l utilisation au dessus des cuisinières avec une largeur maximale de 36 po 91 44 cm Ne pas utiliser des produits en papier lorsque l appareil fonctionne au mode PAN BROWN sur les modèles avec cette caractérist...

Страница 23: ... terre Ne pas utiliser un adaptateur Ne pas utiliser un câble de rallonge Le non respect de ces instructions peut causer un décès un incendie ou un choc électrique Ce dispositif est conforme à la section 18 des règlements FCC INSTRUCTIONS DE MISE À LA TERRE Pour tout appareil ménager connecté par un cordon de courant électrique Il faut que le four à micro ondes soit relié à la terre En cas de cour...

Страница 24: ...uissance sélectionné de façon continue Ce courant constant de puissance à micro ondes aide à minimiser la cuisson excessive et les renversements des aliments Cuisson à détection Le système de micro ondes dispose de fonctions de cuisson à détection Un détecteur d humidité dans la cavité du four détecte l humidité émise par les aliments lorsqu ils chauffent Le détecteur ajuste les durées de cuisson ...

Страница 25: ...e un espace supplémentaire pour la cuisson simultanée de deux récipients ou plus Placer correctement la grille sur ses supports situés sur les parois latérales du four Pour commander à nouveau la grille voir la section Assistance ou Service La grille deviendra chaude Toujours utiliser des mitaines de four ou poignées lors de la manipulation Ne pas laisser la grille toucher les parois le plafond ou...

Страница 26: ...quantité d aliments ou poids Voir les tableaux de code dans les sections Cuisson et ou Réchauffage pour d autres renseignements Miseenmarche La touche START démarre toute fonction à l exception de la minuterie Si la cuisson sans détection est interrompue il suffit d appuyer sur START pour reprendre le programme préréglé Ajouteruneminute La durée de cuisson peut être prolongée par tranches de 1 min...

Страница 27: ...tive puis à nouveau sur TIMER SET OFF ou OFF arrêt pour annuler la minuterie N oubliez pas appuyer sur OFF lorsqu une fonction de cuisson est active sur l affichage annulera cette fonction de cuisson et non pas la minuterie La durée de cuisson peut être réglée de nouveau durant le compte à rebours en répétant les étapes ci dessus Verrouillagedescommandes Le verrouillage des commandes désactive les...

Страница 28: ...te que les gros morceaux et les aliments uniformes cuiront plus également que les aliments de forme irrégulière Température de mise en marche Les aliments à température ambiante chaufferont plus vite que les aliments réfrigérés et les aliments réfrigérés chaufferont plus vite que les aliments congelés Composition et densité Les aliments à haute teneur en gras et en sucre atteindront une températur...

Страница 29: ...pour la viande les brochettes les attaches les doublures de papier d aluminium telles que les enveloppes à sandwich les agrafes et objets avec garniture en or ou en argent ou avec un enduit métalique ne doivent pas être utilisés dans le four Puissancedechauffage De nombreuses recettes de four à micro ondes précisent quelle puissance de chauffage doit être utilisée en indiquant le pourcentage le no...

Страница 30: ...sation de la cuisson à détection à une seule pression Avant de l utiliser s assurer que le four à micro ondes est branché depuis au moins 2 minutes que la température de la pièce n est pas supérieure à 95 F 35 C et que l extérieur du contenant et de la cavité du four à micro ondes sont secs 1 Appuyer sur l une des touches ONE TOUCH Le four à micro ondes se mettra en marche automatiquement La barre...

Страница 31: ...era le réglage pour réchauffer 1 tasse 2 Appuyer sur BEVERAGE une deuxième fois pour réchauffer 2 tasses Le four à micro ondes se mettra en marche 5 secondes après la sélection du nombre approprié de tasses à réchauffer L affichage procède à un compte à rebours de la durée de cuisson Si une modification de la durée est nécessaire appuyer sur COOK POWER puissance de cuisson avant que le four à micr...

Страница 32: ...e boulangerie seulement Le capteur determinera les quantités pour tranche de pizza soupe et sauce La durée de réchauffage peut être ajustée actuellement par appuyer sur COOK POWER puissance de cuisson 4 Appuyer sur START mise en marche L afficheur procède à un compte à rebours de la durée de réchauffage À la fin du programme END fin apparaît sur l afficheur 4 signaux de fin de programme sont émis ...

Страница 33: ...a crème seront à la température ambiante donc prêts à utiliser dans une recette La crème glacée sera assez ramollie pour la servir facilement à la cuiller Se servir du tableau suivant comme guide Enlever le papier d aluminium ou l emballage Mettre sur un plat pour cuisson au four à micro ondes Un bâtonnet équivaut à 0 25 lb 113 g ou 0 5 tasse 125 mL Enlever le couvercle Pour ramollir 1 Appuyer sur...

Страница 34: ...e à rebours de la durée de mijotage À la fin du programme END fin apparaît sur l affichage 4 signaux de fin de programme sont émis suivis de signaux de rappel à intervalles de 1 minute 5 Appuyer sur OFF arrêt ou ouvrir la porte pour effacer l affichage et ou arrêter les signaux de rappel Tableau de mijotage Utiliser le tableau suivant comme guide lors de l utilisation de la fonction faire bouillir...

Страница 35: ... de cuisson Lors de la cuisson le four s arrêtera et on devra retourner les aliments sauf les pizzas Retourner l aliment fermer la porte et appuyer sur START pour reprendre la cuisson À la fin du programme END fin apparaît sur l affichage 4 signaux de fin de programme sont émis suivis de signaux de rappel à intervalles de 1 minute 8 Appuyer sur OFF arrêt ou ouvrir la porte pour effacer l affichage...

Страница 36: ...es essuie tout ou des tampons à récurer en plastique non abrasifs Appliquer le nettoyant à vitre sur un linge doux ou une éponge et non pas directement sur le tableau PLATEAU ROTATIF Remettre le plateau rotatif en place immédiatement après le nettoyage Ne pas faire fonctionner le four lorsque le plateau rotatif est enlevé Nettoyant doux et tampon à récurer Lave vaisselle GRILLE DE CUISSON Ne pas u...

Страница 37: ...che de l ampoule et enlever soigneusement le cache 3 Enlever l ampoule grillée 4 Remplacer l ampoule en la manipulant avec un papier mouchoir ou des gants de coton Ne pas toucher l ampoule avec les doigts nus 5 Réinstaller le cache et la vis de montage 6 Brancher le four ou reconnecter la source de courant électrique Remplacementdelalampedufour La lampe du four à micro ondes est une ampoule halogè...

Страница 38: ...affichage indique des messages L afficheur indique t il un écran Oven Status statut du four ainsi qu un code alphanumérique et les directives pour informer KitchenAid Le four a détecté un problème interne Il a procédé à un programme d autocontrôle et affiché l erreur Faire un appel de service Voir la section Assistance ou service L afficheur indique le compte à rebours mais ne fonctionne pas La mi...

Страница 39: ...èle de KitchenAid Canada au 1 800 461 5681 Lundi à vendredi 8 h 18 h HNE Samedi 8 h 30 16 h 30 HNE Nos consultants vous renseigneront sur les sujets suivants Caractéristiques et spécifications sur toute notre gamme d appareils électroménagers Références aux marchands locaux Pour pièces accessoires et service Composer le 1 800 807 6777 Les techniciens de service désignés par KitchenAid Canada sont ...

Страница 40: ...rechange ou frais de main d oeuvre pour les appareils utilisés hors du Canada 7 Les frais de voyage ou de transport chez les clients qui habitent dans des régions éloignées 8 Tous les frais de main d oeuvre durant la période de garantie limitée KITCHENAID CANADA DÉCLINE TOUTE RESPONSABILITÉ AU TITRE DE DOMMAGES SECONDAIRES OU INDIRECTS Certaines provinces ne permettent pas l exclusion ou la limita...

Отзывы: