background image

Содержание YGH8155XJ

Страница 1: ... START Mfeature 16 Changing preset cooking times 16 Microwave Oven Use 17 Cooking at high cook power 17 Cooking at different cook powers 17 Cooking in stages 19 Progress Bar 20 Using COOK 21 Using REHEAT 22 Using WARM HOLD 24 Using STEAM COOK 24 Using JET DEFROST M feature 26 JET DEFROST M feature chart 27 Defrosting tips 29 Using SIMMER COOK 30 Sensor ONE TOUCH Cooking 31 Using Sensor ONE TOUCH C...

Страница 2: ...call to request service for your appliance you need to know your complete model number and serial number You can find this information on the model and serial number label plate see the diagram in the Getting to Know Your Microwave Oven section Please also record the purchase date of your appliance and your dealer s name address and telephone number Model Number Serial Number Purchase Date Dealer ...

Страница 3: ... the provided Installation Instructions Some products such as whole eggs in the shell and sealed containers for example closed glass jars may explode and should not be heated in the microwave oven Use the microwave oven only for its intended use as described in this manual Do not use corrosive chemicals or vapors in the microwave oven This type of oven is specifically designed to heat cook or dry ...

Страница 4: ...crowave oven outdoors Do not use the microwave oven near water for example near a kitchen sink in a wet basement or near a swimming pool and the like Do not immerse cord or plug in water Keep cord away from heated surfaces Do not let cord hang over edge of table or counter Do not mount over a sink Do not cover racks or any other part of the oven with metal foil This will cause overheating of the o...

Страница 5: ...ve oven is equipped with a cord having a grounding wire with a grounding plug The plug must be plugged into an outlet that is properly installed and grounded WARNING Improper use of the grounding plug can result in a risk of electric shock Consult a qualified electrician or serviceman if the grounding instructions are net completely under stood or if doubt exists as to whether the microwave oven i...

Страница 6: ...from mounting plate If grille cannot be removed per instructions in Step 2 insert a thin looped wire or similar tool through an opening in grille to pull hook 5 Grasp the microwave oven Rotate the microwave oven downward Be careful that door does not swing open 6 Lift off the support tabs _ at the bottom of the I_ m unting plate set the c owovo ovoooo o protected surface 1 Carefully lift microwave...

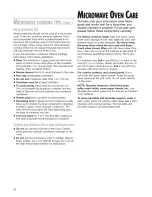
Страница 7: ...g time recommended Check to see how the food is cooking If needed touch the JET STARTTMfeature pad while the oven is operating or after the cooking cycle is over see the Using JET START TM feature section To help make sure the food is evenly cooked stir turn over or rearrange the food about halfway through the cooking time if you do not have a cover for a dish use wax paper or microwave approved p...

Страница 8: ...from the oven to avoid possibly breaking it If your turntable cracks or breaks contact your dealer for a replacement When you use a browning dish the browning dish bottom must be at least Yl10 in 5 mm above the turntable Follow the directions supplied with the browning dish Never cook or reheat a whole egg inside the shell Steam buildup in whole eggs may cause them to burst and possibly damage the...

Страница 9: ...ub _ 3up LY _ _ Shaft Remove tape from the hub Part No 4393754 Place the support Part No 4393752 on the cavity bottom Place the turntable on the hub Make sure the raised curved lines in the center of the turntable bottom are between the three spokes of the hub 6 Charcoal and Grease Filters Included in oven cavity 7 Cooktop Countertop Light Turn on to light your cooktop or countertop or turn on as ...

Страница 10: ... long to cook depending on the amount of humidity it detects from the frozen entree 7 BEVERAGE Touch this pad to heat one or two 8 ounce 250 mL cups of a beverage without entering a cook power or time The oven s sen sor will tell the oven how long to cook depend ing on the amount of humidity it detects from the beverage 8 DINNER PLATE Touch this pad to heat a din ner plate of food without entering...

Страница 11: ...able all audible signals except the end of timer signal TOUCH and hold for 5 seconds To turn signals back on TOUCH and hold for 5 seconds Your microwave oven comes with audible signals that can guide you when setting and using your oven L_ A programming tone will sound each time you touch a pad _ One long tone signals the end of a Kitchen Timer countdown Four tones signal theend ofa cooking cycle ...

Страница 12: ...to enter a cooking time without you needing to touch COOK TIME Your turntable will be turned back on when cooking is over or when you touch OFF CANCEL NOTE You cannot turn off the turntable when using an auto function The Child Lock locks the control panel pads to prevent unintended use of the microwave oven To lock the control panel TOUCH and hold for 5 seconds Two tones will sound and _ will app...

Страница 13: ... microwave oven Do not use rack with browning dish Do not let food container on rack touch the top or sides of the oven Do not cook foods directly on rack Put them in microwave safe containers first Do not place a metal cooking container on rack Use the Cooking Rack only when cooking at more than one level The pad on the bottom left of the control panel controls the 4 speed exhaust fan NOTE Two se...

Страница 14: ... 2 times depending on light setting When your microwave oven is first plugged in or after a power failure the display will flash If a time of day is not set will flash until you touch any pad NOTES If you touch in an invalid time and touch CLOCK 3 tones will sound Enter the correct time If you touch OFF CANCEL while setting the clock the display will show the last time of day set To turn off the c...

Страница 15: ...ithin 5 seconds of doing Step 2 START will appear You then have 1 minute to touch TIMER SET or START ENTER before the display returns to the time of day At the end of the countdown YOU SEE 2 Enter the time to be counted down Example for 1 minute 30 seconds TOUCH YOU SEE During the countdown TOUCH YOU SEE OR NOTE If you enter more than 4 digits the first 4 digits will disappear and the following di...

Страница 16: ...ou can also change the cook power after you touch the JET START feature pad by touching COOK POWER Number pads for the new cook power and START ENTER You can use the JET START feature only for the cook time function 1 Make sure the food is in the oven 2 Touch the JET START feature pad TOUCH YOU SEE Example for cooking for 30 seconds If a preset cooking time is too long or too short you can lengthe...

Страница 17: ... the cooking Each Number pad also stands for a different percentage of cook power Many microwave cookbook recipes tell you by number percent or name which cook power to use The following chart gives the percentage of cook power each Number pad stands for and the cook power name usually used It also tells you when to use each cook power Follow recipe or food pack age instructions if available NOTE ...

Страница 18: ... of fullpower Low Taking chilloutoffruit NOTE Once cooktimehasbeenentered youcanalsousetheCOOK POWER padasasecond Minute Timer byentering 0 forthecookpower Theovenwillcountdownthecooking timeyousetwithout cooking 1 Put your food in the oven and close the door 2 Touch COOK TIME TOUCH YOU SEE 3 Enter the cooking time TOUCH YOU SEE 4 Set the cook power TOUCH YOU SEE G Example for 50 cook power TOUCH ...

Страница 19: ...ength of time and another cook power for another length of time Your oven can be set to change from one to another automatically for up to 3 stages You can set your chosen cook functions in any order However if you use the JET DEFROST TM feature it must be the first stage NOTE You cannot sensor cook with stages 1 Put your food in the oven and close the door 2 Touch COOK TIME TOUCH YOU SEE 3 Enter ...

Страница 20: ...r the next stage s will count down The display contains a Progress Bar which indi cates how far the Cook functions have gone and how much more the functions have to go The full length of the bar represents the estimated running time of the cooking cycle The Progress Bar advances line by line during a cycle The 12 segments on the Progress Bar give an estimate of progress during cooking and show the...

Страница 21: ...If you do not enter a quantity within 2 seconds COOK will prompt you to choose a quantity You then have 1 minute to enter a quantity and to touch START ENTER If you do not do so COOK will be canceled If you touch COOK 6 times the display returns to the Rice setting If you need more or less time do not touch COOK again Touch COOK POWER before you touch START ENTER See Changing preset cooking times ...

Страница 22: ...nd touch START ENTER SENSE appears on the display Also the sensor needs 2 minutes 30 seconds to warm up after the oven is connected to the power or after a power failure If you start sensor cooking during the warm up SENSE shows on the display until the warm up is over Microwave energy will not be turned on until the sensor is warm You can reheat microwavable foods just by You see choosing a categ...

Страница 23: ...g The 1 piece setting heats 1 regular size muffin or bagel or 2 small dinner rolls This chart shows you how to choose a type of food and the amounts you can choose for each type TOUCH OR TOUCH AMOUNTS YOU FOOD REHEAT NUMBER PAD CAN CHOOSE Baked Goods 4 times 4 1 to 6 pieces 2 oz 57 g each You must touch REHEAT once before choosing the food type After you choose the food type and quantity touch STA...

Страница 24: ...plete WARM HOLD cycle The quality of some foods will suffer with extended time 1 Put hot cooked food in the oven and close the door 3 Start the oven TOUCH YOU SEE While entering cooking instructions touch WARM HOLD before touching START ENTER or during cooking When the last cooking cycle is over you will hear two tones WARM will come on while the oven continues to run Your microwave oven has an au...

Страница 25: ... rice you may need more water _ Always allow some standing time in order to give uniform distribution of the temperature within the food and to complete the cooking process _ Do not use the Oval Steamer in a conventional or combination type oven with the Crisp or Grill functions or on electric or gas burners _ Never use the Oval Steamer in the microwave oven without the cooking cover _ To avoid sc...

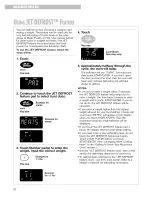
Страница 26: ...defrosting but will take longer to defrost NOTES If you do not enter a weight within 2 seconds the JET DEFROST feature will prompt you to enter a weight You then have 1 minute to enter a weight and to touch START ENTER If you do not do so the JET DEFROST feature will be canceled If you enter a weight higher than the highest weight allowed for your food setting 3 tones will sound and RETRY will app...

Страница 27: ...6 6 91 g to 2994 g Poultry twice 2 2 to 6 6 91 g to 2994 g Fish 3 times 3 2 to 4 4 91 g to 1998 g You must touch the JET DEFROST feature pad once before choosing the food type Ground Beef Bulk Ground Beef Patties Round Steak Tenderloin Steak Pot Roast Chuck Roast Rib Roast Rolled Rump Roast Stew Beef Meat of irregular shape and large fatty cuts of meat should have the narrow or fatty areas shielde...

Страница 28: ...t Place on a microwavable roasting rack Finish defrosting by immersing in cold water under 6 Ibs 2 7 kg FOOD SPECIAL _NSTRUCT_ONS Fish Fillets Place in a microwavable baking dish Carefully separate fillets under cold water Steaks Place in a microwavable baking dish Run cold water over to finish defrosting Whole Place in a microwavable baking dish Cover head and tail with foil do not let foil touch...

Страница 29: ...than expected For more information on standing time see the Microwave cooking tips in the Cooking Guide section You are probably used to food weights as being in pounds and ounces that are fractions of a pound for example 4 ounces equals Ib 113 g However in order to enter food weight in the JET DEFROST feature you must specify pounds and tenths of a pound If the weight on the food package is in fr...

Страница 30: ...s increase amount of water to to _ cup 60 to 125 mL Cover dish with a hard lid i e the lid that comes with the dish or a dinner plate Do not use plastic wrap 4 Touch START ENTER TOUCH YOU SEE The oven will bring the food to a boil The food will then simmer for the time you set Use a container that can hold enough water to cover the food completely when cooking such as a 3 quart 12 cup 2 84 L casse...

Страница 31: ...de section The oven should be plugged in at least 2 minutes before sensor cooking Room temperature should not exceed 95 F 35 C Be sure the exterior of the cooking container and the interior of the oven are dry Wipe off each with a paper towel When covering foods be sure to leave an opening big enough for moisture to escape so that the sensor can determine cooking or reheating time To use Sensor ON...

Страница 32: ...eed stirring and 2 3 minutes standing time after cooking Frozen Entree Works best if entree is Remove from outer package Loosen cover on three 10 to 20 oz sides If entree is not in a microwave safe container 284 to 567 g place it on a plate cover with plastic wrap and vent Most entrees need 2 3 minutes standing time after cooking Beverage 1 or 2 8 ounce Do not cover The shape of the mug will affec...

Страница 33: ...embrane Steam can build up under the membrane during cooking causing the food to burst To relieve the pressure and to prevent bursting pierce these foods before cooking with a fork cocktail pick or toothpick Always allow food to stand after cooking Stand ing time after defrosting and cooking allows the temperature to evenly spread throughout the food improving the cooking results The length of the...

Страница 34: ...Closed glass jars may explode resulting in damage to the oven Do not use the microwave oven to sterilize objects baby bottles etc It is difficult to keep the oven at the high temperature needed for sterilization MH ROWAW Ovm To make sure your microwave oven looks good and works well for a long time you should maintain it properly For proper care please follow these instructions carefully For inter...

Страница 35: ...will slide the front of the filter off the lower lip Swing the front of the filter down and slide the filter out Upper lip Lower lip 4 This model comes with Dishwasher Safe Grease Filters Place the grease filters in an empty dish washer and wash NOTE Washing these filters with dirty dishes may cause the filters to trap the parti cles from the dishes so we recommend washing separately in an empty d...

Страница 36: ...r mounting screws 3 Tip the grille forward then lift out to remove 4 Lift up the bulb holder Mounting Screw 3 We recommend replacing bulb s with candelabra base 30 watt bulb s PN 4393681 available from your designated service company or by calling the Customer Interaction Center at 1 800 807 6777 Make sure to have your model number when ordering 4 Plug in microwave oven or reconnect power 1 Unplug...

Страница 37: ... the cooking cycle begins Sometimes the door of my microwave This appearance is normal and does not oven appears wavy Is this normal affect the operation of your oven What are the humming noises that I hear You may hear the sound of the transformer when the Why does the dish become hot when I As the food becomes hot it will conduct the heat to the dish microwave food in it I thought that this Be p...

Страница 38: ...oltage is low Your electrician or service technician can tell you if the outlet voltage is low The cook power is not at the recommended setting Larger amounts of food need longer cooking times The turntable will The turntable is not correctly in place Make sure the turntable is correct side not turn up and is sitting securely on center shaft The support is not operating correctly Remove turntable ...

Страница 39: ...en calling Please know the purchase date and the complete model and serial number of your appliance see the A Note to You section This information will help us better respond to your request Contact Inglis Limited Service from anywhere in Canada at 1 800 807 6777 If you need further assistance you can write to Inglis Please include a daytime phone number in your Limited with any questions or conce...

Страница 40: ... or systems resulting from unauthorized modifications made to the appliance G Replacement parts or repair labor costs for units operated outside Canada H Travel or transportation expenses for customers who reside in remote areas 6 00 WHIRLPOOL CORPORATION AND iNGMS LIMITED SHALL NOT BE LIABLE FOR INCIDENTAL OR CONSEQUENTIAL DAMAGES Some provinces do not allow the exclusion or limitation of inciden...

Страница 41: ...Utilisation avec le four a micro ondes 17 Cuisson la puissance maximale 17 Cuisson diff6rentes puissances 18 Cuisson par etapes programme de cuisson 19 Barre indicatricede progres 20 Utilisation de COOK cuisson 21 Utilisation de REHEAT r6chauffage 22 Utilisation de WARM HOLD Garde au chaude 24 Utilisation de STEAM COOK Cuisson la vapeur 24 Utilisation de la caract6ristique de d6cong6iation JET DEF...

Страница 42: ...er de tout nouveau renseignement au sujet de votre four micro ondes Lors de toute demande de service au sujet de cet appareil m6nager vous devrez nous communiquer le num6ro de module et le num6ro de s6rie au complet On trouve cette information sur la plaque signal6tique indiquant le num6ro de module et le num6ro de s6fie voir le sch6ma la section Familiafisation avec le four micro ondes Veuillez 6...

Страница 43: ...dans cette section Le four a micro ondes dolt 6tre relie a la terre Brancher I appareil uniquement sur une prise de courant convenablement reliee a la terre Voir les INSTRUCTIONS DE LIAISON ikLA TERRE pr6sentees dans cette section et dans les instructions d installation fournies Installer ou placer le four a micro ondes uniquement selon les instructions d installation fournies Certains produits co...

Страница 44: ...pas utilis_ Veiller a ne rien remiser directement sur le four Iorsqu i est en service Lorsque vous flambez des aliments sous la hotte mettre le ventilateur en marche Nettoyer avec soin le fiitre du ventilateur de la hotte Des agents de nettoyage corrosifs tels que les produits de nettoyage de four base de soude peuvent endommager le filtre Ne pas couvrir ni obstruer toute ouverture sur le four a m...

Страница 45: ... electrique dispose d un itineraire direct d acheminement a la terre Le four a micro ondes est dote d un cordon d alimentation electrique qui comporte un conducteur de liaison a la terre avec broche de liaison a la terre On dolt brancher la fiche sur une prise de courant convenablement installee et reliee a la terre AVERTISSEIVIENT L utilisation incorrecte du dispositif de liaison a la terre peut ...

Страница 46: ...S il n est pas pos sible d enlever la grille voir les instructions a la partie 2 inserer une boucle de fil metallique mince ou un instrument similaire a tra vers une ouverture de la grille pour tirer sur le cro chet 5 Saisir le four a micro ondes Faire pivoter le four micro ondes vers le bas Veiller ace que la porte ne s ouvre pas 6 Soulever tirer les pattes de support _ _ en bas de la plaque de m...

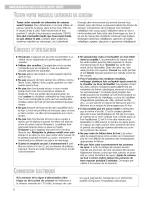
Страница 47: ...START TM pendant le fonctionnement du four ou apr6s le programme de cuisson voir la section Utilisation de la caracteristique JET STARTTM Remuer retourner ou r_arranger les aliments en train de cuire peu pros au milieu de la p_riode de cuisson pour toutes les recettes Ceci aidera faire en sorte que I aliment soit cult uniform_ment Si vous n avez pas un couvercJe pour un plat utiliser du papier cir...

Страница 48: ...ant se fend ou casse contacter le marchand pour obtenir une piece de rechange Quand on emploie un plat brunissement il dolt _tre au moins _ 5 mm _0po au dessus du plateau tournant Suivre le mode d emploi fourni avec le plat brunissement Ne jamais faire cuire ni r_chauffer un euf entier darts la coquile Uaccumulation de vapeur dans les ceufs entiers peut les faire exploser et risque d endommager le...

Страница 49: ...vit 7 Lampo au dessus de latable de cuisson Utilser cette lampe pour I edairagedu comptoirou de latable de cuis son ou comme edairage nocturne 8 I_tiquette du guidede cuisson InformationimmO diate mentaccessiblesur lesdiversesfonctionsdu fou 9 Touchesde commande pour ventilateur et lampe d eclairage de la tablede cuisson Tableaude commande Utilser les touchestactilesou pourselectionnerles diverses...

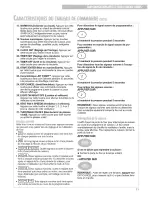
Страница 50: ...auffer une ou deux tasses de 8 oz 250 mL d une boisson sans entrer la puissance de chauffage ou Jetemps de cuisson Le capteur du four indiquera au four le temps de cuisson en fonction de Jaquantite d humidite qu il detecte de la boisson 8 DINNER PLATE Assiett6e Appuyer sur cette touche pour faire chauffer une assiettee d aliments sans entrer la puissance de chauffage ou Jetemps de cuisson Le capte...

Страница 51: ... 6mis Iors de chaque pression sur une touche _ Un long signal sonore indique la fin d une p iode de minutage rebours de la minuterie r _r_ r _r _ Quatre signaux sonores indiquent la fin d une p iode de cuisson r _E_ Deuxsignaux sonores courts et rapides sont 6mis a chaque minute pendant les 15 premi esminutes apr_s un signal de fin d une p iodede cuisson pour rappeler I utilisateurqu il faut retir...

Страница 52: ...une fonction de cuis son automatique Le verrouillage du four immobilise les touches du tableau de commande pour emp_cher I utilisationaccidentelle du four micro ondes Pour verrouiHer le tableau de commande APPUYER SUR Deux signaux sonores seront entendus et i_ apparaftra sur I affichage Lorsque le tableau de commande est verrouill_ trois signaux sonores seront entendus et le mot LOCK apparattra si...

Страница 53: ...re du four Utiliser des mitaines de four pour sortir les articles du four a micro ondes Ne pas faire cuire des aliments directement sur la grille Les placer d abord dans des contenants allant au micro ondes Ne pas remiser la grille en metal dans le four Des etincelles et des dommages au four pourraient en resulter si une personne met accidentellement le four en marche La touche en bas gauche du ta...

Страница 54: ...jour n est pas r6gl_e clignotera jusqu au moment oQ I on appuie sur une touche REMARQUES Si on appuie sur une heure invalable et si on appuie sur CLOCK horloge trois signaux sonores seront entendus Entrer I heure correcte Si on appuie sur la touche CANCEL OFF annula tion arr_t Iors du r6glage de I horloge I affichage affichera la derni_re heure de r6glage Pour arr6ter I horloge appuyer sur CLOCK l...

Страница 55: ...r6s I etape 2 START apparaftra Vous avez alors 1 minute pour appuyer sur TIMER SET ou START ENTER avant que I affichage retourne a I heure du jour A la fin du compte rebours ON OBSERVE 1 Appuyer sur TIMER SET APPUYER SUR ON OBSERVE Durant le compte rebours 2 Entrer la dur_e de la p_riode du compte _ rebours Exemple pour 1 minute 30 secondes APPUYER SUR ON OBSERVE APPUYER SUR ON OBSERVE OU REMARQUE...

Страница 56: ...puyant sur COOK POWER puissance de chauffage les touches num iques pour la nou velle puissance de chauffage et sur START ENTER Vous pouvez utiliser la caract is tique JET START seulement pour la fonction du temps de cuisson 1 S assurer que I aliment est darts le four 2 Appuyer sur la touche de la carac t_ristique JET START APPUYER SUR ON OBSERVE Exemple pour une cuisson pendant 30 secondes Si un t...

Страница 57: ...t darts le four et fermer la porte 2 Appuyer sur COOK TIME temps de cuisson APPUYER SUR ON OBSERVE 4 Mettre le four en marche APPUYER SUR ON OBSERVE A la fin du temps de cuisson ON OBSERVE 3 Entrer le temps de cuisson APPUYER SUR ON OBSERVE quatre signaux sonores seront entendus Q Exemple pour 1 minute 30 secondes On peut changer le temps de cuisson tout moment durant la cuisson en r_p6tant les _t...

Страница 58: ...QLIE Consulter un livre de recettes fiable pour les temps de cuisson Cuisson et chauffage d alments qui demandent une puis sance de chauffage moindre que maximale p ex poisson entier et pain de viande 7 70 de la puissance maximale Moyenne haute Rechauffage d une seule portion d aliments 6 60 de la puissance maximale Cuisson d aliments delicats tels que les plats au fromage et aux oeufs les pouding...

Страница 59: ...ER SUR ON OBSERVE A la fin du temps de cuisson ON OBSERVE quatre signaux sonores seront entendus Pour I obtention de meilleurs r_sultats certaines recettes indiquent une puissance de chauffage pour une certaine dur6e et une autre puissance de chauffage pour une autre dur6e Votre four peut _tre r6g16 pour changer automatiquement d une puissance A une autre et ce jusqu A 3 6tapes Vous pouvez s_lecti...

Страница 60: ...tape en r6p tant les tapes 2 3 et ou 4 et 5 5 R p ter les tapes 2 3 et 4 pour r gler le temps de cuisson et la puissance de chauffage pour chaque 6tape additionnelle Uaffichage contient une barre d indication de progr s qui indiquejusqu quel point les fonctions de cuisson sont rendues et combien il reste de fonctions a ex6 cuter La Iongueur compl te de la barre repr6sente le temps de fonctionnemen...

Страница 61: ...as une quantit6 en moins de 2 secondes COOK vous incitera choisir une quantitY Vous avez alors 1 minute pour entrer une quantit_ et pour appuyer sur START ENTER mise en marche entr_e A d_faut de le faire le r6glage de COOK sera annulS Si vous appuyez sur COOK 6 lois I affichage retourne au r_glage Rice riz Si vous avez besoin de plus ou de moins de temps ne pas appuyer de nouveau sur la touche COO...

Страница 62: ...auffer apr s que le four a t branch a une alimentation lectrique ou apres une panne de courant Si vous commencez la cuisson par d tection durant une p riode de chauffage SENSE apparaTt sur I affichage jusqu _ ce la p riode de chauffer soit termin e L nergie des micro ondes ne sera pas activ e avant que le capteur soit ti de On peut faire r chauffer des aliments qui vont au micro ondes sim lement e...

Страница 63: ...our 2 morceaux Le r_glage pour 1 morceau r6chauffe 1 muffin ou bagel de format r6gulier ou 2 petits pains Ce tableau vous montre comment choisir un type d aliment et en quelle quantit_ pour chaque type ALIMENT APPUYER OU APPUYER SUR QUANTITES QUE VOUS SUR LA TOUCHE POUVEZ CHOISlR REHEAT NUMERIQUE Mets en sauce 3 fois 3 1 4 tasses 250 mL 1 L 4 1a4morceaux 2oz 57 g chocun Vous devez appuyer sur REHE...

Страница 64: ...acer I alirnent cuit et chaud darts le four et fermer la porte 3 Mettre le four en marche APPUYER SUR ON OBSERVE Lorsqu on entre des instructions de cuisson appuyer sur la touche WARM HOLD avant d ap puyer sur la touche START ENTER ou durant la cuisson Lorsque le dernier programme de cuisson est ter mln6 vous entendrez deux signaux sonores WARM apparattra pendant que le four continue de fonctionne...

Страница 65: ...ut avoir besoin de plus d eau Toujourslaisser un temps de repos afin de donner une dis tribution uniforme de la temperature dans I aliment et pour completer le procede de cuisson Ne pas utiliserle plat ovale de cuisson a la vapeur dans un four conventionnel ou de type combin avec les fonctions Crisp ou Grill ou sur des elements electriques ou des brQleursa gaz Ne jamais utiliserle plat ovale de cu...

Страница 66: ...un bip et continuera la d_cong_lation mais cette d_cong_lation prendra plus de temps NOTES Si vous n entrez pas un poids en moins de 2 se condes la caract_ristique JET DEFROST vous incitera entrer un poids Vous avez alors 1 minute pour entrer un poids et pour appuyer sur la touche START ENTER A d_faut de le faire la caract_ristique JET DEFROST sera annul_e Si vous entrez un poids plus _lev_ que le...

Страница 67: ...is lois 3 0 2 4 4 91 g 1998 g Vous devez appuyer sur la touche de caract_ristique JET DEFROST une fois avant de choisir le type d aliment ALIMENT iNSTRUCTiONS SPECIALES Boeuf La viande de forme irr6guli_re et les gros morceaux de viande avec gras Bceuf hach_ en vrac Bceuf hach6 en gaiettes Bifteck de ronde bifteck de filet morceau braiser palette braiser c6te de bceuf r6ti de croupe roul_ devraien...

Страница 68: ...I eau froide Placer sur une grille a rStissage qui va au four micro ondes Terminer la d_cong_la Poitrine tion par immersion dans I eau froide moins de 6 Ib 2 7 kg Filets Placer dans un plat de cuisson qui va au four micro ondes S_parer soigneusement les filets sous I eau froide Dames Entier Placer darts un plat de cuisson qui va au four micro ondes Faire couler I eau froide sur le poisson pour ter...

Страница 69: ...ais peuvent hisser penser que le temps de d ong_lation est plus long que pr u Pour plus de renseignements sur le temps de repos voir Conseils de cuisson aux micro ondes dans la section Guide de cuisson Vous avez probablement I habitude de lire les poids exprimes en livres et en onces qui sont des frac tions de la livre ex 4 onces 113 4 g X Ib Toutefois pour entrer le poids de I aliment dans la car...

Страница 70: ...ou une assiette Ne Le four portera I aliment au point d _bullition L aliment sera ensuite soumis au mijotage pendant le temps que vous avez r_gl_ pas utiliser une pellicule en plastique m_thode suivante placer le contenant avec de I eau 1 Placer I aliment au four et fermer la porte 2 Appuyer sur SIMMER COOK APPUYER SUR ON OBSERVE Utiliser un contenant qui peut contenir assez d eau pour couvrir com...

Страница 71: ...uide de cuJsson Le four doit 6tre branch6 une prise de courant au moins 2 1 2minutes avant la cuisson par d6tection La temp6rature de la piece ne doit pas d6passer 95oF 35oC S assurer que I ext6rieur du contenant de cuisson et I int6rieur du four sont secs Essuyer chacun avec un essuie tout en papier Lorsqu on couvre les aliments s assurer de laisser une ouverture assez grande pour que I humidit6 ...

Страница 72: ...ue et laisser une ouverture d echappement de I air La plupart des legumes ont besoin d 6tre remues et de reposer pendant 2 a 3 minutes apres la cuisson Mets surgel6s Meilleurs resultats si Sortir de I emballage externe Degager la pellicule sur 3 c6tes le mets est de 10 a Si le mets ne se trouve pas dans un contenant pour micro 20 oz 284 a 567 g ondes le placer sur une assiette le couvrir d une pel...

Страница 73: ...r Familiarisation avec le four micro ondes pour les materiaux qui laissent passer les micro ondes Si vous utilisez la fonction Sensor s assurer que I event fonctionne liiiii i I Plusieurs types d alments sont naturelement prot6g_s par une peau ou membrane par exemple pommes de terre saucisses jaunes d oeuf et certains fruits L accumulation de vapeur sous la membrane au cours de la cuisson peut pro...

Страница 74: ...i_i _ Ne pas pr6parer de conserves dans le four Les pots en verre ferm_s peuvent exploser et faire subir des dommages au four Ne pas utiliser le four pour la st_rilisation d objets comme biberons etc II est difficile de maintenir la temperature _lev_e n_cessaire pour st_rilisation ICRO OEDES Pour que le four micro ondes ait toujours une belle apparence et fonctionne bien pen dant Iongtemps il conv...

Страница 75: ...graisse glisser chaque ill tre vers le c6t Tirer le filtre vers le bas et appuyer sur I autre c6t Le filtre se degagera 3 Pour enlever les filtres au charbon pousser Far riere de chaque filtre en I eloignant de vous Cette action fera glisser I avant du filtre hors de la levre inferieure Abaisser le devant du filtre vers le bas et extraire le filtre en le faisant glisser Levre sup_rieure Levre inf6...

Страница 76: ...ever la grille 4 Soulever le cabochon de I ampoule Vis de montage 3 Nous recommandons de remplacer la les ampoule s avec des ampoules de 30 watts douille de candelabre PN 4393681 disponibles de votre compagnie d entretien d6signee ou en tel6phonant au Centre d interaction avec la clientele en composant le 1 890 897 6777 S assurer d avoir le numero de votre modele Iors de la soumission d une comman...

Страница 77: ...tte apparence est normale et elle n affecte pas ble _tre ondul6e est ce normal le fonctionnement du four Quel est le son de bourdonnement que j entends II s agit du son 6mis par le transformateur lots du Iorsque mon four _ micro ondes fonctionne fonctionnement du magn6tron Pourquoi le plat s _chauffe t il Iorsque j en cuis le Alors que les aliments deviennent chauds ils contenu aux micro ondes Je ...

Страница 78: ... peut vous dire si la tension au niveau de la prise de courant est trop basse La puissance de chauffage n est pas au r_glage recommand Les quantit_s d aliments plus grandes ont besoin de temps de cuisson pro long Le plateau rotatif ne Le plateau rotatif n est pas correctement en place S assurer que le plateau tourne pas rotatif ale c6t_ I endroit vers le haut et repose bien fix_ sur la tige centra...

Страница 79: ...er Lors de appel Veuillez connaftre la date d achat et les num_ros au complet du module et de s_rie de votre appareil voir la section Note I utilisateur Ces renseignements nous aideront mieux r_pondre votre demande Communiquer avec le service Inglis Limit_e de partout au Canada en composant le 1 800 807 6777 Si vous avez besoin de plus d assistance vous pou Veuillez indiquer dans votre corresponda...

Страница 80: ...euvre au cours de la garantie limit6e E R_parations de pi_ces ou systemes imputables des modifications non approuv_es de I appareil G CoOts des pieces de rechange et de la main d oeuvre pour les appareils utilis6s hors du Canada H Les depenses de voyage ou de transport pour les clients qui habitent dans des regions eloign6es 5 00 WHIRLPOOL CORPORATION ET INGLIS LIMITI_E DECLINENT TOUTE RESPONSABIL...

Отзывы: