background image

7

Tools

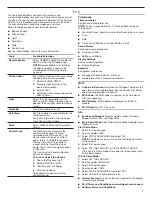
The Tools keypad allows you access to functions and 

customization options for your oven. These tools allow you to set 

the clock, change the oven temperature between Fahrenheit and 

Celsius, turn the audible signals and prompts on and off, adjust 

the oven calibration, change the language, and more.
Select the Tools keypad to view the Tools features:


Remote Enable


Kitchen Timer


Light


Self-Clean


Mute


Control Lock

See the “More Modes” section for more information.

Tools

Available Selections

Remote Enable

Select REMOTE ENABLE to enable the 

ability to utilize the Whirlpool

®

 app.

NOTE:

 Remote Enable turns off when 

the door is opened. It needs to be 

re-enabled each time it is going to 

be used.

Kitchen Timer

Set a kitchen timer by manually entering 

the desired time into the keypad.

1. 

Select KITCHEN TIMER.

2. 

Manually input the time to the 

desired timer length.

3. 

Select START.

4. 

Select the Cancel keypad to end the 

Kitchen Timer.

Light

Select the Light keypad to turn the 

light on and off. When the oven door is 

opened, the oven light will automatically 

turn on.

Turntable

Turn the turntable on or off.

Self-Clean

Self Clean option is not available for the 

microwave oven.
For further information, see the Lower 

Oven Use and Care Guide.

Mute

Select MUTE to Mute and Unmute the 

sound.

Control Lock

The Control Lock shuts down the 

control panel keypads to avoid 

unintended use of the oven(s). The 

Control Lock will remain set after a 

power failure, if set before the power 

failure occurs. When the control is 

locked, only the Oven/Microwave 

Power, Tools, and Oven Light keypads 

will function.
The Control Lock is preset unlocked, 

but can be locked.

To Lock or Unlock the Control:
1. 

Check that the oven is off.

2. 

Select CONTROL LOCK.

3. 

“Control Lock” will display.

4. 

Scroll up to unlock.

No keypads will function with the 

controls locked.

Preferences

Times and Dates

Set time and date preferences.

NOTE:

 If user is connected to Wi-Fi, time and date will be set 

automatically.


Your Meal Times: Adjust when breakfast/lunch/dinner is shown


Time


Date


Time Format (AM/PM vs 24 hour [Military Time])

Sound Volume

Set sound volume preferences.


Timers and Alerts


Buttons and Effects

Display Settings

Set the screen brightness.


Display Brightness

Regional

Set regional preferences.


Language: English, Spanish, or French


Temperature Units: Fahrenheit and Celsius

Wi-Fi


Connect to Network:

 Download the Whirlpool

®

 App from the 

app store on your mobile phone. See the Connectivity Setup 

sheet for more detailed instructions.


SAID Code:

 The SAID code is used to sync a smart device 

with your appliance. 


MAC Address: 

MAC Address is displayed for the Wi-Fi 

module.


Wi-Fi Radio:

 Turn Wi-Fi on or off.

Info


Service and Support:

 Displays model number, Customer 

Support contact info, and Diagnostics


Store Demo Mode: 

Select Store Demo Mode to toggle Demo 

Mode off and on.

Start Demo Mode 
1. 

Select the Tools keypad.

2. 

Scroll and select INFO.

3. 

Select STORE DEMO MODE and select ON.

NOTE: 

The display screen will show the time (default screen/

stanby mode).

4. 

Select the Tools keypad.

5. 

Select TRY THE PRODUCT or VIEW PRODUCT VIDEOS.
If the unit is in Demo Mode after power up, follow these steps 

to exit Demo Mode:

To Exit Demo Mode:
1. 

Select TRY THE PRODUCT.

2. 

Scroll and select EXPLORE.

3. 

Select the Tools keypad.

4. 

Scroll and select INFO.

5. 

Select STORE DEMO MODE and select OFF.

6. 

Select YES on the confirmation screen.


Restore Factory:

 This will restore your product to the original 

factory default settings.


Wi-Fi Terms and Conditions:


www.whirlpool.com/connect.


Software Terms and Conditions.
Содержание WOC75EC7H

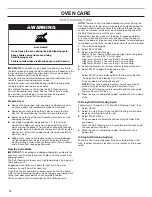
Страница 1: ...e of Contents BUILT IN ELECTRIC MICROWAVE OVEN COMBINATION LOWER OVEN USER INSTRUCTIONS W11040303B OVEN SAFETY 2 OVEN USE 3 Feature Guide 3 Touch Panel 4 Display 4 Display Navigation 4 Setup and Demo Mode 4 Cooking Methods 4 Favorites 6 Assisted Cooking 6 Tools 7 More Modes 8 Aluminum Foil 9 Positioning Racks and Bakeware 9 Oven Vent s 10 Preheating and Oven Temperature 10 Baking and Roasting 10 B...

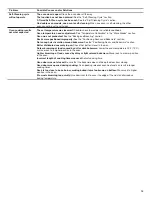
Страница 2: ...d up of pressure may cause container to burst and result in injury Keep Oven Vent Ducts Unobstructed Placement of Oven Racks Always place oven racks in desired location while oven is cool If rack must be moved while oven is hot do not let potholder contact hot heating element in oven DO NOT TOUCH HEATING ELEMENTS OR INTERIOR SURFACES OF OVEN Heating elements may be hot even though they are dark in...

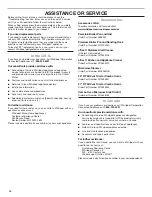
Страница 3: ...rites The Favorites keypad allows the user to save the cycles that they use on a frequent basis Oven Light Oven Cavity Light The oven light is controlled by a keypad on the oven control panel While the oven door is closed press the Oven Light keypad to turn the light on and off When the oven door is opened the oven light will automatically turn on Oven Power Cancel Oven Function Power Cancel The O...

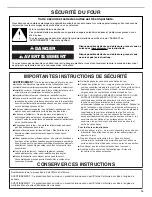
Страница 4: ...than one hour before or after cooking Doing so can result in food poisoning or sickness Cooking Method Feature Instructions BAKE Baking and Roasting 1 Press the Oven Power keypad 2 Select COOKING METHODS 3 Select BAKE 4 Select the desired temperature by scrolling left to right or manually by selecting the grid in the upper right corner and entering the bake temperature into the keypad 5 Select STA...

Страница 5: ...reheating A tone will sound when preheating is complete 6 Press the Oven Cancel keypad when finished For more information see the Convection Cooking section KEEP WARM Keep Warm Food must be at serving temperature before placing it in the warmed oven 1 Press the Oven Power keypad 2 Select COOKING METHODS 3 Select KEEP WARM 4 Select the desired temperature by scrolling left to right or manually by s...

Страница 6: ...ay Input the manufacturer s maximum recommended time and temperature For more information see the Frozen BakeTM section POULTRY Chicken Pieces Whole Chicken Poultry food items do not require preheat Insert food right away SEAFOOD Fish Fillet Fish Sticks Fish fillet and fish sticks require preheat Insert food when preheat is complete BAKED GOODS Biscuits Croissants Baked goods require preheat Inser...

Страница 7: ...ntrol 1 Check that the oven is off 2 Select CONTROL LOCK 3 Control Lock will display 4 Scroll up to unlock No keypads will function with the controls locked Preferences Times and Dates Set time and date preferences NOTE If user is connected to Wi Fi time and date will be set automatically Your Meal Times Adjust when breakfast lunch dinner is shown Time Date Time Format AM PM vs 24 hour Military Ti...

Страница 8: ...Mode For guidance on usage and a complete list of models with Sabbath Mode visit www star k org The Sabbath Mode sets the oven to remain on in a bake setting until disabled When the Sabbath Mode is activated only the Bake cycle will operate All other cooking and cleaning cycles are disabled No tones will sound and the displays will not indicate temperature changes When the oven door is opened or c...

Страница 9: ... when broiling Traditional Cooking Food Rack Position Large roasts turkeys angel food bundt cakes quick breads pies 1 or 2 Yeast breads casseroles meat and poultry 2 Cookies biscuits muffins cakes 2 or 3 when single rack baking 2 and 5 when multi rack baking 6 5 4 3 2 1 Convection Cooking Oven Setting Number of Racks Used Rack Position s Rapid Preheat Bake 1 3 Rapid Preheat Convection Bake 1 3 Con...

Страница 10: ... is not necessary to wait for the oven preheat cycle to end before putting food in unless it is recommended in the recipe Baking and Roasting IMPORTANT The convection fan and convection element may operate during the Bake function to enhance performance and heat distribution The oven will take approximately 12 to 17 minutes to reach 350 F 177 C with all oven racks inside the oven cavity The prehea...

Страница 11: ... cooking foods more evenly crisping surfaces while sealing in moisture and yielding crustier breads During convection cooking the bake broil and convection true convection only elements cycle on and off in intervals to maintain the oven temperature while the fan circulates the hot air If the oven door is opened during convection cooking the fan will turn off immediately It will come back on when t...

Страница 12: ... lights will not work during the Self Cleaning cycle NOTE The oven has a two speed cooling fan motor During the Self Cleaning cycle the fan s will operate at its highest speed to increase airflow to better exhaust the hotter air through the oven vent s An increase in noise may be noticeable during and after the Self Cleaning cycle until the oven cools Before Self Cleaning make sure the door is clo...

Страница 13: ...en Cancel Keypad to clear the display 7 When the oven is completely cooled remove any excess water with a sponge or cloth and wipe down oven interior If needed use a non scratch copper scrubbing pad to remove stubborn soils General Cleaning IMPORTANT Before cleaning make sure all controls are off and the oven is cool Always follow label instructions on cleaning products For additional information ...

Страница 14: ...et or turned on Oven temperature too high or too low Oven temperature needs adjustment See the Temperature Calibration section Display shows messages Power failure On some models reset the clock if needed See Preferences in the Tools section Error code display shows letter followed by number Press the Cancel keypad to clear the display If it reapears call for service See the Warranty section for c...

Страница 15: ... Racks and Bakeware section Not enough air circulation around bakeware See the Positioning Racks and Bakeware section Batter distributed unevenly in pan Check that batter is level in the pan Darker browning of food caused by dull or dark bakeware Lower the oven temperature 25 F 15 C or move rack to a higher position in the oven Lighter browning of food caused by shiny or light colored bakeware Mov...

Страница 16: ... you can write to Whirlpool with any questions or concerns at Whirlpool Brand Home Appliances Customer eXperience Center 553 Benson Road Benton Harbor MI 49022 2692 Please include a daytime phone number in your correspondence Accessories Accessories U S A To order accessories visit our website at www whirlpool com cookingaccessories Porcelain Broiler Pan and Grid Order Part Number 4396923 Premium ...

Страница 17: ...utions etc 5 Defects or damage caused by the use of non genuine Whirlpool parts or accessories 6 Conversion of products from natural gas or L P gas 7 Damage from accident misuse abuse fire floods acts of God or use with products not approved by Whirlpool 8 Repairs to parts or systems to correct product damage or defects caused by unauthorized service alteration or modification of the appliance 9 C...

Страница 18: ...É ÉLECTRIQUE SÉCURITÉ DU FOUR 19 UTILISATION DU FOUR 20 Guide des caractéristiques 20 Panneau tactile 21 Affichage 21 Affichage du menu 21 Mode de paramétrage et de démonstration 21 Méthodes de cuisson 21 Favoris 23 Cuisson assistée 23 Outils 24 Plus de modes 25 Papier d aluminium 26 Positionnement des grilles et des ustensiles de cuisson au four 26 Évents du four 27 Préchauffage et température du...

Страница 19: ...sec ou mousseux Utiliser uniquement des mitaines sèches Les mitaines humides ou trempées sur les surfaces chaudes peuvent provoquer des brûlures dues à la vapeur Ne pas laisser les mitaines toucher des éléments chauffants et chauds Ne pas utiliser un chiffon ou tout autre tissu encombrant Ouvrir la porte lentement Laisser la chaleur ou la vapeur s échapper avant de retirer ou de remettre en place ...

Страница 20: ...r de sauvegarder les programmes qu il utilise le plus souvent Lampe du four Lampe de la cavité du four La lampe du four est commandée à l aide du tableau de commande du four La porte du four étant fermée appuyer sur la touche de la lampe du four pour allumer ou éteindre la lampe La lampe du four s allume automatiquement à l ouverture de la porte Four alimentation annulation Alimentation annulation...

Страница 21: ...lectionner les commandes Lorsque le four est utilisé l affichage indique l horloge le mode la température du four la minuterie de cuisine et la minuterie du four si réglée Si la minuterie du four n est pas réglée on peut la régler à partir de cet écran Après environ 2 minutes d inactivité l affichage passe au mode de veille et l affichage s assombrit Lorsque le four fonctionne l affichage reste lu...

Страница 22: ... le préchauffage Une tonalité se fait entendre une fois le préchauffage terminé 6 Appuyer sur la touche annulation une fois l opération terminée Pour obtenir plus de renseignements consulter la section Cuisson par convection KEEP WARM maintien au chaud Garder au chaud Les aliments doivent être à la température de service avant d être placés dans le four chaud 1 Appuyer sur la touche Oven Power ali...

Страница 23: ...ille Morceaux de poulet Poulet entier Les volailles ne nécessitent pas de préchauffage Insérer les aliments immédiatement SEAFOOD fruits de mer Filet de poisson Bâtonnets de poisson Le filet de poisson et les bâtonnets de poisson nécessitent un préchauffage Insérer les aliments lorsque le préchauffage est terminé BAKED GOODS produits de boulangerie Biscuits Croissants Les produits de boulangerie n...

Страница 24: ...re réactivée à chaque utilisation Minuterie de cuisine Régler la minuterie de cuisine en saisissant le temps désiré à l aide du clavier 1 Sélectionner KITCHEN TIMER minuterie de cuisine 2 Entrer manuellement le temps désiré 3 Sélectionner START mise en marche 4 Sélectionner annulation pour mettre fin à la minuterie de cuisine Éclairage Sélectionner la touche lampe pour allumer ou éteindre la lampe...

Страница 25: ... pas immédiatement Le mode Sabbat n est pas disponible avec le four à micro ondes Info Service et assistance Affiche le numéro de modèle les informations pour contacter le service à la clientèle et le diagnostic Mode démonstrateur en magasin Sélectionner le mode Store Demo démonstrateur en magasin pour mettre en marche et arrêter ce mode Démarrer le mode Demo démonstration 1 Sélectionner la touche...

Страница 26: ...de grille Gros rôtis dindes gâteaux des anges et gâteaux Bundt pains éclairs tartes 1 ou 2 Pains à la levure mets en sauce viande et volaille 2 Biscuits muffins et gâteaux 2 ou 3 pour une cuisson au four sur une seule grille 2 et 5 pour une cuisson au four sur plusieurs grilles Cuisson par convection Réglage du four Nombre de grilles utilisées Position s de la grille Cuisson au four avec préchauff...

Страница 27: ... de cuisson au four Lors du rôtissage il n est pas nécessaire d attendre la fin du préchauffage du four avant d y placer la nourriture sauf si la recette le recommande Cuisson au four et rôtissage IMPORTANT Le ventilateur de convection et l élément de convection peuvent se mettre en marche durant la fonction de cuisson au four pour améliorer la performance et la distribution de chaleur Le four att...

Страница 28: ... humidité naturelle et de donner des pains plus croustillants Durant la cuisson par convection les éléments de cuisson au four cuisson au gril et cuisson par convection vraie convection seulement s allument et s éteignent par intermittence pour maintenir la température du four tandis que le ventilateur fait circuler l air chaud Si la porte du four est ouverte durant la cuisson par convection le ve...

Страница 29: ...e ne pas appliquer de chiffon humide et froid sur la partie interne du hublot de la porte avant qu il n ait complètement refroidi Les lampes du four ne fonctionnent pas durant le programme d autonettoyage REMARQUE Le four possède un moteur de ventilateur de refroidissement à 2 vitesses Pendant le programme d autonettoyage les ventilateurs fonctionneront à la vitesse la plus élevée pour augmenter l...

Страница 30: ...ssuyer l intérieur du four Au besoin utiliser un tampon à récurer en cuivre non abrasif pour retirer les souillures tenaces 4 Lorsque le four a complètement refroidi retirer la cendre avec un chiffon humide Pour arrêter le programme d autonettoyage à tout moment Appuyer la sur touche annulation de la fonction d alimentation du four Si la température du four est trop élevée la porte reste verrouill...

Страница 31: ...re du four est trop élevée ou trop basse Il faut régler la température du four Voir la section Calibration de la température du four Des messages s affichent Panne de courant Sur certains modèles régler de nouveau l horloge au besoin Voir la rubrique Préférences dans la section Outils Code d erreur l afficheur indique une lettre suivie d un numéro Appuyer sur la touche annulation pour effacer l af...

Страница 32: ...sage Les grilles ont été positionnées de façon inappropriée Voir la section Positionnement des grilles et ustensiles de cuisson au four La circulation d air est insuffisante autour des ustensiles de cuisson au four Voir la section Positionnement des grilles et ustensiles de cuisson au four La pâte est distribuée de façon inégale dans le plat Vérifier que la pâte est répartie uniformément dans le p...

Страница 33: ...ool Brand Home Appliances Customer eXperience Center 553 Benson Road Benton Harbor MI 49022 2692 Veuillez indiquer dans votre correspondance un numéro de téléphone où l on peut vous joindre dans la journée Accessoires Accessoires É U Pour commander des accessoires visiter le www whirlpool com cookingaccessories Lèchefrite et grille en porcelaine Commander le numéro de pièce 4396923 Lèchefrite et g...

Страница 34: ...ation de pièces ou accessoires Whirlpool non authentiques 6 Conversion de votre produit du gaz naturel ou du gaz de pétrole liquéfié 7 Dommages causés par accident mésusage abus incendie inondations catastrophe naturelle ou l utilisation de produits non approuvés par Whirlpool 8 Réparations aux pièces ou systèmes dans le but de rectifier un dommage ou des défauts résultant d une réparation altérat...

Страница 35: ... EL HORNO INFERIOR SEGURIDAD DEL HORNO 36 USO DEL HORNO 37 Guía de características 37 Panel táctil 38 Pantalla 38 Navegación de la pantalla 38 Configuración y modo de demostración 38 Métodos de cocción 38 Favoritos 40 Cocción asistida 40 Herramientas 41 Más modos 42 Papel de aluminio 43 Posición de las parrillas y los utensilios para hornear 43 Ventilaciones del horno 44 Precalentamiento y tempera...

Страница 36: ...as por vapor No deje que el agarrador de ollas toque los elementos calefactores calientes No use una toalla ni otros paños voluminosos Tenga cuidado al abrir la puerta Deje que salga el aire caliente o el vapor antes de quitar o volver a colocar alimentos No ponga a calentar recipientes de alimentos cerrados La acumulación de presión puede hacer que el recipiente explote y ocasione lesiones Manten...

Страница 37: ... Luz de la cavidad del horno La luz del horno está controlada por un botón que está en el panel de control del horno Mientras la puerta del horno está cerrada presione el botón de la luz del horno para encender y apagar la luz Cuando se abre la puerta del horno la luz del horno se enciende automáticamente Encendido del horno Cancelar Encender cancelar la función del horno La tecla encender cancela...

Страница 38: ...nas ligero Cuando hay un horno en uso la pantalla muestra el reloj el modo la temperatura del horno el temporizador de cocina y el temporizador del horno si está ajustado Si el temporizador del horno no está ajustado puede ajustarlo en esta pantalla Después de aproximadamente 2 minutos de inactividad la pantalla entrará al modo de suspensión y se atenuará Cuando el horno está funcionando la pantal...

Страница 39: ...tono cuando el precalentado se complete 6 Presione la tecla cancelar el horno cuando haya finalizado Para obtener más información vea la sección Cocción por convección KEEP WARM Mantener caliente Mantener caliente Los alimentos deberán estar a la temperatura para ser servidos antes de colocarlos en el horno calentado 1 Presione el botón encendido del horno 2 Seleccione COOKING METHODS Métodos de c...

Страница 40: ...M POULTRY Pollo Presas de pollo Pollo entero Los alimentos de pollo no requieren que precaliente el horno Inserte los alimentos inmediatamente SEAFOOD Mariscos Filete de pescado Palitos de pescado Los filetes de pescado y palitos de pescado requieren que precaliente el horno Introduzca el alimento cuando termine de precalentar BAKED GOODS Alimentos horneados Galletas Medialunas Los alimentos horne...

Страница 41: ...or Mute Silencio Seleccione MUTE Silencio para silenciar o activar el sonido Preferencias Horas y fechas Ajuste las preferencias de hora y fecha NOTA Si el usuario está conectado a Wi Fi la hora y fecha se ajustarán automáticamente Sus horarios de comidas Ajuste cuando aparezca desayuno almuerzo cena Hora Fecha Formato de hora AM PM o 24 horas hora militar Volumen de sonido Ajuste las preferencias...

Страница 42: ... horno de microondas Info Información Servicio y asistencia Muestra el número de modelo información de contacto de Asistencia al cliente y diagnósticos Modo de demostración en tiendas Seleccione STORE DEMO MODE Modo de demostración en tiendas para activar y desactivar el modo de demostración Inicie el Modo de Demostración 1 Seleccione las herramientas 2 Desplácese y seleccione Info Información 3 S...

Страница 43: ...or a punto use una parrilla plana en la posición 6 El lado 1 debe cocinarse durante aproximadamente 3 minutos El lado 2 debe cocinarse durante aproximadamente 3 a 4 minutos Es normal que haya un grado moderado de humo cuando se asa a la parrilla Cocción tradicional Alimento Posición de la parrilla Asados grandes pavos pasteles de ángel roscas Bundt panes rápidos pays 1 o 2 Panes de levadura guisad...

Страница 44: ...r el tiempo y el rendimiento de la cocción Se recomienda usar la luz del horno para controlar el progreso de cocción NOTA En los modelos con convección el ventilador de convección puede funcionar en el modo de horneado sin convección para mejorar el rendimiento del horno Antes de hornear o asar coloque las parrillas según la sección Posición de las parrillas y los utensilios para hornear Al asar n...

Страница 45: ...ara obtener resultados óptimos utilice una charola para asar con rejilla que está diseñada para drenar los jugos y ayudar a evitar salpicaduras y humo Si desea comprar una charola para asar puede hacer un pedido Para obtener más información vea la sección Accesorios Cocción por convección En un horno por convección el aire caliente que hace circular el ventilador distribuye el calor continuamente ...

Страница 46: ...l vidrio interior de la puerta antes de que se haya enfriado por completo Las luces de los hornos no funcionarán durante el ciclo de autolimpieza NOTA Cada horno tiene un motor de ventilador enfriador de 2 velocidades Durante el ciclo de autolimpieza los ventiladores funcionan a máxima velocidad para aumentar el flujo de aire y eliminar mejor el aire caliente a través de los ductos de escape de lo...

Страница 47: ... Si es necesario use una esponja de fregar de cobre que no raye para eliminar la suciedad rebelde Limpieza general IMPORTANTE Antes de la limpieza asegúrese de que todos los controles estén apagados y que el horno esté frío Siempre siga las instrucciones de las etiquetas de los productos de limpieza Para obtener información adicional puede visitar la sección de preguntas frecuentes de nuestro siti...

Страница 48: ...sulte la sección Modo de descanso En los modelos con horno doble un horno está haciendo autolimpieza Si un horno está haciendo autolimpieza el otro horno no se puede ajustar ni encender La temperatura del horno es demasiado alta o demasiado baja La temperatura del horno debe regularse Vea la sección Calibración de la temperatura La pantalla muestra mensajes Corte de corriente En algunos modelos re...

Страница 49: ... temperatura en la sección Más modos No se ha precalentado el horno Consulte la sección Cómo hornear y asar Se han colocado las parrillas de modo inadecuado Vea la sección Posición de las parrillas y los utensilios para hornear No hay suficiente circulación de aire alrededor de los utensilios para hornear Vea la sección Posición de las parrillas y los utensilios para hornear Se ha distribuido el b...

Страница 50: ...guntas o dudas a Whirlpool Customer eXperience Center 553 Benson Road Benton Harbor MI 49022 2692 Incluya en su correspondencia un número de teléfono en el que se le pueda localizar durante el día Accesorios Accesorios en EE UU Para pedir accesorios visite nuestro sitio web en www whirlpool com cookingaccessories Charola para asar y rejilla de porcelana Pida la pieza número 4396923 Parrilla para a...

Страница 51: ... de agua o de aire soluciones de conservación etc 5 Defectos o daños causados por el uso de piezas o accesorios no legítimos de Whirlpool 6 Conversión del producto de gas natural o gas L P 7 Daño causado por accidente uso indebido abuso incendio inundación actos fortuitos o el empleo de productos no aprobados por Whirlpool 8 Reparaciones a piezas o sistemas para corregir el daño o los defectos del...

Страница 52: ...W11040303B 06 17 2017 Whirlpool Used under license in Canada All rights reserved Utilisé sous licence au Canada Tous droits réservés Usado en Canadá bajo licencia Todos los derechos reservados ...

Отзывы: