background image

17

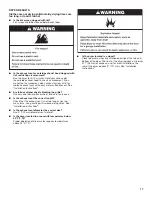
DRYER RESULTS
Clothes are not drying satisfactorily, drying times are 

too long, or load is too hot

Is the lint screen clogged with lint? 


Lint screen shold be cleaned before each load.

Is the exhaust vent or outside exhaust hood clogged with 


lint, restricting air movement? 

Run the dryer for 5-10 minutes. Hold your hand under 

the outside exhaust hood to check air movement. If you 

do not feel air movement, clean exhaust system of lint or 

replace exhaust vent with heavy metal or flexible vent. See 

“Installation Instructions

.

Are fabric softener sheets blocking the grille? 


Use only one fabric softener sheet, and use it only once.

Is the exhaust vent the correct length? 


Check that the exhaust vent is not too long or has too 

many turns. Long venting will increase drying times. See 

“Installation Instructions

.

Is the exhaust vent diameter the correct size?


Use 4" (102 mm) diameter vent material.

Is the dryer located in a room with temperature below 


45°F (7°C)?


Proper operation of dryer cycles requires temperatures 

above 45°F (7°C).

Is the dryer located in a closet? 


Closet doors must have ventilation openings at the top and 

bottom of the door. The front of the dryer requires a minimum 

of 1" (25 mm) of airspace, and, for most installations, the 

rear of the dryer requires 5" (127 mm). See “Installation 

Instructions

Содержание WGD7300XW

Страница 1: ..._______________________ NOTES CONCERNANT L INSTALLATION Table des matières SÉCURITÉ DE LA SÉCHEUSE 17 EXIGENCES D INSTALLATION 19 Outillage et pièces 19 Exigences d emplacement 20 Raccordement à l alimentation électrique de la sécheuse électrique Canada seulement 22 Raccordement d une sécheuse à gaz 23 L EVACUATION 25 Exigences concernant l evacuation 25 Planification du système d évacuation 26 In...

Страница 2: ...instructions are not followed Your safety and the safety of others are very important We have provided many important safety messages in this manual and on your appliance Always read and obey all safety messages This is the safety alert symbol This symbol alerts you to potential hazards that can kill or hurt you and others All safety messages will follow the safety alert symbol and either the word...

Страница 3: ...ctions If you cannot reach your gas supplier call the fire department Installation and service must be performed by a qualified installer service agency or the gas supplier Clear the room building or area of all occupants IMPORTANT The gas installation must conform with local codes or in the absence of local codes with the National Fuel Gas Code ANSI Z223 1 NFPA 54 or the Canadian Natural Gas and ...

Страница 4: ...le for purchase from the dealer from whom you purchased your dryer For further information please refer to the Assistance or Service section in your Use and Care Guide Parts supplied all models Flat blade screwdriver Adjustable wrench that opens to 1 25 mm or hex head socket wrench Tin snips new vent installations Caulking gun and compound for installing new exhaust vent Vent clamps 1 4 6 mm nut d...

Страница 5: ... in garages closets mobile homes or sleeping quarters Contact your local building inspector NOTE No other fuel burning appliance can be installed in the same closet as a dryer DRYER DIMENSIONS Optional Equipment Not supplied with dryer Refer to your Use and Care Guide for information about accessories available for your dryer INSTALLATION CLEARANCES The location must be large enough to allow the d...

Страница 6: ... branch circuit This dryer is equipped with a CSA International Certified Power Cord intended to be plugged into a standard 14 30R wall receptacle The cord is 5 ft 1 52 m long Be sure wall receptacle is within reach of dryer s final location 4 wire receptacle 14 30R If using a replacement power supply cord it is recommended that you use Power Supply Cord Replacement Part Number 9831317 For further...

Страница 7: ...ing personnel authorized gas company personnel and authorized service personnel Failure to do so can result in death explosion or fire GAS SUPPLY REQUIREMENTS 1 2 IPS pipe is recommended 3 8 approved aluminum or copper tubing is acceptable for lengths under 20 ft 6 1 m if local codes and gas supplier permit If you are using Natural gas do not use copper tubing Lengths over 20 ft 6 1 m should use l...

Страница 8: ...onal 18 460 mm from the floor 2 1 8 54 mm 1 25 mm A B Venting REQUiREMENTS WARNING Fire Hazard Use a heavy metal vent Do not use a plastic vent Do not use a metal foil vent Failure to follow these instructions can result in death or fire WARNING To reduce the risk of fire this dryer MUST BE EXHAUSTED OUTDOORS IMPORTANT Observe all governing codes and ordinances Dryer exhaust must not be connected ...

Страница 9: ...e information see Assistance or Service section in your Use and Care Guide Plan Vent System Recommended exhaust installations Typical installations vent the dryer from the rear of the dryer Other installations are possible A B B C D E F G H A Dryer B Elbow C Wall D Exhaust hood E Clamps F Rigid metal or flexible metal vent G Vent length necessary to connect elbows H Exhaust outlet Optional exhaust...

Страница 10: ... Rigid metal Rigid metal Rigid metal 64 ft 20 m 54 ft 16 5 m 44 ft 13 4 m 35 ft 10 7 m 27 ft 8 2 m 58 ft 17 7 m 48 ft 14 6 m 38 ft 11 6 m 29 ft 8 8 m 21 ft 6 4 m INStall VENT SYSTEM 12 min 305 mm 12 min 305 mm Install exhaust hood 1 Install exhaust hood and use caulking compound to seal exterior wall opening around exhaust hood The Vent System Chart provides venting requirements that will help ach...

Страница 11: ...finish turning legs until diamond marking is no longer visible Now stand the dryer on its feet Slide the dryer until it is close to its final location Leave enough room for electrical connection and to connect the exhaust vent Connect gas supply to dryer 1 Remove red cap from gas pipe Using a wrench to tighten connect gas supply to dryer Use pipe joint compound on threads of all non flared male fi...

Страница 12: ...h additional two thirds turn NOTE Do not overtighten Damage to the coupling can result Attach short hose and Y connector 2 If space permits attach the brass female end of the Y connector to the cold water faucet See figure A If Y connector cannot be attached directly to the cold water faucet the short hose must be used See figure B Attach short hose to cold water faucet Screw on coupling by hand u...

Страница 13: ... faucet 6 Check that the water faucets are turned on Check for leaks 7 Check for leaks around Y connector faucets and hoses Connect vent 1 Connect vent to exhaust outlet Using a 4 102 mm clamp connect vent to exhaust outlet in dryer If connecting to existing vent make sure vent is clean Dryer vent must fit over dryer exhaust outlet and inside exhaust hood Check that vent is secured to exhaust hood...

Страница 14: ...or thoroughly with a damp cloth to remove any dust q Read Dryer Use in your Use and Care Guide q If you live in a hard water area use of a water softener is recommended to control the buildup of scale through the water system in the dryer Over time the buildup of lime scale may clog different parts of the water system which will reduce product performance Excessive scale buildup may lead to the ne...

Страница 15: ...emove remaining two loose screws from dryer front panel 5 Remove the 4 plastic plugs A located outside the dryer door opening 6 Install 4 plastic plugs A into screw holes in the dryer left where the hinges were removed in Step 4 Reverse the strike 1 Remove the door strike A from the dryer door opening 2 Remove the cosmetic screw B opposite the door strike A A B A Door strike B Cosmetic screw 3 Rei...

Страница 16: ...ian Is the correct power supply available Electric dryers require a 240 volt power supply Check with a qualified electrician Was a regular fuse used Use a time delay fuse No heat Has a household fuse blown or has a circuit breaker tripped The drum may be turning but you may not have heat Elelctric dryers use two household fuses or circuit breakers Replace the fuse or reset the circuit breaker If t...

Страница 17: ...ets blocking the grille Use only one fabric softener sheet and use it only once Is the exhaust vent the correct length Check that the exhaust vent is not too long or has too many turns Long venting will increase drying times See Installation Instructions Is the exhaust vent diameter the correct size Use 4 102 mm diameter vent material Is the dryer located in a room with temperature below 45 F 7 C ...

Страница 18: ...18 SÉCURITÉ DE LA SÉCHEUSE ...

Страница 19: ...19 ...

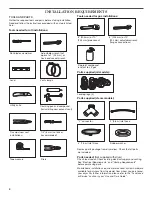
Страница 20: ...uprès duquel vous avez acheté votre sécheuse Pour plus d informations voir la section Assistance ou service dans le Guide d utilisation et d entretien Pièces fournies tous les modèles Tournevis à lame plate Clé à molette avec ouverture jusqu à 1 25 mm ou clé à douille hexagonale Cisaille de ferblantier pour l installation d un nouveau conduit Pistolet à calfeutrage et composé de calfeutrage pour l...

Страница 21: ...lle sera exposée à l eau et ou aux intempéries Vérifier les spécifications des codes Certains codes limitent ou n autorisent pas l installation des sécheuses dans un garage un placard une maison mobile ou une chambre à coucher Communiquer avec l inspecteur des bâtiments local REMARQUE Aucun autre appareil consommant un combustible ne doit être installé dans le même placard DIMENSIONS DE LA SÉCHEUS...

Страница 22: ...commander un ensemble d ancrage au sol pour installation en résidence mobile pièce numéro 346764 Pour plus d informations voir la section Assistance ou service dans le Guide d utilisation et d entretien RACCORDEMENT DE LA SÉCHEUSE ÉLECTRIQUE CANADA UNIQUEMENT SPÉCIFICATIONS ÉLECTRIQUES C est à l utilisateur qu incombe la responsabilité de Contacter un électricien qualifié S assurer que le raccorde...

Страница 23: ...ord Failure to follow these instructions can result in death fire or electrical shock WARNING Une source d alimentation de 120 V 60 Hz CA uniquement de 15 ou 20 ampères et protégée par fusible est nécessaire On recommande d utiliser un fusible ou un disjoncteur temporisé Il est également recommandé de raccorder l appareil sur un circuit distinct exclusif à cet appareil SPÉCIFICATIONS DE L ALIMENTA...

Страница 24: ... amont de la connexion d alimentation en gaz de la sécheuse A B E D C Aux États Unis Un robinet d arrêt individuel manuel doit être installé à six 6 pieds 1 8 m maximum de la sécheuse conformément au Code National d alimentation au gaz ANSI Z223 1 L emplacement doit être facile à atteindre pour ouvrir et fermer la sécheuse Au Canada Un robinet d arrêt individuel doit être installé conformément au ...

Страница 25: ...lever tout excès de conduit flexible pour éviter tout affaissement et déformation susceptible de réduire la capacité d évacuation et le rendement Ne pas installer le conduit métallique flexible dans des cavités fermées de mur plafonds ou planchers La longueur totale ne doit pas dépasser 7 3 4 pi 2 4 m 4 102 mm Conduit d évacuation métallique robuste de 4 pouces 102 mm REMARQUE Lors de l utilisatio...

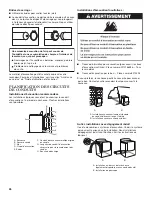
Страница 26: ...sse d évacuation par le bas Pièce numéro 8212503 Si vous préférez la sécheuse peut être convertie pour évacuer par le bas Contactez votre revendeur local pour convertir la sécheuse A B A Installation avec acheminement standard du conduit d évacuation par l arrière B Installation avec évacuation par le bas Planification des circuits de conduits Installations d évacuation recommandées Les installati...

Страница 27: ...obtenir une performance de séchage idéale Déterminer l itinéraire d acheminement du conduit Choisir l itinéraire d acheminement vers l extérieur qui sera le plus direct et le plus rectiligne Planifier l installation de façon à introduire un nombre minimal de coudes et de changements de direction Si des coudes ou changements de direction sont utilisés prévoir autant d espace que possible Plier le c...

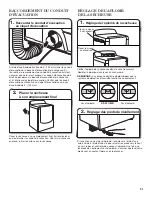
Страница 28: ...ment diamond marking Examiner les pieds de nivellement pour trouver le repère en forme de losange Visser manuellement les pieds dans les trous pour pieds de nivellement et utiliser une clé pour terminer le vissage jusqu à ce que le repère en forme de losange ne soit plus visible À présent redresser la sécheuse et la placer sur ses pieds Faire glisser la sécheuse jusqu à ce qu elle se trouve à prox...

Страница 29: ...t de caoutchouc se trouve dans le raccord en Y Retirer l ancien joint de caoutchouc du tuyau d arrivée d eau et le remplacer par le nouveau joint de caoutchouc fourni Robinet d arrêt du gaz ouvert 3 Ouvrir le robinet d arrêt de la canalisation d alimentation le robinet est ouvert lorsque la manette est parallèle à la canalisation de gaz Vérifier ensuite tous les raccordements en les badigeonnant d...

Страница 30: ...x tiers de tour supplémentaire avec une pince REMARQUE Ne pas serrer excessivement Le raccord risque d être endommagé 3 3 4 95 mm 11 279 mm Fixer le long tuyau à l électrovanne de remplissage de la sécheuse et serrer les raccords 5 Fixer l autre extrémité du long tuyau à l électrovanne située au bas du panneau arrière de la sécheuse Visser le raccord à la main jusqu à ce qu il repose sur le raccor...

Страница 31: ... Éviter d écraser ou de déformer le conduit d évacuation Une fois la sécheuse en place retirer le carton sous la sécheuse Réglage de l aplomb de la sécheuse Réglage de l aplomb de la sécheuse 1 Pas d aplomb D APLOMB Pas d aplomb Vérifier l aplomb de la sécheuse dans le sens transversal Répéter l opération dans le sens avant arrière REMARQUE La sécheuse doit être d aplomb pour que le système de dét...

Страница 32: ...e en marche Ne pas sélectionner le réglage de température Air Only air seulement Si la sécheuse ne démarre pas vérifier ce qui suit Les commandes sont réglées à la position de marche ou sur ON marche Le bouton Start mise en marche a été enfoncé fermement La sécheuse est branchée dans une prise reliée à la terre et ou l alimentation électrique est connectée Les fusibles du domicile sont intacts et ...

Страница 33: ...les 4 vis dans les mêmes trous 3 Retirer les quatre vis du côté opposé de la porte 4 Installer les deux charnières sur le panneau avant de la sécheuse à l aide de 4 vis Utiliser le côté sans fente pour fixer la charnière sur le panneau avant 5 Installer les vis dans les trous supérieurs de la charnière sur la porte Ne pas serrer les vis Laisser les vis en retrait d environ 1 4 5 mm 6 Suspendre la ...

Страница 34: ... la sécheuse en marche Si le message reste affiché consulter un électricien qualifié Codes de service variables F F1E1 F2E2 F3E1 F3E2 F7E1 F3E6 F3E7 Appeler pour demander une intervention de dépannage RÉSULTATS DE SÉCHAGE Le séchage des vêtements n est pas satisfaisant les durées de séchage sont trop longues ou la charge est trop chaude Le filtre à charpie est il obstrué de charpie Le filtre à cha...

Страница 35: ...ent comporter des ouvertures d aération au sommet et en bas de la porte Un espace minimum de 1 25 mm est nécessaire à l avant de la sécheuse et pour la plupart des installations un espace de 5 127 mm est nécessaire à l arrière de la sécheuse Voir les Instructions d installation ...

Страница 36: ...W10347751B W10352826B SP 2010 Whirlpool Corporation All rights reserved Tous droits réservés 11 10 Printed in U S A Imprimé au E E U U ...

Отзывы: