background image

11

RANGE CARE

Self-Cleaning Cycle

 (on some models)

IMPORTANT: The health of some birds is extremely sensitive to the 
fumes given off during the Self-Cleaning cycle. Exposure to the 
fumes may result in death to certain birds. Always move birds to 
another closed and well-ventilated room.
Do not block the oven vent(s) during the Self-Cleaning cycle. Air 
must be able to move freely. Depending on your model, see “Oven 
Vent” section.

Do not clean, rub, damage or move the oven door gasket. 

Prepare Range

Remove the broiler pan, grid, cookware and bakeware, all 
cooking utensils, oven racks and aluminum foil and, on some 
models, the temperature probe from the oven.

Use a damp cloth to clean inside door edge and the 
1½" (3.8 cm) area around the inside oven cavity frame, being 
certain not to move or bend the gasket.

Remove plastic items from the cooktop because they may 
melt.

Remove all items from the storage drawer.

How the Cycle Works

IMPORTANT: The heating and cooling of porcelain on steel in the 
oven may result in discoloring, loss of gloss, hairline cracks and 
popping sounds.
Before self-cleaning, make sure the door is completely closed or 
the door will not lock and the self-cleaning cycle will not begin.

Once the oven has completely cooled, remove ash with a damp 
cloth. To avoid breaking the glass, do not apply a cool damp cloth 
to the inner door glass before it has completely cooled.
To stop the self-cleaning cycle at anytime, press the CANCEL 
keypad. If the temperature is too high, the oven door will remain 
locked and “cool” and “locked” will be displayed.
The oven light will not function during the self-cleaning cycle.

Style 1 - Electronic Oven Control with Adjustable Clean 
Time (on some models)

The SELF CLEAN self-cleaning cycle is time adjustable between 
2 hours 30 minutes and 4 hours 30 minutes in 15-minute 
increments. Suggested clean times are 2 hours 30 minutes for light 
soil, and 4 hours 30 minutes for heavy soil. The last 30 minutes of 
the cycle is for cool down.

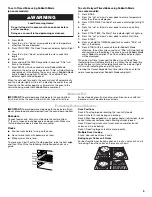
To Self-Clean:

1. Press SELF CLEAN.
2. Press the TEMP/TIME “+” or “-” arrow pads to enter the 

desired self-clean cycle time.

3. Press START.

The oven door will automatically lock. The DOOR LOCKED and 
CLEAN indicator lights will be displayed. The time remaining 
will also be displayed.

4. When the self-clean cycle is complete and the oven cools, the 

DOOR LOCKED and CLEAN indicator lights will turn off.

5. When the oven is completely cooled, remove ash with a damp 

cloth.

Style 2 - Electronic Oven Control with Adjustable Self-Clean 
(HI - LO) (on some models)

The self-cleaning cycle can be set at HI self-clean time (4 hours 
30 minutes) or LO self-clean time (3 hours 30 minutes). The 
suggested clean times are 3 hours 30 minutes for light soil, or 
4 hours 30 minutes for heavy soil. The last 30 minutes of the cycles 
is for cool down.

To Self-Clean:

1. Press SELF CLEAN to set the clean time to HI (4 hours 

30 minutes). 

2. Press the TEMP/TIME “+” or “-” arrow pads to cycle between 

LO and HI clean time.

3. Press START.

The oven door will automatically lock. The CLEAN indicator 
light will be displayed. The time remaining will also be 
displayed.

4. When the self-clean cycle is complete and the oven cools, the 

CLEAN indicator light will turn off.

5. When the oven is completely cooled, remove ash with a damp 

cloth.

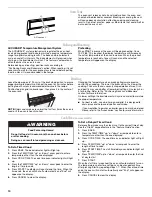
WARNING

Burn Hazard

Do not touch the oven during the Self-Cleaning cycle.

Keep children away from oven during 
Self-Cleaning cycle.

Failure to follow these instructions can result in burns.

Содержание  WFC130M0AB

Страница 1: ...ducto visite www whirlpool com Tenga listo su número de modelo completo Puede encontrar su número de modelo y de serie en la etiqueta ubicada en el marco del horno detrás del panel del cajón de almacenamiento ELECTRICRANGE USERINSTRUCTIONS Table of Contents RANGE SAFETY 2 The Anti Tip Bracket 2 FEATURE GUIDE 4 COOKTOP USE 5 Cookware 7 Home Canning 7 OVEN USE 8 Electronic Oven Controls 8 Sabbath Mo...

Страница 2: ... alert symbol and either the word DANGER or WARNING These words mean follow instructions instructions DANGER WARNING Tip Over Hazard A child or adult can tip the range and be killed Verify the anti tip bracket has been properly installed and engaged per installation instructions Re engage anti tip bracket if range is moved Do not operate range without anti tip bracket installed and engaged Failure...

Страница 3: ...f these pans or bowls during cooking may subject wiring or components underneath to damage Protective Liners Do not use aluminum foil to line surface unit drip bowls or oven bottoms except as suggested in the manual Improper installation of these liners may result in a risk of electric shock or fire Glazed Cooking Utensils Only certain types of glass glass ceramic ceramic earthenware or other glaz...

Страница 4: ...play the countdown for 5 seconds START Cooking start The Start pad begins any oven function If Start is not pressed within 5 seconds PUSH appears in the display If Start is not pressed within 1 minute after pressing a keypad the function is canceled and the time of day is displayed CANCEL Range function The Cancel keypad stops any function except the Clock Timer and Oven Control Lockout TEMP TIME ...

Страница 5: ...dditional information IMPORTANT To avoid permanent damage to the cooktop surface and to make soils easier to remove clean the cooktop after each use to remove all soils Avoid storing jars or cans above the cooktop Dropping a heavy or hard object onto the cooktop could crack the cooktop To avoid damage to the cooktop do not leave a hot lid on the cooktop As the cooktop cools air can become trapped ...

Страница 6: ...s of pots and pans are clean and dry before using them Residue and water can leave deposits when heated To avoid damage to the cooktop do not cook foods directly on the cooktop Ceramic Glass Cooktop Cleaning on some models Clean the cooktop after each use to help avoid scratches pitting abrasions and to condition the glass surface Ceramic glass cooktop cleaner and a cooktop scraper are also recomm...

Страница 7: ...ss smooth top cooking surface When canning for long periods alternate the use of surface cooking areas or elements between batches This allows time for the most recently used areas to cool Center the canner on the largest surface cooking area or element On electric cooktops canners should not extend more than 1 3 cm beyond the surface cooking area or element Do not place canner on 2 surface cookin...

Страница 8: ... Sabbath Mode sets the oven to remain on in a Bake setting until turned off A Timed Bake can also be set to keep the oven on for only part of the Sabbath The Oven Control Lockout Feature if present will be disabled during the Sabbath Mode After the Sabbath Mode is set no tones will sound the display will not show the temperature the Kitchen Timer Mode will be canceled if active and only the follow...

Страница 9: ...eached the Bake On and Cook Time indicator lights will automatically turn on When the set cook time ends the oven will shut off automatically and the indicator lights will turn off indicating the end of the cycle Pressing the Cancel keypad at any time returns the oven to the normal cooking mode not Sabbath Mode compliant AluminumFoil IMPORTANT To avoid permanent damage to the oven bottom finish do...

Страница 10: ... better at lower broil settings Use racks 4 or 5 for broiling Refer to the Positioning Racks and Bakeware section for more information On lower settings the broil element will cycle on and off to maintain the proper temperature For best results use a broiler pan and grid It is designed to drain juices and help avoid spatter and smoke If you would like to purchase a broiler pan one may be ordered P...

Страница 11: ... Style 1 Electronic Oven Control with Adjustable Clean Time on some models The SELF CLEAN self cleaning cycle is time adjustable between 2 hours 30 minutes and 4 hours 30 minutes in 15 minute increments Suggested clean times are 2 hours 30 minutes for light soil and 4 hours 30 minutes for heavy soil The last 30 minutes of the cycle is for cool down To Self Clean 1 Press SELF CLEAN 2 Press the TEMP...

Страница 12: ...r and cooktop cleaner Scrape off sugary spills while the cooktop is still warm You may want to wear oven mitts while cleaning the cooktop Heavy soil dark streaks specks and discoloration Clean with Cooktop Cleaner or nonabrasive cleaner and cleaning pad Burned on soil Clean with Cooktop Cleaner Cleaning Pad and Cooktop Scraper Metal marks from aluminum and copper Clean with Cooktop Cleaner and Cle...

Страница 13: ...utlet in the home may be miswired Contact a qualified electrician to verify the electrical supply Cooktop will not operate The control knob is not set correctly Push in knob before turning to a setting On ceramic glass models the oven control lockout is set See the control lock keypad feature in the Feature Guide Excessive heat around cookware on cooktop Cookware is not the proper size Use cookwar...

Страница 14: ...correct Double check the recipe in a reliable cookbook Oven temperature needs adjustment See Oven Temperature Control in the Electronic Oven Controls section Oven was not preheated See Baking and Roasting section Racks were positioned improperly See Positioning Racks and Bakeware section Not enough air circulation around bakeware See Positioning Racks and Bakeware section Batter distributed uneven...

Страница 15: ...the appliance 9 Expenses for travel and transportation for product service if your major appliance is located in a remote area where service by an authorized Whirlpool servicer is not available 10 The removal and reinstallation of your major appliance if it is installed in an inaccessible location or is not installed in accordance with published installation instructions 11 Major appliances with o...

Страница 16: ...ge drawer panel For assistance or service in the U S A call 1 800 253 1301 If you need further assistance you can write to Whirlpool with any questions or concerns at the address below Whirlpool Brand Home Appliances Customer eXperience Center 553 Benson Road Benton Harbor MI 49022 2692 Please include a daytime phone number in your correspondence Please keep this User Instructions and model number...

Отзывы: