


16
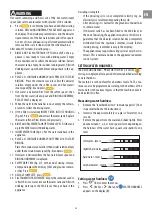
2. SELECT LANGUAGE : press
(B10) or
(B8) until the
flag corresponding to the required language appears on the
display (B), then press the flag;
Follow the instructions indicated on the appliance display:
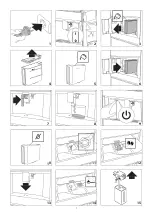
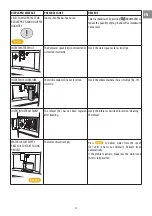
1. FILL TANK WITH FRESH WATER : remove the water tank
(A12) (fig. 3), open the lid (fig. 4), fill to the MAX line
(marked on the inside of the tank) with drinking water (fig.
5), close the lid and put the tank back in the appliance (fig.
6);
2. INSERT WATER SPOUT : Check that the hot water/steam
spout (C4) is inserted on the connection nozzle (A10) (fig.
7) and place a container holding a minimum of 100 ml un-
derneath (fig. 8);
3. WATER CIRCUIT EMPTY PRESS OK TO START FILLING PRO-
CESS appears on the display;
4. Press
to confirm. The appliance delivers water from
the spout (fig. 8) then goes off automatically.
The coffee machine is now ready for normal use.
• The first time you use the appliance, you need to make 4-5
cappuccinos before it starts to give satisfactory results.
• The first time you use the machine, the water circuit is emp-
ty and the appliance could be very noisy. The noise becomes
less as the circuit fills.
• When making the first 5-6 cappuccinos, it is normal to hear
the noise of boiling water. After this, the noise becomes
less.
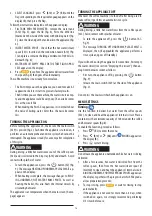
TURNING THE APPLIANCE ON
Before turning the appliance on, make sure the main switch
(A19) is pressed (fig. 2). Each time the appliance is turned on, it
performs an automatic preheat and rinse cycle which cannot be
interrupted. The appliance is ready for use only after completion
of this cycle.
WARNING
During rinsing, a little hot water comes out of the coffee spouts
(A13) and is collected in the drip tray (A14) underneath. Avoid
contact with splashes of water.
• To turn the appliance on, press the
button (A7) (fig.
9). The message HEATING UP UNDERWAY PLEASE WAIT ap-
pears on the display.
• When heating is complete, the message changes to: RINS-
ING UNDERWAY, HOT WATER FROM SPOUTS. As well as
heating the boiler, this also heats the internal circuits by
circulating hot water.
The appliance is at temperature when the main screen (home-
page) appears.
TURNING THE APPLIANCE OFF
Whenever the coffee machine is turned off after being used to
make coffee, it performs an automatic rinse cycle.
WARNING
During rinsing, a little hot water flows from the coffee spouts
(A13). Avoid contact with splashes of water.
• To turn the appliance off, press the
button (A7-
fig. 9).
• The message TURNING OFF UNDERWAY, PLEASE WAIT is
displayed, then (if applicable) the appliance performs a
rinse cycle and goes off (standby).
If you will not be using the appliance for some time, first empty
the water circuit (see section “Emptying the circuit”), then un-
plug from the mains socket as follows:
• first turn the appliance off by pressing the
button
(fig. 9);
• release the main switch (A19) at the side of the appliance
(fig. 2).
Do not press the main switch while the appliance is on.
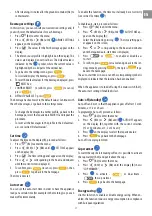
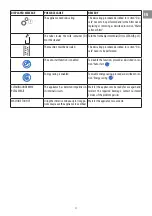
MENU SETTINGS
Rinsing
Use this function to deliver hot water from the coffee spouts
(A13), to clean and heat the appliance’s internal circuit. Place a
container with a minimum capacity of 100ml under the coffee
and hot water spouts (fig. 8).
To enable the function, proceed as follows:
1. Press (B2) to enter the menu;
2. Press (B10) or
(B8) until
RINSING appears on
the display (B);
3. Press to start rinsing.
WARNING
Do not leave the appliance unattended while hot water is being
delivered.
1. After a few seconds, hot water is delivered first from the
coffee spouts, then from the hot water/steam spout (if
inserted) to clean and heat the appliance’s internal circuit.
RINSING UNDERWAY, HOT WATER FROM SPOUTS appears on
the display, together with a progress bar which fills gradu-
ally as preparation proceeds;
2. To stop rinsing, press
or wait for rinsing to stop
automatically.
• If the appliance is not used for more than 3-4 days, when
switched on again, we strongly recommend performing
2/3 rinses before use;
Содержание W11 CM145
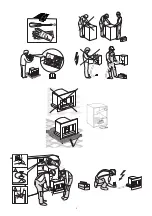
Страница 1: ...Instruction for Use ...
Страница 2: ...2 ...
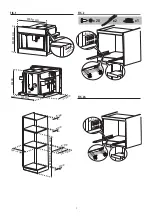
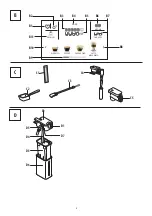
Страница 4: ...4 x 1 x 1 approx 350mm x 2 560 1 mm x 4 x 4 FIG 3 FIG 5 FIG 4 FIG 6 FIG 7 ...
Страница 5: ...5 A4 A1 A14 A13 A18 A3 A2 A5 A6 A8 A10 A7 A9 A16 A21 A15 A12 A A19 A17 A22 A20 A23 ...
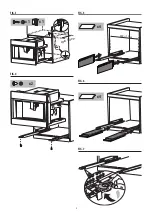
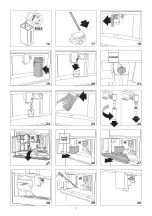
Страница 7: ...7 1 4 5 7 13 15 2 3 6 8 9 10 12 14 11 ...
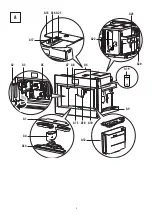
Страница 8: ...8 16 30 17 18 23 24 25 20 22 28 27 26 21 19 29 ...
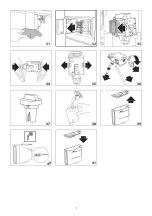
Страница 9: ...9 34 33 36 38 39 40 35 37 41 31 32 ...
Страница 36: ...400011239758 ...