background image

Содержание Trash Masher JTF8500XL

Страница 1: ...c I1 TRASH MASHER Compactor Model JTF8500XL ...

Страница 2: ...To avoid being cut let the compactor do the compacting l DO not compact any container or material which might contain porsonous or explosive products l Do not compact cloths or cans contarnlng paint Irqulds thinners etc which could create a fire hazard Installation Safety OBSERVE ALL GOVERNING ELkCTRlCAL CODES AND ORDINANCES Be sure your compactor is electrically grounded in an approved manner Do ...

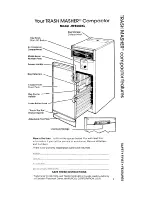
Страница 3: ...late 3 Literature Storage Now is the time to fill in the spaces below You will need this Information If you call for service or assistance Record all letters and numbers There is no warranty registration card to be returned Purchase Dale Seri ce Company Telephone No SAVE THESE INSTRUCTIONS Trademarks WHIRLPOOL and TRASH MASHER in Canada Used by Authority of Canadian Trademark Owner WHIRLPOOL CORPO...

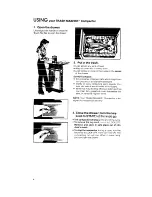
Страница 4: ... thin ners etc which would create a fire hazard l Items that may develop offensive odors such as raw meat fish grapefruit rinds disposable dia pers or personal hygiene items NOTE Your TRASH MASHER Compactor is de signed for household use only 3 Close the drawer turn the key knob to START let the knob go l The compactor will stop at the end of the cycle l To remove the key knob turn it to LOCK OFF ...

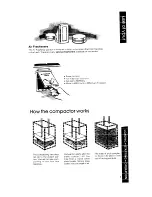
Страница 5: ...hener l Set dial to NORMAL l Move to MAXimum or MlNin How the compactor works lum If needed The compacting ram does not go to the drawer bot tom You will not see com pacting of the first few loadings Compactron starts after the drawer IS about J full YOU may hear a noise when glass breaks Strong glass bottles may not break at all The tor t size trash rn a full comF 3ag will be about 14 of its orig...

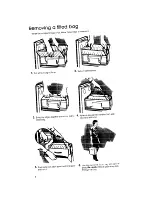
Страница 6: ... cufk up 2 Tuck in slotted sides 3 Bring top edges together and roll 01 fold to 4 Remove bag carrier handles from side retainers and hold close bag 5 Push side lock latch down and tilt drawer 6 Use bag carrier to lift out bag and carry it away Be careful Bits of glass may stick side open through the bag 6 ...

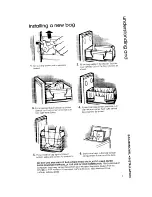
Страница 7: ...ind the bag retainers as shown 4 Spread rear bag corners and slide cuff over eh rear corner Tuck CULLS behind bag retainers as shown 6 Store extra bags in the bag storage compartment in the top at the back DO NOT USE ANY KIND OF BAG OTHER THAN THE PLASTIC LINED PAPER BAGS DESIGNED ESPECIALLY FOR USE IN YOUR COMPACTOR TRASH MASHER Compactor bags may be purchased from your Whirlpool Appliance Dealer...

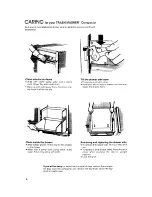
Страница 8: ...rawer l Wash with a damp cloth using warm sudsy water Rinse Dry with a soft cloth Tilt the drawer side open l Press side lock latch down l Hold latch and tilt side of drawer until the latch clears the drawer front Removing and replacing the drawer side l To remove the drawer side tilt it out Then lift It out l To replace It slide it back tilted Press the latch down while pushing the side to uprigh...

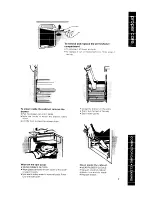
Страница 9: ...n whrch the drawer rollers move l Lrft the front to clear the drawer stops Wipe off the ram cover WEAR RUBBER GLOVES l Wipe glass particles off ram cover with a cloth or paper towels l Use warm sudsy water to remove foods Rinse Dry with soft cloth l Grasp the drawer on the srdes l Pull It out the rest of the way l Set it down gently Clean inside the cabinet l WEAR RUBBER GLOVES l Vacuum rnsrde of ...

Страница 10: ...ll straigh COLOR PANEL DRAWER TRIM DRAWER TRIM l Remove two screws shown l Remove handle COLOR PANEL DRAWER TRIM l Remove the color panel you want l Install desired color panel in Option Match your kitchen s color l Be careful edges may be sharp front behind drawer trim scheme by replacing color panels l Reinstall the remaining color with your own creation wallpaper panel between spacers panelling...

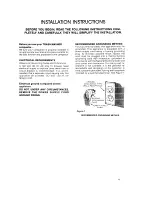
Страница 11: ...ension cord Electrical ground is required on this appliance DO NOT UNDER ANY CIRCUMSTANCES REMOVE THE POWER SUPPLY CORD GROUND PRONG RECOMMENDED GROUNDING METHOD For your personal safety this appliance must be grounded This appliance is equipped with a power supply cord having a 3 prong groundrng plug To minimize possible shock hazard the cord must be plugged into a mating 3 prong grounding type w...

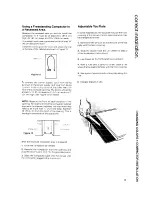
Страница 12: ...usted Pre adjust the leveling feet by turning them part way out A suitable hand tool may be required to pre adjust the leveling feet 6 Stand compactor upright The compactor s overall dlmensrons are Herght 34 87 3 cm Depth 24 61 cm Wtdth 15 38 1 cm In installrng your compactor It is desirable to leave at least 6 Inches 15 cm clearance from the right edge of the drawer front for convenrent bag remov...

Страница 13: ...ere the top plate Interferes with the floor covenng 5 Use a pair of scrssors and cut toe plate along this line To prevent the power supply cord from being ptnched or the power supply cord plug from being crushed install a stop block at the lower rear cor ners of the recessed openrng The blocks should be at least 12 1 27 cm deep by 2 5 1 cm wade by 2 5 1 cm hrgh See Frgure 13 for details 6 Replace ...

Страница 14: ...or stops during operation l Push drawer in while turning key knob to start Repeat if necessary Rearrange trash load do not load rigid items at front of drawer Trash not compacted l Drawer must be at least 13 full to to see compaction Not enough compaction or force l Compacting works best when only a few items are loaded Use the compacting Cycle frequently Bottles don t break l Not all bottles will...

Страница 15: ...glis Direct Factory Service Branch or the nearest service organrzation authorized by lnglis to service Whirlpool products Installation cost will of course be paid by you Or if you need service 1 Contact your Whirlpool appliance dealer from whom you purchased the applr ante or consult your local telephone directory for the nearest service organi zation authorized by lnglis to service Whirlpool prod...

Страница 16: ...king your world a little easier Distributed by lnglis Limited 1901 Minnesota Court Mississauga Ontario L5N 3A7 l Branches Across Canada Trademarks in Canada Use by Authority of Canadian Trademark Owner WHIRLPOOL CORPORATION U S A Printed in U S A ...

Отзывы: