


4
INSTALLING YOUR
REFRIGERATOR
Unpacking Your Refrigerator
Remove shelves from the shipping position (shelves are
shipped upside down):
IMPORTANT:
Do not clean glass shelves with warm water when
they are cold. Shelves may break if exposed to sudden
temperature changes or impact, such as bumping. For your
protection, tempered glass is designed to shatter into many small
pebble-size pieces. This is normal.
NOTE:
Glass shelves are heavy. Use special care when removing
them to avoid impact from dropping.
1.
Grasp the front of the upper shelf with one hand and use the
other hand to remove packing material from the shelf area.
2.
Lower the front of the upper shelf until shelf hooks can be
removed from the shelf supports and pull the shelf forward.
3.
Flip the shelf over and insert the rear shelf hooks into the
shelf supports. Tilt the front of shelf up until rear shelf hooks
drop into the shelf supports.
4.
Lower the front of the shelf and check to make sure that it is
securely in position.
Removing packaging materials
■
Remove tape and any labels from your refrigerator before
using (except the model and serial number label).
To remove any remaining tape or glue, rub the area briskly
with your thumb. Tape or glue residue can also be easily
removed by rubbing a small amount of liquid dish soap over
the adhesive with your fingers. Wipe with warm water and
dry.
■
Do not use sharp instruments, rubbing alcohol, flammable
fluids, or abrasive cleaners to remove tape or glue. These
products can damage the surface of your refrigerator. For
more information, see “Refrigerator Safety” section.
■
On some models, shelves, bins, door shelf rails, and other
feature parts may be packaged in the Interior FeaturePak.
Follow the instructions contained in the package for proper
assembly.
IMPORTANT:
■
Depending on your model, do not remove any permanent
instruction labels inside your refrigerator or the Tech Sheet
that is fastened behind the base grille.
■
Depending on your model, do not remove the white
Styrofoam insert that is located behind the control panel on
the ceiling of the refrigerator. The insert is part of the
refrigerator and not part of the packing material. If the insert
is removed, ice may migrate down from the freezer and cause
icicles to form.
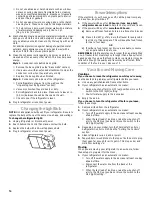
Space Requirements
■
To ensure proper ventilation for your refrigerator, allow for a
.5 in. (1.25 cm) space on each side
■
Allow 3 in. (7.5 cm) of space between overhead cabinets and
refrigerator top.
■
Allow at least 1 in. (2.5 cm) between back of cabinet and the
wall.
■
If your refrigerator has an ice maker, make sure you leave
some extra space at the back for the water line connections.
■
If you are installing your refrigerator next to a fixed wall, leave
2 in. (5.08 cm) minimum on the hinge side (depending on your
model) to allow for the door to swing open.
■
Level the refrigerator (See “Door Closing and Alignment”).
NOTE:
Do not install the refrigerator near an oven, radiator, or
other heat source, nor in a location where the temperature will fall
below 40° F (5° C).
WARNING
Excessive Weight Hazard
Use two or more people to move and install
refrigerator.
Failure to do so can result in back or other injury.
When Moving Your Refrigerator:
Your refrigerator is heavy. When moving the refrigerator
for cleaning or service, be sure to protect the floor.
Always pull the refrigerator straight out when moving it.
Do not wiggle or “walk” the refrigerator when trying to move
it, as floor damage could occur.
WARNING
Explosion Hazard
Keep flammable materials and vapors, such as
gasoline, away from refrigerator.
Failure to do so can result in death, explosion,
or fire.
3" (7.5 cm)
2" (5.08 cm)
Содержание ST14CKXHW00
Страница 1: ...TOP MOUNT REFRIGERATOR Use CareGuide Table of Contents 2 2202190A ...
Страница 19: ...19 Notes ...


