background image

Содержание RF395PXP

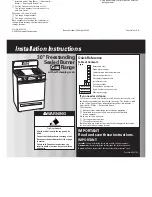
Страница 1: ...RANGE Self Cleaning Model RF395PXP ...

Страница 2: ...ge Rood this lhm L Can Quldo omd The Cooklng Ouldo for lmporkmt safety IdORtWttOIL bb4 an personalty mpendblo for l Reading and tallawtng all sat y precaullons In this Use b Care Guide and the Caaklng Gukte lndolllngthemngewhere Ispmtectedtrom elemenhondona oor shwrg enough ta suppart Itsweight f P b czonnedng the mnge toelectrlcol apply and gwndlng See Installattan I l Maklng sure the mnge Isnat ...

Страница 3: ...cooktop 9 DO NOT heat unopened cosltalners and oven walls racks and door They could explode The hot cw can get hot enough to cause tents could bum and container par bums Hcles could cause Injury 5 DONOTusethemngetoheata 10 when addlng or removing toc 3 rocwn Persons In the room could MAKE SUREto open the oven be burn or Injured or a fire docxallthewaytopreventbums could start l K RYouRsAFElY DO NO...

Страница 4: ...NUfB TIMER t Efr CCNlROl KNOB SloWAL UOHY CoNTRot KNOB INDICATOR CONTROL PANEL FlUO IN SURFACE UNll MODEi AND SERIAL NUMBER PUTB ovEH FIBEROUtS HEAT SEAL REMOVt BLE STORAGE DRAWER UttRATlIRt PAC notrhorm H Tmk 4 5 RIP TOP 4l INsmmmHs AMOMATIC OVEH UOHT OVEN DOQR ...

Страница 5: ...as a guide For best resutts start cooking ot the high settings men turn the control knob down to conHnue cooklng Use HI to start Use MED HI Use MED Use MED LO Use Lo to hods cook to hold a for gravy lng to brlng to keep food keep food rapld boll to warm unHl llqulds to a puddings cooklng after h ychlcken boll and Iclng to starting it ready to or panca ker cook large on a hlgher 58 0 set me amour35...

Страница 6: ... we recommend the installation of a Canning Kit Order the kil tram your Whlrtpcal Dealer or Tech Care Service Company See the Cooklng Guide for Important canning Informalion The Electronic MEALTIMER Clock The Electranlc MEALTIMER Clock hatiles many dltferent types 01tunctions The followlng operattng hints may be helptul when using the clock l The numbers on the display change rapldly Men tumlng th...

Страница 7: ...es mlnutw OHWOpWUflngMn r bOfoundOflpagO Setting the Electronic Clock When you first plug ln the mnge or If your electrlctty goes off for a while each light In the dlspkxy will Rash In sequence Then 4 eights and the MlnlSec llmer and Bake Houn signal lights will flash The IIoshlng means fhut the clock Is madyfabeset oontlnuodonnudpogo 7 ...

Страница 8: ...nor tlw ccmct lime b sot release bath buttans Using the Electronic Minute Timer The Minute llrner does not start or stop the oven tt works llke a kttchen timer It can be set In minutes and seconds up to W minutes You will hear bwps whenmesetttrtwlsup 1 push In and hold the MlnCiec mmf Elunon TheJSlgnal Llght will came on and the Dlspky will show 0 OO 2 While holdlng In the Mln Sec TimefEUtan tumth...

Страница 9: ... Rack s should be placed so the top ot the food WIII be cen tered In the oven Always leave at leastlY2 to 2 Inches 4 5 cm between the sides ot the pan and the oven walls and other pans For more informatron see the Cooking Guide 1 Positron the rack s properly before turning on the oven To change rack position IIA rack at front and pull out 2 Set Oven Selector to BAKE 3 Set Oven Temperature Control ...

Страница 10: ...adually wlthout your nottclng the change Your new oven Is properly adlusted to pmvlde accumte tempemtures But when compared to your old oven the new deslgn may give you dlfterent results If after using the oven for a period 01time ycu are not sattsfled with the temperature setttngs they can be adjusted by followlng these steps 1 Pull the oven k3fnpemture CcMol Knob stmlght off 3 To lower the tempe...

Страница 11: ...ector and the Oven Temperature Control to OFF Custom Broil l If food is cooking too fast turn me Oven Temperature Control counterclock wise until me Oven Slgnal Light goes off l If you want the food to broil slower from the start set the Oven Temperature Control between 150 and 325 F 65 5 and 142 C The lower me temperature the slower the cooking The Oven Selector must be on BROIL for all brolllng ...

Страница 12: ... in the oven 2 Make sure the clock Is set to the rtght ttme 01 day 3 Set Oven Selector on TIMEDBAKE 4 Set me Oven Temperature Control on the baking temperature you want 5 Set the clock for the length of baklng ttme you want Push in and hold the Bake Hours Bufton and turn the Set Knob until the ength of baking time you want shows In the display This exom pie shows 2 hours 15mlnutes Bake Hours can b...

Страница 13: ...ay start and outomuito shut 0th 4 P0Morl It m oven rock s properly and place the food In the oven 2 Malt0 sum the clock b sot to Ihe right time ot day 3 set the Owen Selector on WED BAKE 4 Set the Teinperolure Control on the baking temperature you wont 5 Set the clock for the ttme of day you want the tood to be dono Stop Time Push In and hold the Stop Time Buiton and turn the Set Knob until the ti...

Страница 14: ...theovenon At lhol me the men Slgnal Llghl and Auto Oven Light will comeonandtheovenwlllheat Thisexample shows the oven on CA45 minutes pod 3 o clock n To stop ttw ovwl bofon the preset tlmo Push In and hold the Bake Hours EMton ond turn the Set Kmb caunterclockwlsc Y the display shows 0 OO 7Clmthe Oven Selector and 0ven TeinpemturecontrdlooFF 14 10 When baking b complete the oven will shut off aut...

Страница 15: ...lsh1ree petmfntth9 oven through a vent under the rlght fear surface unit You con cook on the un ork pfoodwarmonttwhlle meovenIsm ICAUTloN Plaslto utmdb Ion OVUltWVUttC lVWtt I I J Bo not block the vent Poor baking con result 13 ...

Страница 16: ...of drawer slide rolls Into the drawer guldes an both sldes of opening w 2 Lift back sllghfly ond slide dmwer all the way out 2 Lift drawer ho t and push in until metal stops on drawer slide rulls clear white stops on drawer guldes Lltt dmwer tront again to clear second stop ond slide drawer closed Use Care Guide storage Store this booklet along with your Cooklng Guide sales slip and warranty In me...

Страница 17: ...OtiOn instructions Caring for your range Control Panel 1 Pull knobs straight ott 2 Use warm soapy water and a sott cloth or spray glass cleaner to wipe the control panel Rinse and wipe dry 3 Wash control knobs in warm soapy water Rinse well and dry 4 Push control knobs straight back on Make sure they point to OFF Surface Units and Reflector Bowls continued on next page ...

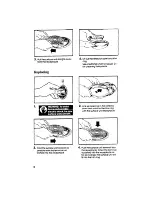
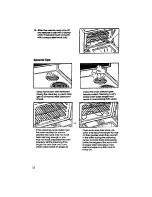
Страница 18: ... 4 LIRout the refiector bowl ond trim ring See Cleaning Chart on page 24 for cleaning instructlcns 2 Line up opening in the reflector bowl ond notch in the trim ring with the surtace unit receptacle 4 Push me suriace unit terminal into me receptacle When the termlnal Is pushed into me receptacle as tar OSIt will go me surface unit will fit Into me trim rlng 18 ...

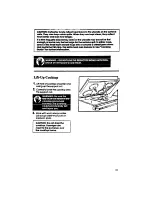
Страница 19: ...Lift Up Cooktop 1 unmltdcxKMopatcenterand swlng upmeslJppofrrod 2 carefully lowerthe cooktop onto 3 wlpewlltlwarmsoapywatef usesoapysteel mpadtnl stubborn spots ...

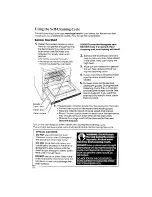
Страница 20: ...guides During the Self Cleaning Cycle they will darken and become horder to slide See tips on page 22 If you wont the oven rocks to remain shiny Clean them by hand The porcelain reflector bowls may be cleaned in the oven Cleon Door Put the oven rocks on the second and fourth guides l Wipe the reflector bowls of loose soiled and grease Cleon Frame l Place 2 bowls upside down on each rack For best r...

Страница 21: ... hours for light soll l Use 3 hours or more for moder ate to heavy soll 2 Move the Lock Lever to the Clean Posltton The Clean Llght will come on only when the lever Isall the way to the rlght 4 The Lock Llght will come on when fhe oven tempemiure exceeds norm01 baking temperatures The mck Lever must not be moved and It mdoor cant be opened when the light Ison HOTS lho Bake Hours and Stop Time Sign...

Страница 22: ...he cleaning cycle doesn t get the oven as clean as you ex pected the cycle may not have beensetlongenoughoryou may not have prepared the oven properly Set the cleaning ttme longer the next ttme and hand clean oreas noted on page 20 Oven racks lose their shine dls color and beoome harder to slide on their guides when they are lett In lhe oven during the cleaning cycle Tomake them slide easier polis...

Страница 23: ...ing or brolling approxlmately 875 F 468 C This heat breaks up grease and soil and bum5 it off The graph shows approximate temperatures and ttmes durlng a selfcleanlng cycle for 3 hours SELF CLEANING CYCLE THREE HOUR SETTING Appfoxlmote Temperatures and nm STAR1 2046 v3 c VI hr 1 hr 1VI hn 2 hn 2 VI hn 3 hn 3K hn STOP Notice that the heating stops when the 3 hour setting is up but that it takes lon...

Страница 24: ...d kncbs Warm wxlpy water and l Wash rinse and dry wetl sort clam l Donotscak conhdpand Warm soapy water or l Wash rinse and dry well spmy glass clmner l Fallow dIrections provlded with cleaner Oven rocks SelfCleanIng Oven cycle l Leave In oven during Self Cleaning warm soapy water or cycle rwpy steel wool pads WOth rinse and dry Use soapy steel wool pods tor stubborn areas NOTE The even rocks WIN ...

Страница 25: ...ower supply The Oven Light The Oven light will come on when you open the oven door To turn the light on when the oven door is closed push the Oven light switch on the console Push rt OgOin f0 turn off the light 2 Remove lhe light bulb from rts socket Replace the bulb wlih o 40 watt applrance bulb Remove the bulb cover In the back of the oven by pulling out and push ing the wire holder to the side ...

Страница 26: ...ven kmpm I re Control set an CLEAN l Did you push the SelfClean Buttcn l Isthe Lock Lever all the way ta the rlghn The Clean Llght will come on If oooklng nsutts aren t what you l kthemngelevel Areywuslngpansrecommended In the Cooking Mot l tfbaklng haveyouallowedlHto2 Inches 4 5 cm on oil sides ot the pans tof alr clrculatton youp the oven as lhe recipe calls td 0 Are the pans the size called for...

Страница 27: ...elephone number see Step 2 and talk with one of our Ccnsuttants or If you preM wrtte to Mr Robert F Gunb Vice Restdent Whlltpcol Corpomtlon Admlnlstrattve Center 2000 US 33 North Benton Harbor MI 49022 If you must call or wrtte please pro vlde model numtxr serial number date of purchase and a Complete descrlptlon of the problem This informatlon Is needed In order to better respond to your request ...

Страница 28: ...Maklng your world a IlltIe easier Part No 313274 I984 Whirlpool Corporation Printed in U S A ...

Отзывы: