background image

Содержание RF364PSB

Страница 1: ...fety Instructions 3 Parts and Features 6 Using Your Range 7 Using the Self Cleaning Cycle 21 Carin for Your ange R 25 If You Need Assistance or Service 30 Warranty 36 1 800 253 1301 Call us with questions or comments SELF CLEANING ELECTRIC RANGE MODEL RF364PSB 1M ...

Страница 2: ...ill help alert you to such dangers as personal injury burns fire and electrical shock This symbol will help you avoid actions which could cause product damage scratches dents etc and damage to your personal property Our Consumer Assistance Center number 1 800 253 1301 is toll free 24 hours a day If you ever have a question concerning your appliance s operation or if you need service first see If Y...

Страница 3: ...an could k part of the range They e burned or injured Do not operate the range if it is damaged or not working properly Do not use the range for warming or heatin the room Persons could be urned or injured or a fire could start Use the range only for itsin te e zluse as described In this a tttllrtt Donot touch surface units areas near units heating ele ments or interior surfaces of oven Surface un...

Страница 4: ...e surface unit If pan is smaller than the surface unit some of the heatin element will be exposed an could result l n r t e also improves cooking efficiency Check to be sure lass cook ing utensils are sa e for use 3 on the range Only certain types of glass glass ceramic ceramic earthenware or other lazed utensils are suitab B e for cooktops without breaking due to the sudden change In temperature ...

Страница 5: ...osure to these subs9 nificant antes could cause cancer or repro ductive harm Exposure can be minimized by venting with a hood or open window and wip ing out excess food spills prior to self cleaning ADOnot use oven cleaners No commercial oven cleaner or oven liner any kind sR rotective coating of ould be used in or around any part of the oven Before self cleaning the oven remove broiler pan broile...

Страница 6: ...ures Control panel d Oven vent CleanTopTY ceramic COOktOP Model and Automatic ove J t Broil element Bake element kit see page 20 Removable storage drawer Control panel Left front kiEt zr control knob knob Electronic oven control Right rear Manual Riff oven pl light control switch knob Surfa unit marker Hot surface Surface unit indicator light indicator light 6 ...

Страница 7: ...Using the surface units Push in control knobs before turning them to a setting You can set them anywhere between HI and OFF Surface unit markers The solid dot in the surface unit marker shows which surface unit is turned on by that knob Surface unit indicator lights One of the Surface Unit Indicator lights on the control panel will glow when a surface unit is turned on Hot surface indicator light ...

Страница 8: ...s Cookware with rounded warped ribbed such as some porcelain enamelware or dented bottoms could cause uneven heating and poor cooking results You can however use the newer cookware available with slightly indented bottoms or very small expansion channels This cookware is specially designed to provide the good contact needed for best cooking results Also woks canners and teakettles with flat bottom...

Страница 9: ...ozen pies large roasts turkeys angel food cakes Lowest level or 2nd level from bottom Bunti cakes most quick breads yeast breads casseroles meats 2nd level from bottom l Always position oven rack s in desired location before turning oven on Be sure the rack s is level l If rack s must be moved while oven is hot use potholders or oven mitts to protect hands Failure to follow the above precautions c...

Страница 10: ...k Three or four pans Place in opposite corners on each oven rack Stagger pans so no pan is directly over another Using aluminum foil for baking Use aluminum foil to catch spillovers from pies or casseroles l Place the foil on the oven rack below the rack with the food Turn up foil edges and make sure foil is about 1 inch 3 cm larger all around than the dish holding the food l Do not cover the enti...

Страница 11: ...For settings from 1 59 minutes the display will count down each second For settings 1 hour or over the display will count down each minute Command pads The command pads tell the oven what to do and in what order A few examples Clock tells the oven you are going to set the clock Off Cancel tells the oven to turn off Each command pad except Off Cancel and Start Enter has its own Indicator Light The ...

Страница 12: ...er does not start or stop the oven It works like a kitchen timer It can be set in hours and minutes up to 12 hours 59 minutes The Minute Timer will display minutes and seconds for settings under one hour You will hear four l second tones when the set time is up 1 Push the Timer Set pad TIMER will come on and the display will show OO 2 Use the Hour and Minute pads to set the desired time Push the u...

Страница 13: ... push one of the two Timer pads NOTE To display the time of day while the Minute Timer is counting down push the Clock pad To cancel the Minute Timer l Push the Timer Off pad The time of day will show on the display Using the Off Cancel pad The Off Cancel pad will cancel any function except for the Clock and Timer Set func tions When you push the Off Cancel pad the display will show the time of da...

Страница 14: ...d PC HEAT BAKE and ON will light up A preheat time will count down on the display The oven control automatically sets preheat times depending on the oven tempera ture you select l For 320 F and less the preheating time is 6 minutes l For 325 F 375 F the preheating time is 8 minutes l For above 38O F the preheating time is 10 minutes 5 The oven is preheated when you hear a one second tone and PrE o...

Страница 15: ...aking roasting results you can change the temperature calibration by following these steps 1 Push the Bake pad and hold for 5 seconds The display will show the current temperature offset for example 0 if you have not previously adjusted the temperature 2 To adjust the temperature use the Temp pad s Push A to raise the temperature or V to lower the temperature in 10 F incre ments You can set the te...

Страница 16: ...e Start Enter pad However you must push the Start Enter pad again 6 When broiling is done push the Off Cancel pad The time of day will show on the display and all other displays will go off To custom broil at a lower temperature l If food is cooking too fast push the Broil pad and push the V Temp pad until 325 F shows on the small display l If you want food to broil slower using the Custom Broil f...

Страница 17: ... Use the broiler pan and grid for broiling They are designed to drain excess liquid and grease away from the cooking surface to help prevent spatter smoke or fire l After broiling remove the broiler pan from the oven when you remove the food Drippings will bake on the pan if you leave it in the heated oven Fire Hazard l Place meat the correct distance from the element Meat placed too close to the ...

Страница 18: ... control on low or off to finish cooking Use retained heat for cooking when possible l Use the more efficient surface units instead of the oven when possible l Turn on the surface unit only after placing filled pan on the unit l Oven Peeking may cause heat loss longer cooking times and unsatisfactory baking results Rely on your timer to keep track of the cooking time l Bake cakes pies or cookies w...

Страница 19: ... have one Use care when handling the drawer Removing the storage drawer 1 Empty drawer of any pots and pans before removing drawer Pull drawer straight out to the first stop Lift front and pull out to the second stop 2 Lift back slightly and slide drawer all the way out Replacing the storage drawer 1 Fit ends of drawer slide rails into the drawer guides on both sides of opening 2 Lift drawer front...

Страница 20: ...ed to floor with screws l Make sure one rear leveling leg is positioned under the anti tip bracket Rear leveling leg l See Installation Instructions for further details To verify the anti tip bracket is engaged if you have a wall bracket l Look to see if the anti tip bracket is attached with screws to the wall behind the control panel Cable attached to rear of control l Make sure the cable on the ...

Страница 21: ...ase and burns it away Your oven is preset for a 3 hour Self Cleaning cycle However you can adjust the cycle time to the amount of soil in your oven You can set the cycle time anywhere between 2 12 and 4 hours See Setting the controls on page 22 START 87I F 408 OVEN SHUT OFF DOOR UNLOCKS 1 Tin m It Hours 3 SlaP The graph at the right is representative of a normal 3 hour Self Cleaning cycle Note tha...

Страница 22: ...ing the cycle Burn Hazard l Do not touch the oven during the Self Cleaning cycle It could burn you l Do not use commercial oven cleaners in your oven Cleaners could produce hazardous fumes or damage the porcelain finish l Do not leave any foil in the oven during the Self Cleaning cycle Foil could burn or melt and damage the oven surface NOTES l Do not force the Lock Lever You could bend or break i...

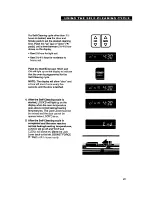
Страница 23: ...lf Cleaning cycle NOTE The display will show door and a tone will sound once every five seconds until the door is latched 4 After the Self Cleaning cycle is started LOCK D will light up on the display when the oven temperature goes above normal baking roasting temperatures The Lock Lever must not be moved and the door cannot be opened when LOCK D is on 5 After the Self Cleaning cycle is completed ...

Страница 24: ...ool wipe up any residue or ash with a damp cloth or sponge If any spots remain clean with a mild abrasive cleanser or cleaning sponge l Clean the oven before it gets heavily soiled Cleaning a very soiled oven takes longer and results in more smoke than usual l If the Self Cleaning cycle does not get the oven as clean as you expected the cycle may not have been set long enough or you may not have p...

Страница 25: ...ktop is designed for easy care However ceramic cook tops need to be maintained differently than standard electric open coil elements Foods spilled directly on the cooktop will not burn off as on open coil elements Because of this the surface should be dust free and soil free before heating Your cooktop has been prepolished at the factory for improved protection and cleanability The Cooktop Polishi...

Страница 26: ...r glass cleaning products with ammo nia These could damage the cooktop surface l Dropping heavy or hard objects on the cooktop could crack it Be careful with heavy skillets Do not store jars or cans above the cooktop Cleaning tips What to use l Cooktop Polishing Creme included with your range with paper towel or clean damp sponge This creme has been developed especially for cleaning and protecting...

Страница 27: ...rasions do not affect cooking In time these will become less visible as a result of cleaning To prevent scratches and abrasions use Cooktop Polishing Creme regularly l Nonabrasive cleanser with damp paper towel or sponge can be used as an alternative method for removing cooked on soils Always rinse and dry your cooktop thoroughly after using cleanser to prevent streaking or staining To obtain orde...

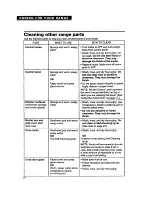
Страница 28: ...he control lock on page 11 Exterior surfaces Sponge and warm soapy l Wash rinse and dry thoroughly Use other than cooktop water nonabrasive plastic scrubbing pad on and control panel heavily soiled areas l Do not use abraslve or harsh cleansers They may damage the finish Broiler pan and grid clean after each use Oven racks Steel wool pad and warm l Wash rinse and dry thoroughly Do soapy water not ...

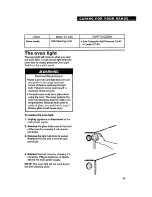
Страница 29: ...k or burns The bulb cover must be in place when using the oven The cover protects the bulb from breaking and from high oven temperatures Because bulb cover is made of glass be careful not to drop it 1 Broken glass could cause injury To replace the oven light 1 Unplug appliance or disconnect at the main power supply 2 Remove the glass bulb cover in the back of the oven by screwing it out counter cl...

Страница 30: ... will operate The oven will not operate The surface units will not operate Control knob s will not turn The Self Cleaning cycle will not operate POSSIBLE CAUSE The power cord is not plugged into a live circuit with proper voltage A household fuse has blown or a circuit breaker has tripped The electronic control has not been set correctly A household fuse has blown or a circuit breaker has tripped ...

Страница 31: ...used There has been a power failure The electronic control or temperature sensor has failed SOLUTION Level range See Installation Instruc tions Adjust the oven temperature control See Adjusting the oven temperature control on page 15 Preheat oven when called for in recipe Use only tested recipes from a reliable source Refer to a reliable cookbook for recommended pan type and size Allow 1l z to 2 i...

Страница 32: ...need FSP replace ment parts FSP is a registered trademark of Whirlpool Corporation for quality parts Look for this symbol of quality whenever you need a replacement part for your Whirlpool appli ance FSP replacement parts will fit tight and work right because they are made to the same exacting specifications used to buikf every new Whirlpool appliance To locate FSP replacement parts in your area r...

Страница 33: ...ickup and delivery Your range is designed to be repaired in the home D Damage to your range caused by accident misuse fire flood acts of God or use of products not approved by Whirlpool E Any labor costs during limited warranty F Repairs to CleanTop ceramic cooktop if it has not been cared for as recommended in this Use and Care Guide G Repairs to parts or systems caused by unauthorized modificati...

Отзывы: