background image

2

TABLE OF CONTENTS

RANGE SAFETY .............................................................................3

The Anti-Tip Bracket ....................................................................3

PARTS AND FEATURES................................................................5

COOKTOP USE ..............................................................................6

Cooktop Controls.........................................................................6
Coil Elements and Burner Bowls (on some models) ...................6
Lift-up Cooktop (on some models) ..............................................7
Home Canning .............................................................................7
Cookware .....................................................................................7

OVEN USE.......................................................................................8

Oven Temperature Control ..........................................................8
Aluminum Foil...............................................................................8
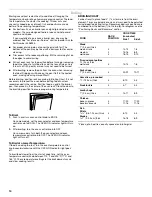
Positioning Racks and Bakeware ................................................8
Bakeware......................................................................................9
Meat Thermometer.......................................................................9
Oven Vent.....................................................................................9
Baking and Roasting....................................................................9
Broiling........................................................................................10

RANGE CARE ...............................................................................11

General Cleaning........................................................................11
Oven Door ..................................................................................12
Storage Drawer ..........................................................................13

TROUBLESHOOTING ..................................................................14

ASSISTANCE OR SERVICE.........................................................15

WARRANTY ..................................................................................16

Содержание RF3020XKQ4

Страница 1: ... operation performance parts accessories or service call 1 800 253 1301 or visit our website at www whirlpool com Table of Contents 2 9762370A To the installer Please leave this instruction book with the unit To the consumer Please read and keep this book for future reference ...

Страница 2: ... models 6 Lift up Cooktop on some models 7 Home Canning 7 Cookware 7 OVEN USE 8 Oven Temperature Control 8 Aluminum Foil 8 Positioning Racks and Bakeware 8 Bakeware 9 Meat Thermometer 9 Oven Vent 9 Baking and Roasting 9 Broiling 10 RANGE CARE 11 General Cleaning 11 Oven Door 12 Storage Drawer 13 TROUBLESHOOTING 14 ASSISTANCE OR SERVICE 15 WARRANTY 16 ...

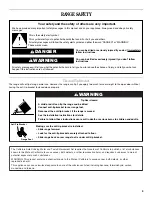
Страница 3: ...instructions instructions DANGER WARNING Tip Over Hazard A child or adult can tip the range and be killed Connect anti tip bracket to rear range foot Reconnect the anti tip bracket if the range is moved See the installation instructions for details Failure to follow these instructions can result in death or serious burns to children and adults Anti Tip Bracket Making sure the anti tip bracket is i...

Страница 4: ...hese pans or bowls during cooking may subject wiring or components underneath to damage Protective Liners Do not use aluminum foil to line surface unit drip bowls or oven bottoms except as suggested in the manual Improper installation of these liners may result in a risk of electric shock or fire Glazed Cooking Utensils Only certain types of glass glass ceramic ceramic earthenware or other glazed ...

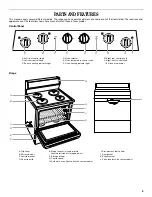
Страница 5: ... light G Right rear control knob H Right front control knob I Surface area locator A Oven vent B Surface burner C Anti tip bracket D Door stop clip E Model and serial number plate behind left side of storage drawer F Storage drawer G Control panel H Automatic oven light switch on some models I Broil element not shown J Door gasket K Bake element L Self clean latch on some models LO 2 3 4 5 6 7 8 H...

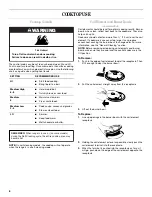
Страница 6: ...rol knobs are in the Off position To Remove 1 Push in the edge of coil element toward the receptacle Then lift it enough to clear the burner bowl 2 Pull the coil element straight away from the receptacle 3 Lift out the burner bowl To Replace 1 Line up openings in the burner bowl with the coil element receptacle 2 Holding the coil element as level as possible slowly push the coil element terminal i...

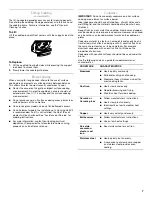
Страница 7: ...ware IMPORTANT Do not leave empty cookware on a hot surface cooking area element or surface burner Ideal cookware should have a flat bottom straight sides and a well fitting lid and the material should be of medium to heavy thickness Rough finishes may scratch the cooktop Aluminum and copper may be used as a core or base in cookware However when used as a base they can leave permanent marks on the...

Страница 8: ...r cookware because permanent damage will occur to the oven bottom finish Do not cover entire rack with foil because air must be able to move freely for best cooking results To catch spills place foil on rack below dish Make sure foil is at least 1 3 cm larger than the dish and that it is turned up at the edges PositioningRacksandBakeware IMPORTANT Do not place food or bakeware directly on the oven...

Страница 9: ...ess recommended in the recipe To Bake or Roast 1 Push in and turn the oven control knob to the desired temperature setting The OVEN ON and OVEN HEATING lights will turn on and the set temperature will appear in the display for 5 seconds On some models set the oven selector to BAKE and turn the oven temperature control knob to the desired temperature setting The OVEN ON indicator light will turn on...

Страница 10: ...n to ensure proper broiling temperature To Broil 1 Push in and turn oven control knob to BROIL On some models set the oven selector and oven temperature control knob to BROIL The OVEN ON indicator light will turn on 2 After broiling turn the oven control knob to OFF On some models turn both the oven selector and oven temperature control knob to OFF The OVEN ON indicator light will turn off To Broi...

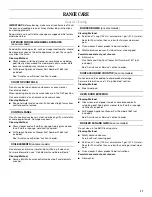
Страница 11: ...rt Number 31662 not included See Assistance or Service section to order COIL ELEMENTS on some models Do not clean or immerse in water Soil will burn off when hot For more information see Coil Elements and Burner Bowls Cleaning Method Damp cloth Make sure control knobs are off and elements are cool BURNER BOWLS on some models Cleaning Method Solution of cup 125 mL ammonia to 1 gal 3 75 L water Soak...

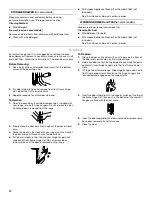
Страница 12: ...other door stop clip To Remove 1 Open the oven door Insert door removal pins included with your range into both hinge hangers Do not remove the pins while the door is removed from the range 2 Slowly close the door until it rests against the door removal pins 3 Grasp the door on the sides with your fingers on the front of the door and your thumbs on the inside surface 4 Pull door straight up then t...

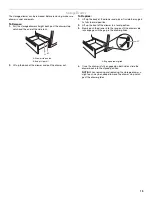
Страница 13: ... place it inside the range in its fully forward position 2 Lift up the front of the drawer to a level position 3 Slowly push the drawer into the range until the drawer side rails engage with the gap in the drawer glides 4 Once the drawer is fully engaged on both sides slide the drawer back into the closed position NOTE When removing and replacing the storage drawer a slight push may be needed to m...

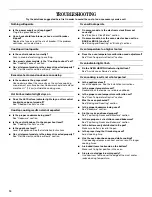
Страница 14: ... See Coil Elements and Burner Bowls section Oven will not operate On some models is the electronic clock timer set correctly See Electronic Clock Timer section On some models has the oven selector been set to a BAKE or BROIL function See Baking and Roasting or Broiling sections Oven temperature too high or too low Does the oven temperature calibration need adjustment See Oven Temperature Control s...

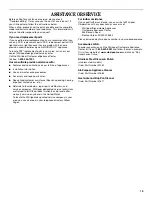
Страница 15: ...ssory and repair parts sales Specialized customer assistance Spanish speaking hearing impaired limited vision etc Referrals to local dealers repair parts distributors and service companies Whirlpool designated service technicians are trained to fulfill the product warranty and provide after warranty service anywhere in the United States To locate the Whirlpool designated service company in your ar...

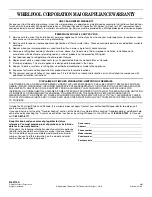
Страница 16: ...D WARRANTY SHALL BE PRODUCT REPAIR AS PROVIDED HEREIN IMPLIED WARRANTIES INCLUDING WARRANTIES OF MERCHANTABILITY OR FITNESS FOR A PARTICULAR PURPOSE ARE LIMITED TO ONE YEAR OR THE SHORTEST PERIOD ALLOWED BY LAW WHIRLPOOL SHALL NOT BE LIABLE FOR INCIDENTAL OR CONSEQUENTIAL DAMAGES SOME STATES AND PROVINCES DO NOT ALLOW THE EXCLUSION OR LIMITATION OF INCIDENTAL OR CONSEQUENTIAL DAMAGES OR LIMITATION...

Отзывы: