


9
Assisted Cooking
Scroll through the Assisted Cooking menu until the desired food
selection is reached. The microwave oven will automatically adjust
the settings, so there is no need to make manual changes.
How to access Assisted Cooking:
1.
Touch HOME.
2.
Touch ASSISTED COOKING.
3.
Select the desired food.
Follow the prompts on the screen to customize the settings for
Assisted Cooking.
Tools
The Tools keypad allows you access to functions and
customization options for your oven. These tools allow you to set
the clock, change the oven temperature between Fahrenheit and
Celsius, turn the audible signals and prompts on and off, adjust
the oven calibration, change the language, and more.
Select the Tools keypad to view the Tools features.
See the “More Modes” section for more information.
Tool
Notes
Remote Enable
Select REMOTE ENABLE to enable the
ability to utilize the Whirlpool
®
app.
NOTE:
Remote Enable turns off when the
door is opened. It needs to be re-enabled
each time it is going to be used.
Kitchen Timer
Set a kitchen timer by manually entering the
desired time into the keypad.
1.
Select KITCHEN TIMER.
2.
Touch number keypads to set the length
of time.
3.
Touch START.
OR
1.
Touch + 30 sec, + 1 min, or + 5 min
keypads.
2.
Select the Cancel keypad on the Timer
screen to end the kitchen timer.
Hood Fan
Press HOOD FAN once for Maximum
speed setting. You may press this keypad
repeatedly and choose a different speed.
There are five available speeds: Maximum,
High, Medium, Medium-Low, and Low.
Choose the speed you want.
To keep the microwave oven from
overheating, the auto hood fan will
automatically turn on at high speed if the
temperature from the range or cooktop
below the microwave oven gets too hot.
When this occurs, the hood fan cannot be
turned off.
NOTE:
Choose this step only if you want the
ventilation fan to be on. The ventilation fan
will automatically turn off after 4 hours.
Tool
Notes
Light
Press the Hood Light keypad once for High
setting or twice for Low setting of cooktop
light.
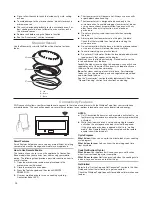
Turn Table
By touching TURNTABLE ON/OFF, it is
possible to switch the turntable on and
off during some microwave cycles. The
turntable can be turned on or off only during
Manual cooking cycles.
Grease Filter
Press GREASE FILTER once and the display
shows the remaining time of replacing the
grease filter and the last replaced date.
When “0% remaining” appears on the
display, press INSTALL NEW. After you have
replaced your old grease filter with a new
one, the replaced date will be updated and it
will remind you when your filter needs to be
changed.
NOTE:
Clean monthly or as prompted by
Filter Status indicator.
Charcoal Filter
Press CHARCOAL FILTER once and
the display shows the remaining time of
replacing the charcoal filter and the last
replaced date. When “0% remaining”
appears on the display, press INSTALL NEW.
After you have replaced your old charcoal
filter with a new one, the replaced date will
be updated and it will remind you when your
filter needs to be changed.
NOTE:
The charcoal filter cannot be
cleaned and should be replaced about every
6 months or as prompted by Filter Status
indicator.
Self-Clean
Press SELF-CLEAN once and follow the
instructions,
To Clean:
1.
Remove metal accessories from the
cavity. Use a damp sponge or paper
towel to remove easily-removed soils.
2.
Place a microwave-safe container with
1 cup (250mL) of water on the turntable
and close the door.
IMPORTANT:
Do not use chemicals or
other additives with the water. Do not
open the door during the Clean cycle.
3.
Start the cycle. It will take about
15 minutes.
4.
Press NEXT to start Self-Clean.
Mute
Select MUTE to mute or unmute the
microwave oven sounds.
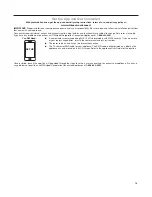
Control Lock
The Control Lock shuts down the control
panel keypads to avoid unintended use of
the microwave oven. The Control Lock will
remain set after a power failure, if set before
the power failure occurs.
When the control is locked, only the fan,
light, and kitchen timer will function.
The Control Lock is preset unlocked, but can
be locked.
To Lock Control:
Touch CONTROL LOCK
once to lock the product.
To Unlock Control:
Swipe up to unlock.


