background image

Содержание MW3600XW

Страница 1: ...Models MW3600XW MW3601XW Freezers Refrllerator Freezers Ice Makers DIshwashers Built In Ovens and Surlace Unlls Ranges MIcrowave Ovens Trash Compactors Room AM CondItIonerr Oehumu ...

Страница 2: ... Your Microwave Oven 26 Cleaning the Microwave Oven 26 How Your Microwave Oven Works 27 Operating Safety Precautions 28 If You Need Service or Assistance 30 Microwave Oven Warranty 32 arts and features DOOR LATCHES 0 1989 Whirlpool Corporation MODELAND SERIAL E DEFRQ GUIDE ST e VENTS TEMPERATURE I PROBESOCKET CONTROL L PANEL Q POWyN COOKING RACK REMOVABLE AUTOSET PUSHBUTTON GLASSTRAY CHART DOOR RE...

Страница 3: ...ough to support its weight l Has been properly connected to electrical supply and grounded See Installation Instructions l Is operated with the removable glass tray in place Is not used by children or anyone unable to operate it properly l Is properly maintained l Is used only for jobs expected of a home microwave oven PRECAUTIONS TO AVOID POSSIBLE EXPOSURE TO EXCESSIVE MICROWAW ENERGY DO NOT atte...

Страница 4: ...whole eggs and appliance if paper plastic or other com sealed containers for example closed bustible materials are placed inside the glass jars may explode and should not oven to facilitate cooking Paper can char be heated in this oven or burn and some plastics can melt if used when heating foods 6 Use this appliance only for its intended b Test dinnerware or cookware before use as described in th...

Страница 5: ...indicator Command pads When you are not using the micro wave oven this is an accurate digital clock When you are using the micro wave oven it dis plays time settings and indicator lights Touch Command Pads to tell the microwave oven what to do and In what order A few examples CLOCK SETtells the oven you are golng to set the clock STARTtells the oven to start See page 6 for information on the tone ...

Страница 6: ... to remove them again Setting the clock When the oven is first plugged in one beep will sound and the Display shows 88 88 If the electric power ever goes off the Display will again show all 8 s when the power comes back on You can cook without setting the clock but the Display will be blank after cooking DO THIS THIS HAPPENS m 1 Touch CLOCK SET The Display will show a 0 and the colon will stat t t...

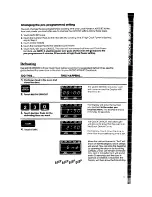
Страница 7: ... door m 2 Touch COOK 1 The COOK 1 lndlcator Light 111 come on and the Display 111show four O s 3 Touch Number Pads for the cooking time you want The Display WIII show the numbers you touched in the order you touched them The example shows 1minute 30 seconds d Count own The oven will automatically cook at high Cook Power The COOK 1 lndlcator Light will stay on to show that the oven IS cook ing In t...

Страница 8: ...y used automatic 100 of full power HIGH 9 90 of full power 8 80 of full power 7 70 of full power MED HIGH 6 60 of full power 5 50 of full power MED 4 40 of full power 3 30 of full power MED LOW 2 20 of full power 1 lO offull power LOW 0 TIMER fan and light will be off DO THIS THIS HAPPENS 1 Put food in the oven and close the door 2 Touch COOK 1 The COOK 1 Indicator Light will come on and the Displ...

Страница 9: ... l Touch START The cycle will cook at the new Cook Power for the original time OR l Touch COOK POWER twice if you want to change a lower Cook Power to HIGH l Touch START Using AUTO SET Auto Set provides ten preset times One to nine minutes at HIGH cook power can be set by touching AUTO SETand the corresponding number pad l 9 This provides a short cut method for setting commonly used cooking times ...

Страница 10: ... touched Number Pad 5 for 50 of full power 6 Touch START d count own NOTE You can set COOK 1or COOK 1and 2 to follow Auto Set See page 13 14 and 15 for Instructions 2r The AUTO SETIndicator Light will stay on while the oven is cooking in the preprogrammed cycle If you selected a Cook Power other than high the Cook Power Indicator Light will also come on The Display counts down the time to show how...

Страница 11: ...ide behind the oven door or the chart in your MICRO MENUS Cookbook DO THIS THIS HAPPENS 1 Put frozen food in the oven and close the door l m 2 Touch QUICK DEFROST The QUICK DEFROST Indicator Light will come on and the Drsplay w li show four O s 3 Touch Number Pads for the defrostlng tlme you want The Display will show the number you touched in the order you touched them This example shows 2 minute...

Страница 12: ...d Cook Power 6 Touch START 6 Touch START When QUICK DEFROST is over the oven will shut off When QUICK DEFROST is over the oven will shut off Two beeps will sound The Display will count down The Display will count down a standing time equal the standing time set in COOK 2 at zero Cook to the time touched in for QUICK DEFROST Two Power beeps will sound COOK 1will start End will show on the Display a...

Страница 13: ... COOK POWER If you want the high Cook Power skip to stec8 6 1 The COOK POWER Indicator Light will come on and the Display will show P HI This shows the oven is pre programmed to cook at full IHIGH power m 0 5 Touch a Number Pad for the Cook Power you want in the first cycle The Display will show what you touched This example shows you touched Number Pad 6 for 60 of full power The Display will show...

Страница 14: ...eeps at the end of Cook 4 You can either open the door to check stir or turn the food etc or you can let the oven start the next cycle If you do open the door touch STARTafter closing the door to restart the oven The COOK 2 Indicator Light will be on during the second cycle The COOK POWER Indicator Light will also be on if you are using a Cook Power other than high The Display counts down the time...

Страница 15: ...the oven to stop between cycles so that you can check food add ingre dients or additional food items stir turn etc you can program PAUSEbetween each Cook cycle See page 18 Changing or adding instructions You can change times Cook Powers or add cycles any time before touching STARTor during oven operation l Touch the Cook cycle you wish to change or add COOK 1or 2 l Touch numbers for new time if de...

Страница 16: ...6 for 60 of full power 8 Touch START The PROBETEMP and COOK POWER Indicator Lights will stay on The Dis play will show CCCL to show the food is less than 90 F As the food cooks the Display will show the in ternal temperature of the food for every 5 F increase For 2 of every 10 seconds the Dis play will show the Cook Power you selected if you are using a Cook Power other than high When the probe se...

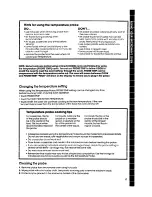
Страница 17: ...oven Operation Touch PROBE TEMF l Touch Number Pads for new temperature o Touch START The oven will continue cooking to the new temperature If the new temperature is lower than the temperature of the food the oven will shut off TemperaWe probe cooking tips For casseroles the tip For liquids balance the For roasts the top of the of the probe should probe on a wooden probe should be in the be in the...

Страница 18: ... START The Display will show the time you selected for Cook 1 When Cook 1 is over 2 beeps will sound and the oven will shut off The Display will show PAUSI The COOK 2 Indicator Light will come on The Display will show the time set for Cook 2 Open the door Stir turn or add ingredients Close the door Touch STARTto continue with Cook 2 The oven will remain off until you touch START Using PAUSEwith QU...

Страница 19: ...EEPWARM operates for up to 99 minutes 99 seconds Opening the oven door cancels KEEPWARM Close the door and touch KEEPWARM then STARTif additional KEEPWARM time is desired Foods cooked covered should be covered during KEEPWARM Pastry items pies turnovers etc should be uncovered during KEEPWARM Complete meals kept warm on a dinner plate should be covered during KEEPWARM The use of more than one comp...

Страница 20: ...Number Pad 5 Touch START NOTE If you hear the fan start when you touch START you have not set the time prop erly Touch CANCEL and start over The Cook 1and Cook Power Indicator Lights will stay on to show you that the timer is running The Display counts down to show you how much time is left During the countdown the oven will be dark and the fan will be off When the set time ends End will show on t...

Страница 21: ...ay will show four 0 s 3 Touch Number Pads for the length of delay you want The Display will show the numbers you touched In the order you touched them This example shows 60 minutes t hour 8 al 4 Touch COOK POWER The COOK POWER Indicator Light will come on and the Display will show P HI m 0 The Display will show P 0 This tells you that the oven will be operating at 0 power 5 Touch 0 Number Pad The ...

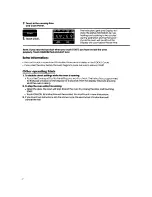
Страница 22: ...cle a If you open the door before the oven begins to cook be sure to retouch START Other operating hints 1 To double check sefflngs while the oven Is running o Touch the Command Pad for the setting you want to check The instruction programmed for that pad will show on the display for 5 seconds Then the display returns to showing what the oven is doing 2 To stop the oven while It is runnlng Open th...

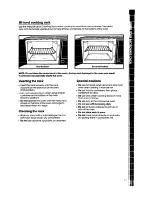
Страница 23: ...m of the oven Second position e Do not operate the oven with the metal rack stored on the floor of the oven Damage to the interior finish will result Do use hot pads when removing rack from oven after cooking It may be hot Do put food in containers then place containers on rack Do use only when cooking foods in more than one container Do use only in the microwave oven Do not use wlth browning dish...

Страница 24: ...air Intake openlngs can cause damage to the oven and poor cooklng results Make sure the mlcrowave oven legs are in place to ensure proper alr flow 2 Put the oven on a cart counter table or shelf that is strong enough to hold the oven and the food and utensils you put in It The control slde of the unit is the heavy side Use care when handling The weight of the oven is approximately 43 5 Ibs 19 57 k...

Страница 25: ...polarized 3 prong wall receptacle in stalled by a qualified electrician Consult a qualified electrician if the grounding instructions are not completely understood or if doubt exists as to whether the appliance is properly grounded It Is NOT recommended to use an extension cord with your mlcrowave oven but If you flnd It necessary to do so temporarily untll a properly grounded and polarized 3 pron...

Страница 26: ...crowave oven i i for your microwave oven Cleaning the microwave oven Wipe often with warm sudsy water and a soft cloth or sponge The glass tray may be removed for cleaning Wash by hand in mild detergent or in the automatic dishwasher ALWAYS OPERATE OVEN WITH GLASS TRAY IN PLACE For stubborn soil boil a cup of water in the oven for 2 or 3 minutes Steam will soften the soil Be sure to keep the areas...

Страница 27: ... the oven where they are scattered or stirred by a mode mixer like a fan Microwaves bounce off metal oven walls and are absorbed by food The glass tray of your microwave oven lets micro waves through Then they bounce off a metal floor back through the ceramic bottom and are absorbed by the food Microwaves may not reach the center of a roast The heat around the outside is what cooks the roast all t...

Страница 28: ...et burned 0 NOT let the oven DO NOT heat store or use flammable inflammable or corrosive materials in or near the oven continue to operate after removing food Cancel time Additional Precautions NEVER lean on the door or allow a child to swing on it when the door is open Injury could result DO NOT can foods in the oven Closed glass jars may explode resulting in damage to the oven or possible person...

Страница 29: ... microwave ovens Results are the manufacturers responsibility NEVERtry to pop corn in a paper bag Overcooking may result in smoke and fire NEVER remove the stirrer cover The plastic cover protects the microwave stirrer blade from soil or bending DO NOT OVERCOOK POTATOES Fire could result At the end of the rec ommended cooking time they should be slightly firm Wrap in foil and set aside for 5 minut...

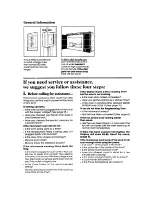
Страница 30: ...your home or wall out lets low or lower than normal Your electric company can tell you if the line voltage is low Your electrician or service technician can tell you if the outlet voltage is low Is the Cook Power at the recommended setting Are you allowing for more time when cooking more food at one time If the display shows a time counting down but the oven Is not cooklng l Is the oven door close...

Страница 31: ...your correspondence 4a Whirlpool has a mikl 01 Sk4 d I SERVICE rized Whirlpool service compa nies Whirlpool l If you must call or write please provide model number serial number date of pur chase and a complete description of the problem This information is needed in order to better respond to your request for assistance service technicians are trained to fulfill the product warranty and provide a...

Страница 32: ...ousehold use c Pick up and delivery This product is designed to be repaired in the home D Damage to microwave oven caused bY accident misuse fire flood acts of God or use of products not approved by Whirlpool E Any labor costs during the limited Warranty MW002 WHIRL CORPORATION SHALLNOT BELIABLEFORINCIDENTAL OR CONSEQUENTIAL DAMAGES Some states do not allow the exclusion or llmltatlon of lncldenta...

Отзывы: