background image

Содержание MW3600XS

Страница 1: ...Model MW36OOXS reezers Relrlgerator freezers Ice Makers Olshwashers Etullt In Ovens and Surface Units Ranges Mlcrnwave Ovens Trash Compactors Room Air Condllloners Oehumldifi ...

Страница 2: ...Custom Mounting the Microwave Oven 26 Caring for Your Microwave Oven 26 Cleaning the Microwave Oven 26 How Your Microwave Oven Works 27 Operating Safety Precautions 28 If You Need Service or Assistance 28 Partsand features 01986 Whirlpool Corporation MODEL AND SERIAL oxs II CONTROL PANEL II A P POSITION BI LEVEL COOKING RAW A O SET PUSH BUTTON CHART DOOR RELEASE Copy your Model and Serial Numbers ...

Страница 3: ...t l Has been properly connected to electrical supply and grounded See Installation Instructionsl l Is not used by anyone unable to operate it properly l Is properly maintained l Is used only for jobs expected of a home microwave oven PRECAUTIONS TO AVOID POSSIBLE EXPOSURE TO EXCESSIVE MICROWAW ENERGY DO NOT attempt to oper ate this oven with the door open since open door operation can result in ha...

Страница 4: ...y result 9 This appliance should be serviced only by qualified service personnel Call a Whirlpool authorized TECH CARE Service Company for examination repair or adjustment 10 Do not cover or block any opening on the appliance for fire may result 11 Do not use outdoors for damage to the oven or electric shock may result 12 Do not immerse cord or plug in water for electric shock may result 13 Keep c...

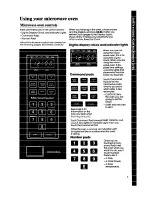
Страница 5: ... and indicator lights When you are not using the micro wave oven this is an accurate digital clock When you are using the micro wave oven it dis plays time settings indicator lights and shows what number pads you touched Touch Command Pads to tell the microwave oven what to do and in what order A few examples CLOCK SETtells the oven you are going to set the clock STARTtells the oven to start Each ...

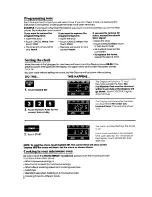
Страница 6: ...gain show all 8 s when the power comes back on You can cook without setting the clock but the Display will be blank after cooking DO THIS THIS HAPPENS The Display will show a 0 and the colon will start to flash The first Number Pad must be touched within 5 seconds or the Display will go blank Touch CLOCK SETagain and continue 2 Touch Number Pads for the correct time of day The D sploy WIII show wh...

Страница 7: ... 1 lndlcalor Light WIII come on and the Display WIII show four O s 3 Touch Number Pads for the cooking time you want The Display will show the numbers you touched in the order you touched them The example shows 1minute 30 seconds 4 Touch START d COUd ClWfl The oven will automatically cook at high Cook Power The COOK 1 Indicator Light will stay on to show that the oven IS cook Ing in the first cycl...

Страница 8: ...sually used automatic 100 of full power HIGH 9 90 of full power 8 80 of full power 7 70 of full power MED HIGH 6 60 of full power 5 50 of full power MED 4 40 of full power 3 30 of full power MED LOW 2 20 of full power 1 10 of full power LOW 0 TIMER fan and light will be off DO THIS THIS HAPPENS 1 Put food in the oven and close the door The COOK 1 lndicotor Light will come on and the Display WIII s...

Страница 9: ...ouch COOK POWER l Touch a number for the new Cook Power l Touch START The cycle will cook at the new Cook Power for the original time OR l Touch COOK POWER lwlce if you want to change a lower Cook Power to HIGH l Touch START Using AUTO SET Auto Set provides fen presettimes One to nine minutes at HIGH cook power can be set by touching AUTO SETand the corresponding number pad 1 9 This provides a sho...

Страница 10: ...Pad 5 for 50 of full power 6 Touch START d count own The AUTO SETIndicator Light will stay on while the oven is cooking in the preprogrammed cycle If you selected a Cook Power other than high the Cook Power Indicator Light will also come on The Display counts down the time to show how much cooking time is left For 2 of every 10 seconds the Display will show the Cook Power you selected if you are u...

Страница 11: ...efore cooking For suggested defrost times see the guide behind the oven door or the chart in your MICRO MENUS Cookbook DO THIS THIS HAPPENS 1 Put frozen tood In the oven and close the door iiEii 2 Touch QUICK DEFROST The QUICK DEFROST Indicator Light will come on and the Display will show four 0 s WWRM 3 Touch Number Pads tor the defrosting time you want The Display will show the number you touche...

Страница 12: ...ch COOK POWER 5 Touch 0 for zero Cook Power 6 Touch START When QUICK DEFROST is over the oven will shut off If Cook 1has not been programmed 2 beeps will sound and the Display will count down the time for Cook 2 at zero Cook Power If Cook 1has been programmed the Display will count down and sound 2 beeps before Cook 1will start End will show on the Display and 4 beeps will sound when the standing ...

Страница 13: ... 4 Touch COOK POWER If you want the high Cook Power skip to step 6 The COOK POWER Indicator Light will come on and the Display will show P HI This shows the oven is pre programmed to cook at full HIGH power The Display will show what you touched This example shows you m full power touched Number Pad 6 for 60 of 5 Touch a Number Pad for the Cook Power you want in the first cycle The COOK 2 Indicato...

Страница 14: ... Cook 1 You can either open the door to check stir or turn the food etc or you can let the oven start the next cycle If you do open the door touch STARTafter closing the door to restart the oven The COOK 2 Indicator Light will be on during the second cycle The COOK POWER Indicator Light will also be on if you are using a Cook Power other than high The Display counts down the time the time to show ...

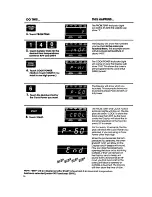
Страница 15: ...operation l Touch the Cook cycle you wish to change or add COOK 1or 2 l Touch numbers for new time if desired l Touch COOK POWER if change is desired l Touch number for new Cook Power or touch COOK POWER again if high is desired l Touch in new cycle and time if desired Touch START Cooking with the TEMPERATURE PROBE The Temperature Probe helps take guesswork out of cooking roasts and larger cassero...

Страница 16: ...of full power 8 Touch START The PROBE TEMP and COOK POWER Indicator Lights will stay on The Dis play will show CCCL to show the food is less than 90 F As the food cooks the Display will show the in ternal temperature of the food for every 5 F increase For 2 of every 10 seconds the Dis play will show the Cook Power you selected if you are using a Cook Power other than high When the probe senses the...

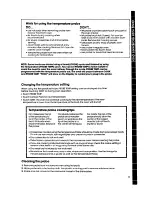
Страница 17: ...ng oven operation Touch PROBE TEMt l Touch Number Pads for new temperature l Touch START The oven will continue cooking to the new temperature If the new temperature is lower than the temperature of the food the oven Will shutoff Temperature probe cooking tips For casseroles the tip For liquids balance the For roasts the top of the of the probe should probe on a wooden probe should be in the be in...

Страница 18: ... START The Display will show the time you selected for Cook 1 When Cook 1 is over 2 beeps will sound and the oven will shut off The Display will show PAUS The COOK 2 Indicator Light will come on The Display will show the time set for Cook 2 Open the door Stir turn or add ingredients Close the door Touch STARTto continue with Cook 2 The oven will remain off until you touch START Using PAUSEwilh QUI...

Страница 19: ...perates for up to 99 minutes 99 seconds l Opening the oven door cancels KEEPWARM Close the door and touch KEEPWARM then STARTif additional KEEPWARM time is desired l Foods cooked covered should be covered during KEEPWARM l Pastry items pies turnovers etc should be uncovered during KEEPWARM l Complete meals kept warm on a dinner plate should be covered during KEEPWARM l The use of more than one com...

Страница 20: ...0 power 4 Touch 0 Number Pad mw 5 Touch START The Cook 1and Cook Power Indicator Lights will stay on to show you that the timer is running The Display counts down to show you how much time is left During the countdown the oven will be dark and the fan will be off When the set time ends End will show on the Display and 4 beeps will sound You can stop the beeping by opening the door or by touching C...

Страница 21: ... show four 0 s 3 Touch Number Pads tor the length of delay you want The Display will show the numbers you touched In the order you touched them This example shows 60 minutes 1hour I m 4 Touch COOK POWER The COOK POWER Indicator Light will come on and the Display will show P HI 6JI I The Display will show P 0 This tells you that the oven will be operating at 0 power 5 Touch 0 Number Pad m 6 Touch C...

Страница 22: ...h or any item with baking powder or yeast Smoked or frozen meats may be used so can vegetables fruits and casserole type foods Any food that has to wait for cooking to start should be very cold or frozen before it is put in the oven MOST UNFROZEN FOODS SHOULD NEVER STAND AT ROOM TEMPERATURE MORE THAN TWO HOURS BEFORECOOKING STARTS Other operating hints 1 To double check settings while the oven Is ...

Страница 23: ...r on the bottom of the oven Second position l Do not operate the oven with the metal rack stored on the floor of the oven Damage to the interior finish will result Cleaning the rack l Do use hot pads when removing rack from oven after cooking It may be hot l Do put food in containers then place containers on rack l Do use only when cooking foods in more than one container l Do use only in the micr...

Страница 24: ... made 3 Do not block the front vent or rear alr Intake openings Blocking vent or air intake openings can cause damage to the oven and poor cooklng results Make sure the microwave oven legs are in place to ensure proper air flow 2 Put the oven on a cart counter table or shelf that is strong enough to hold the oven and the food and utensils you put in It The control side of the unit Is the heavy sid...

Страница 25: ...ceptacle prop erly installed and grounded in accordance with the National Electrical Code and local codes and ordinances If a mating wall recep tacle is not available or if you are not sure if the n f GP6UNDING DLL It is NOT recommended to use an extension cord with your microwave oven but if you find it necessary to do so temporarily until a pro perly grounded and polariz ed 3 prong recepta cle i...

Страница 26: ... This could damage the microwave oven Caring for your microwave oven Cleaning the microwave oven Wipe otten with warm sudsy water and a sott cloth or sponge For stubborn soil boil a cup of water in the oven for 2 or 3 minutes Steam will soften the soil Be sure to clean the areas where the door and oven frame touch when closed When cleaning surfaces of door and oven that come to gether on closing t...

Страница 27: ... the oven where they are scattered or stirred by a mode mixer like a fan Microwaves bounce off metal oven walls and are absorbed by food The ceramic bottom of your microwave oven lets micro waves through Then they bounce off a metal floor back through the ceramic bottom and are absorbed by the food Microwaves may not reach the center of a roast The heat around the outside is what cooks the roast a...

Страница 28: ...tainers may become overheated The liquid may splash out with a loud noise during or after heating or when adding ingredients coffee etc resulting in harm to the oven and possible personal injury For best results stir any liquid several times before heating or reheating DO NOT heat store or use flammable or inflammable materials in or near the oven NEVER lean on the door or allow a child to swing o...

Страница 29: ...hen it s empty is not rec ommended If you experi ment put a container of water in the oven NEVERremove the stirrer cover The plastic cover protects the microwave stirrer blade from soil or bending CAUTION DO NOT use the oven until you have read and understood AU preoautlons to prevent damage to the oven DO NOT OVERCOOK POTATOES Fire could result At the end of the rec ommended cooking time they sho...

Страница 30: ...o long l Is the electric supply to your home low or lower than normal Your electric company can tell you if the line voltage is low l Is the Cook Power at the recommended setting l Are you allowing more time when cooking more food at one time If the display shows a time counting down but the oven is not cooklng l Is the oven door closed completely l Have you set the controls as a kitchen timen l I...

Страница 31: ...er 4 If you have a problem Call our COOL LINE service assistance tele phone number see Step 2 and talk with one of our Consultants or if you prefer write to Mr Robert Stanley Division Vice President Whirlpool Corporation 2000 US 33 North Benton Harbor Ml 49022 5 If you need FSP replacement parts FSP is a registered trademark of Whirlpool Corporation for quality parts Look for this sym bol of quali...

Страница 32: ...little easier Part No 4B72006Al415B023 01986 Whirlpool Corporation lakers Dishwashers Bwlt In Ovens and Surface Untls Ranges MIcrowave Ovens Trash Compactors Room AH Condltloners Oehumbdlfiers Automatic Washers Clothes Or ...

Отзывы: