background image

Содержание MH6110XE

Страница 1: ...crowave Oven Safety 3 5 Getting to Know Your Microwave Oven 6 Using Your Microwave Oven 23 Caring for Your Microwave Oven 38 Cooking Guide 43 Questions and Answers 47 If You Need Assistance or Service 48 Warranty 52 l 800 253 1 301 Call us with questions or comments PART NO 3828W5A060914359620 MODEL MH611OX 5 f ...

Страница 2: ... ance The card helps us notify you about any new information on your appliance i jp Please record your model s information Whenever you call to request service for Model Number your appliance you need to know your i complete model number and serial number Serial Number You can find this information on the model Purchase Date F and serial number plate see diagram in the Getting to Know section Plea...

Страница 3: ...G INSTRUCTIONS found at the end of l Keep cord away from heated surfaces this section 9 Do not let cord hang over edge of table or counter l Install or locate the microwave oven only in accordance with the provided l See door surface cleaning instructions in Installation Instructions the Caring for Your Microwave Oven section l Some products such as whole eggs in the shell and sealed containers l ...

Страница 4: ...y on top of the microwave oven when the micro wave oven is in operation SAVE THESE INSTRUCTIONS PRECAUTIONS TOAVOID POSSIBLE EXPOSURE TO EXCESSIVE MICROWAVE ENERGY a Do not attempt to operate this oven with the door open since open door operation can result in harmful exposure to microwave energy It is important not to defeat or tamper with the safety interlocks b Do not place any object between t...

Страница 5: ...e for the electric current The microwave oven is equipped with a cord having a grounding wire with a grounding plug The plug must be plugged into an outlet that is properly installed and grounded i WARNING Improper use of the grounding can result in a risk of electric shock Consult a qualified electrician or service man if the grounding instructions are not completely understood or if doubt exists...

Страница 6: ...rical connection 11 Page Microwave oven features 12 Control panel features 13 Using the exhaust fan 16 Using the cook top countertop light 18 Using the bi level cooking rack 20 Setting the clock 21 Using the Minute Timer 22 7 7 q 12 11 kc Explosion Hazard Do not store flammable materials such as gasoline near the microwave oven Doing so can result in death explosion fire or burns How your microwav...

Страница 7: ...at spreads to the center from the outer cooked areas just as in regular oven cooking This is one of the reasons for letting some foods for example roasts or baked potatoes stand for a while after cooking or for stirring some foods during the cooking time The microwaves disturb water molecules in the food As the molecules bounce around bumping into each other heat is made like rubbing your hands to...

Страница 8: ... a corner to vent steam during cooking Radio interference Using your microwave oven may cause interference to your radio TV or similar equipment When there is interference you can reduce it or remove it by Cleaning the door and sealing surfaces of the oven Adjusting the receiving antenna of the radio or television Moving the receiver away from the microwave oven Plugging the microwave oven into a ...

Страница 9: ... cook or reheat a whole egg inside the shell Steam buildup in whole eggs may cause them to burst and burn you and possibly damage the oven Slice hard boiled eggs before heating In rare cases poached eggs have been known to explode Cover poached eggs and allow a standing time of one minute before cutting into them For best results stir any liquid several times before heating or reheating Liquids he...

Страница 10: ...g wrap potatoes in foil and set aside for 5 minutes They will finish cooking while standing Do not start a microwave oven when it is empty Product life may be shortened If you practice programming the oven put a container of water in the oven It is normal for the oven door to look wavy after the oven has been running for a while Do not use newspaper or other printed paper in the oven Fire could re...

Страница 11: ...ctrical connection If your electric power line or outlet voltage is less than 110 volts cooking times may be longer Have a qualified electrician check your electrical system Circuit breaker or fuse box 11 ...

Страница 12: ...ooks 4 Two Position Bi Level Cooking Rack Accessory optional Use for extra space when cooking in more than one container at the same time See page 20 for more information 5 Filter See page 39 for cleaning information 6 CooktopKountertop Light Turn on to light your cooktop or countertop or turn on as a night light See pages 18 and 41 for more information 7 Exhaust Fan and Cooktop Light Switches See...

Страница 13: ... Command and Number Pads located on the control panel For more information see pages 15 37 0 l 0 3 0 2 0 5 0 6 a a4 09 0 7 0 12 0 11 0 14 1 Display The Display includes a clock 2 COOK TIME Touch this pad followed and indicators to tell you time of day by Number Pads to set a cooking time cooking time settings and cooking See pages 23 25 and 26 for more functions selected information continued on n...

Страница 14: ...e 21 for more information 11 TIMER SET Touch this pad to set the Minute Timer See page 22 for more information 12 TIMER OFF Touch this pad to cancel the Minute Timer See pages 17 19 and 13 14 15 16 17 18 19 20 22 for more information START ENTER Touch this pad to start a function If you open the door after the oven begins to cook retouch START ENTER Also touch this pad to activate or deactivate th...

Страница 15: ...ing l Close the door and the light goes off OR l TOUCH Interrupting cooking You can stop the oven during a cycle by opening the door The oven stops heating and the fan stops but the light stays on To restart cooking close the door and TOUCH Using the safety lock The safety lock prevents unwanted use of the microwave oven by disabling the control panel Command Pads To lock or deactivate the control...

Страница 16: ...n the exhaust fan in the vent hood will automatically turn on at the LOW setting to protect the oven It may stay on up to an hour to cool the oven When this occurs the Fan OFF Pad will not turn the fan off TOUCH FAN El LOW 2 Turn off fan when desired TOUCH I OFF I To set fan to run for a specific time NOTE The Minute Timer must not be in use when starting this feature 1 Start fan TOUCH 16 ...

Страница 17: ...n run time TOUCH YOU SEE Example to run fan for 1 hour and 30 minutes 4 Start timed fan feature NOTES l The letter F indicates the timed fan feature has been selected l If both the timed fan and light features have been selected an H Hood will be displayed TOUCH YOU SEE To check the remaining fan time during a cooking cycle TOUCH To cancel the timed fan feature TOUCH NOTE Touching the TIMER OFF Pa...

Страница 18: ...ired TOUCH I OFF To set light to be on for a specific time NOTE The Minute Timer must not be in use when starting this feature 1 Turn on light TOUCH OR 2 Touch TIMER SET TOUCH YOU SEE NOTE If both the fan and light are operating and the TIMER SET Pad is touched twice both the fan and light will be controlled by the timer The Display will alternate between FAN and LIGHT one time before HR MN is dis...

Страница 19: ... has been selected EE3 l If both the timed light and fan features have been selected an H Hood will OR be displayed l l TIMER SET To check the remaining light time during a cooking cycle TOUCH I I SET I To cancel the timed light TOUCH feature NOTE Touching the TIMER OFF Pad shuts off both the light and timed feature Touch ing the light OFF Pad shuts off just the light 19 ...

Страница 20: ... areas near oven vent openings during use Failure to follow these instructions can result in burns NOTES l Do not store the metal rack in the oven Arcing and damage to the oven could result if someone accidentally starts the oven l Do not operate the oven with the metal rack stored on the floor of the oven Damage to the interior finish will result l Use rack only in the microwave oven l Do not use...

Страница 21: ... is not set 88 88 will show on the Display until you touch CLOCK NOTES YOU can set the clock even while the oven is cooking food l If you enter an incorrect time and touch CLOCK three tones will sound Enter the correct time l If you touch OFF CANCEL while setting the clock the Display will show the last time of day set or if no time of day has To set time 1 Choose setting been set TOUCH YOU SEE fo...

Страница 22: ... minute 30 seconds NOTE If you enter more than 4 digits III three tones will sound Touch START ENTER to count down the 3 digit time you have entered or touch TIMER OFF 131 to clear the Display To start over touch TIMER SET and re enter desired time lol 3 Start countdown TOUCH YOU SEE NOTE If you do not do this step within three seconds of doing Step 2 START will flash You then have 1 minute to tou...

Страница 23: ...LD 34 Using POPCORN 35 Using ADD MINUTE 36 Adding or subtracting cook time 3 7 Cooking at high cook power 1 Put food in oven and close the door 2 Set cooking time Example for 1 minute 30 seconds TOUCH YOU SEE 3 Start oven TOUCH YOU SEE NOTE If you do not do this step within three seconds of doing Step 2 START will flash You then have one minute to gg m touch START ENTER before the display returns ...

Страница 24: ...8 80 of full power 7 70 of full power l Heating cream soups l Heating rice pasta or casseroles Medium High 0 Cooking and heating foods that need a Cook Power lower than high for example whole fish and meat loaf or when food is cooking too fast l Reheating a single serving of food 6 60 of full power Cooking requiring special care such as cheese and egg dishes pudding and custards l Finishing cookin...

Страница 25: ...H YOU SEE YOU SEE 4 Start oven NOTE If you do not do this step within three seconds of doing Step 3 START will flash You then have one minute to touch START ENTER before the Display returns to time of day At end of cooking time YOU SEE four tones will sound Changing instructions You can change the cooking time or Cook Power any time by repeating Steps 2 and or 3 and 4 25 ...

Страница 26: ...ven can be set to change from one to another automatically for up to two cycles 1 Put food in oven and close the door 2 Set cooking time for first cycle TOUCH YOU SEE Example for 7 minutes 30 seconds TOUCH YOU SEE 3 Set Cook Power for first cycle TOUCH YOU SEE Example for 50 Cook Power TOUCH YOU SEE 4 Repeat Steps 2 and 3 to set cooking time and Cook Power for second cycle 26 ...

Страница 27: ...g Guide section for cooking needing to program times and Cook Powers with Cook Power and cooking time AUTO COOK has preset times and Cook Powers for five major food categories Casseroles Baked Potatoes Baked Goods Fresh Canned Vegetables and Frozen Vegetables To use AUTO COOK 1 Touch AUTO COOK 1 to 5 times to select the desired category 2 Wait 4 seconds 3 Touch AUTO COOK again to increase the numb...

Страница 28: ...es After 3 seconds TOUCH A 0 m 00 once YOU SEE 3 To increase cups items YOU SEE 4 Start oven optional If you do not touch START ENTER the oven will start cooking 3 seconds after you complete the previous step TOUCH At end of cooking time YOU SEE YOU SEE four tones will sound 28 ...

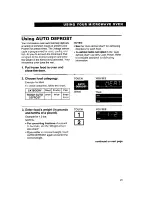
Страница 29: ...category and enter the weight of the items being defrosted Your to a reliable cookbook for defrosting information microwave oven does the rest 1 Put frozen food in oven and close the door 2 Choose food categorgy Example for Meat To select categories follow this chart 1 CATEGORY TOUCH YOU SEE Then TOUCH AUTO DEFROST 3 Enter food s weight in pounds and tenths of a pound Example for 1 2 Ibs NOTES l F...

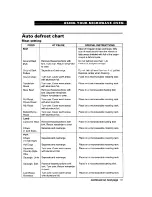
Страница 30: ...food while oven continues to defrost YOU SEE Open door turn over food and shield any warm portions NOTE If you do not open the door within two minutes the Display will resume the countdown Close the door YOU SEE 6 Restart oven TOUCH YOU SEE At end of defrosting time YOU SEE four tones will sound 30 ...

Страница 31: ...nder Return remainder to oven Pot Roast Turn over Cover warm areas Place on a microwavable roasting rack Chuck Roast with aluminum foil Rib Roast Turn over Cover warm areas Place on a microwavable roasting rack with aluminum foil Rolled Rump Turn over Cover warm areas Place on a microwavable roasting rack Roast with aluminum foil Lamb Cubes for Stew Remove thawed portions with Place in a microwava...

Страница 32: ...owavable baking dish Carefully separate fillets under cold water Place in a microwavable baking dish Run cold water over to finish defrosting Place in a microwavable baking dish Cover head and tail with foil do not let foil touch sides of microwave oven Finish defrosting by immersing in cold water Place in a microwavable baking dish Place in a microwavable baking dish Place in a microwavable bakin...

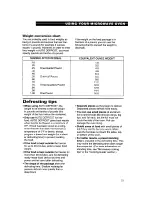
Страница 33: ... temperature of 0 F or below always program a lower food weight for a short er defrosting time to prevent cooking the food l If the food is kept outside the freezer for up to 20 minutes enter a lower food weight l If the food is kept outside the freezer for more than 20 minutes and for defrosting ready made food defrost by time and power and let stand after defrosting The shape of the package alte...

Страница 34: ...uncovered during WARM HOLD l Complete meals kept warm on a dinner plate should be covered during WARM HOLD l Do not use more than one complete WARM HOLD cycle about 1 hour 40 minutes The quality of some foods will suffer with extended time 2 Choose setting 3 Start oven 0Dtional TOUCH YOU SEE I If you do not touch START ENTER the oven will start cooking 3 seconds after you complete the previous ste...

Страница 35: ...and fat content Try several brands to decide which gives best popping results For best results use fresh bags of popcorn NOTE If you want to change the popping time after choosing POPCORN see Adding or subtracting cook time 1 Place bag in oven and close door Fire Hazard Do not repop unpopped kernels Do not reuse popcorn bags Doing so can result in death fire or burns 2 Choose POPCORN TOUCH Example...

Страница 36: ... NOTES l To extend cooking time in multiples of one minute touch ADD MINUTE repeatedly during cooking l You can enter ADD MINUTE only after closing the door after touching OFF CANCEL or during cooking 1 Make sure food is in oven l If you touch ADD MINUTE during cook ing the oven will cook at the currently selected Cook Power If you touch ADD MINUTE after cooking is over the oven will cook at 100 C...

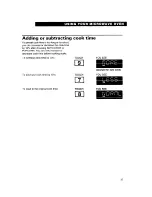
Страница 37: ...ncrease or decrease the cook time by 10 after choosing AUTO COOK or POPCORN You can only increase or decrease cook time before cooking starts To increase cook time by 10 To decrease cook time by 10 To reset to the original cook time TOUCH El example for auto cook TOUCH YOU SEE TOUCH Isl 37 ...

Страница 38: ...ttering during cooking This is normal For stubborn soil boil a cup of water in the oven for 2 or 3 minutes Steam will soften the soil To get rid of odors inside the oven boil a cup of water with lemon juice or vinegar For exterior surfaces and control panel Use a soft cloth with spray glass cleaner Apply the spray glass cleaner to the soft cloth do not spray directly on the oven NOTE Abrasive clea...

Страница 39: ...l panels before operating Failure to do so can result in death or electrical shock Before removing filters For your personal safety turn off the electric power at the main power supply Grease filters 1 To remove grease filters slide each filter to the side Pull filters downward and push to the other side The filter will drop out 2 Soak grease filters in hot water and a mild detergent Scrub and swi...

Страница 40: ... Push the top until it snaps into place Replace the mounting screws After replacing filters l Turn the power back on at the main power supply 3 Lift the back of the charcoal filter Slide the filter straight out l Do not operate the hood without the filters in place To replace 1 Slide a new charcoal filter into place The filter should rest at the angle shown 40 ...

Страница 41: ...b Failure to follow the above could result in fire or electrical shock The cooktop light 2 Remove the bulb cover mounting screws 3 We recommend replacing bulb s with candelabra base 30 watt bulb s available from your authorized Whirlpool service company Part No 4158432 4 Turn the power back on at the main power supply 1 Turn off power at the main power supply 41 ...

Страница 42: ...ews 3 Tip the cover forward then lift out to remove 4 Remove bulb holder mounting screw 5 Lift up the bulb holder 6 We recommend replacing the bulb with a candelabra base 30 watt bulb available from your authorized Whirlpool service company Part No 4158432 7 Replace the bulb holder and mounting screw 8 Slide the top of the vent cover into place Push the bottom until it snaps into place Replace the...

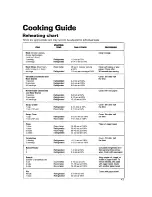
Страница 43: ...rigerated Refrigerated Refrigerated Refrigerated Room temp Room temp Room temp Refrigerated Refrigerated TIME POWER l 2 min at 70 2 4 min at 70 45 set 1 min per serving at 50 l 3 min per serving at 50 2 4 min at 100 4 6 min at 100 6 6 min at 100 5 6 min at 50 9 12 min at 50 13 l 6 min at 50 3 4 min at 50 5 7 min at 50 2X 3 min at 100 4 5X min at 100 15 25 set at 100 30 40 set at 100 30 40 set at 1...

Страница 44: ...min 2X min Summer 1 lb Hamburger 100 1st side 2X min OTHER Patties 4 2nd side 2 3 min COOK Meat Loaf 100 13 19 min FOOD POWER TIME 1X Ibs Applesauce 100 7 l 0 min Chicken 100 6 9 min lb 4 servings Pieces Baked 100 4 6 min Internal temperature should be 185 F Apples 4 after standing Chocolate 50 l 2 min Turkey 100 5 min melt 1 Breast then 70 8 l 2 min lb square Internal temperature should be 185 F ...

Страница 45: ... shaped pieces of food cook more evenly than irregularly shaped foods l With unevenly shaped foods the thinner parts will cook faster than the thicker areas Place the thinner parts of chicken wings and legs in the center of the dish Stirring turning foods l Stirring and turning foods distributes heat quickly to the center of the dish and avoids overcooking at the outer edges of the food Covering f...

Страница 46: ...wl and add some water so that it covers the bottom of the container not more than 4 inch high This ensures even heating of the container bottom l Always remove the lid to avoid damage to the oven 0 Use only undamaged containers l Do not use containers taller than inch l Container must be half filled l To avoid arcing there must be a mini mum Iinch between the aluminum container and the walls of th...

Страница 47: ...t happen What does standing time mean This appearance is normal and does not affect the operation of your oven You hear the sound of the transformer when the magnetron tube cycles on As the food becomes hot it will conduct the heat to the dish Be prepared to use hot pads to remove food after cooking Standing time means that food should be removed from the oven and covered for additional time to al...

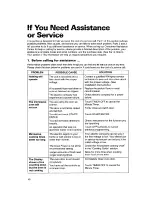
Страница 48: ...r Replace household fuse or reset a circuit breaker has tripped circuit breaker The electric company has Check electric company for a power experienced a power failure failure The microwave You are using the oven as Touch TIMER OFF to cancel the oven will a timer Minute Timer not run The door is not firmly closed Firmly close and latch door and latched You did not touch START ENTER Touch START ENT...

Страница 49: ...network of autho SERVICE rized Whirlpool service companies Whirlpool service technicians are trained to fulfill the product warranty and provide after warranty service anywhere in the United States To locate the authorized Whirlpool service company in your area call our Consumer Assistance Center telephone number see Step 2 or look in your telephone directory Yellow Pages under APPLIANCE HOUSEHOLD...

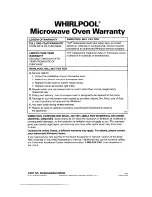
Страница 50: ... by accident misuse fire flood acts of God or use of products not approved by Whirlpool E Any labor costs during limited warranty F Repairs to parts or systems caused by unauthorized modifications made to the appliance 396 WHIRLPOOL CORPORATION SHALL NOT BE LIABLE FOR INCIDENTAL OR CONSE QUENTIAL DAMAGES Some states do not allow the exclusion or limitation of incidental or consequential damages so...

Отзывы: