background image

7

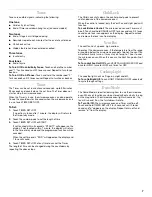
Tones

Tones are audible signals, indicating the following:

One tone

Valid entry (short tone)

End of Timer countdown (long tone) (on some models)

Two tones

End of stage in multistage cooking

Reminder, repeat each minute after the end-of-cycle tones

Child Lock active

Hidden feature has been entered or exited

Three tones

Invalid entry

Four tones

End of cycle

To Turn Off/On Valid Entry Tones: Touch and hold the number 
pad “1” for 5 seconds until 2 tones sound. Repeat to turn tones 
back on.

To Turn Off/On All Tones: Touch and hold the number pad “2” 
for 5 seconds until 2 tones sound. Repeat to turn tones back on.

Timer

The Timer can be set in minutes and seconds, up to 99 minutes 
99 seconds and counts down the set time. The Timer does not 
start or stop the microwave oven.

When the Timer is in use, the microwave oven can also operate. 
To see the countdown for 5 seconds when the microwave oven is 
in use, touch TIMER SET•OFF.

To Set:

1. Touch TIMER SET•OFF.

If no action is taken after 1 minute, the display will return to 
the time of day mode.

2. Touch the number pads to set the length of time.

3. Touch TIMER SET•OFF or START.

If not touched within 5 seconds, “START?” will appear on the 
display. If not touched within 1 minute, the display will return 
to the time of day mode and the programmed function will be 
canceled.

When the set time ends, “END” will appear on the display and 
1 tone will sound.

4. Touch TIMER SET•OFF at any time to cancel the Timer.

The length of time can be changed during the countdown by 
repeating the above steps.

Child Lock

The Child Lock shuts down the control panel pads to prevent 
unintended use of the microwave oven.

When the control is locked, only the Vent Fan and Light pads will 
function.

To Lock/Unlock Control: The microwave oven and Timer must 
be off. Touch and hold CANCEL•OFF for 5 seconds until 2 tones 
sound and a lock icon appears on the display. Repeat to unlock 
and remove the lock icon from display.

Vent Fan

The vent fan has 2 speeds: high and low.

To protect the microwave oven, if the temperature from the range 
or cooktop below the microwave oven gets too hot, the vent fan 
will automatically turn on. It may stay on for up to 1 hour to cool 
the microwave oven. When this occurs, the Vent Fan pad will not 
function.

To Turn Vent Fan On/Off: Touch VENT FAN HIGH/LOW/OFF pad 
once for HIGH, twice for LOW or 3 times for OFF.

Cooktop Light

The cooktop light has 3 settings: on, night and off.

To Turn On/Night/Off: Touch LIGHT ON•NIGHT•OFF repeatedly 
to cycle through settings.

Demo Mode

The Demo Mode is ideal for learning how to use the microwave 
oven. When set, functions can be entered without actually turning 
on the magnetron. The microwave oven light will come on, the 
fan will run and, if on, the turntable will rotate.

To Turn On/Off: The microwave oven and Timer must be off. 
Touch and hold TIMER SET•OFF for 5 seconds until 2 tones 
sound and “d” appears on the display. Repeat to turn off and 
remove “d” from the display.

Содержание MH1140XM

Страница 1: ...INATION Use CareGuide For questions about features operation performance parts accessories or service call 1 800 253 1301 or visit our website at www whirlpool com Table of Contents 2 8185377 4619 652 62132 Model MH1140XM ...

Страница 2: ...o Mode 7 MICROWAVE OVEN USE 8 Food Characteristics 8 Cooking Guidelines 8 Cookware and Dinnerware 8 Aluminum Foil and Metal 9 Cooking Power 9 Cooking 10 Cooking in Stages 10 Popcorn 10 Baked Potato 10 Pizza 11 Preset Cooking 11 Reheating 11 Defrosting 12 MICROWAVE OVEN CARE 12 General Cleaning 12 Replacing Filters 13 Replacing Cooktop Light 13 Replacing Microwave Oven Light 14 TROUBLESHOOTING 14 A...

Страница 3: ...Some products such as whole eggs in the shell and sealed containers for example closed glass jars are able to explode and should not be heated in the microwave oven Use the microwave oven only for its intended use as described in this manual Do not use corrosive chemicals or vapors in the microwave oven This type of oven is specifically designed to heat cook or dry food It is not designed for indu...

Страница 4: ...se overheating of the oven Do not store anything directly on top of the microwave oven when the microwave oven is in operation To reduce the risk of injury to persons Liquids such as water coffee or tea are able to be overheated beyond the boiling point without appearing to be boiling Visible bubbling or boiling when the container is removed from the microwave oven is not always present THIS COULD...

Страница 5: ...ected appliances The microwave oven must be grounded In the event of an electrical short circuit grounding reduces the risk of electric shock by providing an escape wire for the electric current The microwave oven is equipped with a cord having a grounding wire with a grounding plug The plug must be plugged into an outlet that is properly installed and grounded WARNING Improper use of the groundin...

Страница 6: ...ll appear on the display as a reminder If not touched within 1 minute after touching a pad the display will return to the time of day mode and the programmed function will be canceled If cooking is interrupted touching START will resume the preset cycle Cancel Off The CANCEL OFF pad stops most functions except for the Timer Control Lock and Demo Mode The microwave oven will also turn off when the ...

Страница 7: ... tone will sound 4 Touch TIMER SET OFF at any time to cancel the Timer The length of time can be changed during the countdown by repeating the above steps ChildLock The Child Lock shuts down the control panel pads to prevent unintended use of the microwave oven When the control is locked only the Vent Fan and Light pads will function To Lock Unlock Control The microwave oven and Timer must be off ...

Страница 8: ...n other foods Heavy dense foods such as meat and potatoes require a longer cook time than the same size of a light porous food such as cake CookingGuidelines Covering Covering food helps retain moisture shorten cook time and reduce spattering Use the lid supplied with cookware If a lid is not available wax paper paper towels or plastic wrap approved for microwave ovens may be used Plastic wrap sho...

Страница 9: ...king power to use by percent name or number For example 70 7 Medium High Use the following chart as a general guide for the suggested cooking power of specific foods Plastic Wraps Bags Covers Dinnerware Containers Use those approved by the manufacturer for microwave oven use Pottery and Clay Follow manufacturer s recommendations Styrofoam Do not use in oven Straw Wicker Wooden Containers Do not us...

Страница 10: ... few seconds Enter the new cook time and touch START or wait a few seconds for the countdown to resume To Change Cook Power Touch COOK POWER repeatedly to scroll through the cook power levels Touch START Popcorn Do not use regular paper bags or glassware Pop only one package of popcorn at a time Follow manufacturer s instructions when using a microwave popcorn popper Listen for popping to slow to ...

Страница 11: ... this time by touching COOK POWER 4 Touch START The display will count down the cook time When the cycle ends END will appear in the display 4 end of cycle tones will sound and then reminder tones will sound every minute 5 Touch CANCEL OFF or open the door to clear the display and or stop reminder tones Reheating Times and cooking power have been preset for reheating specific food types Use the fo...

Страница 12: ...FF or open the door to clear the display and or stop reminder tones To Defrost Manually 1 Touch COOK TIME 2 Touch the number pads to set a length of time to defrost 3 Touch COOK POWER 4 Touch number pad 3 5 Touch START The display will count down the defrost time When the cycle ends END will appear in the display 4 end of cycle tones will sound and then reminder tones will sound every minute 6 Tou...

Страница 13: ... without the grease filters in place The charcoal filters cannot be washed and should be replaced every 6 to 12 months See General Cleaning for cleaning instructions See Assistance or Service to reorder filters To Remove and Replace Grease Filters 1 Unplug microwave oven or disconnect power 2 Remove each grease filter by sliding filter to the end Pull tab down until the filter drops out 3 Replace ...

Страница 14: ...els attached to the inside of the door Remove spacer then firmly close door Is the electronic oven control set correctly See Microwave Oven Control section On some models is the Child Lock set See Child Lock section Is the magnetron working properly Try to heat 1 cup 250 mL of cold water for 2 minutes at 100 cooking power If water does not heat call for service See Assistance or Service section Ov...

Страница 15: ...eed help follow the instructions below When calling please know the purchase date and the complete model and serial number of your appliance This information will help us to better respond to your request If you need replacement parts If you need to order replacement parts we recommend that you only use FSP replacement parts FSP replacement parts will fit right and work right because they are made...

Страница 16: ...E LIABLE FOR INCIDENTAL OR CONSEQUENTIAL DAMAGES Some states do not allow the exclusion or limitation of incidental or consequential damages so this exclusion or limitation may not apply to you This warranty gives you specific legal rights and you may also have other rights which may vary from state to state Outside the 50 United States this warranty does not apply Contact your authorized Whirlpoo...

Отзывы: