background image

Содержание MC8790XT

Страница 1: ......

Страница 2: ... High Precautions 30 Cook Power 8 If You Need Service or Assistance 32 Microwave Cooking at Lower Convection Microwave Oven Cook Powers 9 Warranty 36 c 1988 Whirlpool Corporation 1 urn CD UllU I UCU1 U Model MC8790Xl IEFROSTGUIDE ROUND BAKING SHEET TEMPERATURE Ii PROBESOCKET 7 ITOD Interior C n Ceiling MODEL AND SERIAL4 NUMBER PLATE not shown LOWEROVEN RACK LOWEROVEN RACK I I I DOOR LATCH DOOR OPE...

Страница 3: ...its weight l Has been properly connected to electrical supply and grounded See Installation Instructions l Is not used by anyone unable to operate it properly l Is properly maintained l Is used only for jobs expected of a home convection microwave oven PRECAUTIONS TO AVOID POSSIBLE EXPOSURE TO EXCESSIVE MICROWA ENERGY wave energy It is important not to defeat or tamper DO NOT attempt to oper with ...

Страница 4: ...horized factory service com pany for examination repair or adjustment IO Do not cover or block any opening on the appliance for fire may result 11 Do not use outdoors for damage to the oven or electric shock may result 12 Do not immerse cord or plug in water or electric shock may result 13 Keep cord away from heated surfaces for electric shock may result 14 Do not let cord hang over edge of table ...

Страница 5: ...ital display clock and indicator lights When you are not using the convection microwave oven this is an accurate digital clock When you are using the oven it dis plays time settings indi cator lights and shows what number pads you touched Command pads Touch Command Pads CLOCK SETtells the See page 6 for informa tion on the tone vou hear when touching any pad Each Command Pad you touch the Com mand...

Страница 6: ...he above steps NOTE If electric power ever goes off the programming tones will again sound each time you touch a pad Setting the clock When the oven is first plugged in a tone sounds and the display shows 888 88 If the electric power ever goes off the display will again show all 8 s when the power comes back on You can cook or use the Minute Timer without setting the clock but the display will be ...

Страница 7: ... show how much time is left on the Minute Timer When the set time is up a 3 second signal will sound and the Display will show the time of day Changing the minute timer Touch MINUTE TIMER Touch numbers to set new time Touch START New instructions cancel the old ones Cancelling the minute timer Touch MINUTE TIMER Touch CANCEL NOTE MINUTE TIMER must be touched before touching CANCEL If CANCEL is tou...

Страница 8: ...oking l When popping commercially packaged microwave popcorn place bag on lower oven rack Microwave cooking at hi cook Dower DO THIS 1 Put food in the oven and close the door 2 Touch COOK 3 Touch Number Pads for the cooking time you want 4 Touch START THIS HAPPENS The COOK Indicator Light will come on and the Display will show four 0 s The Display will show the numbers you touched in the order you...

Страница 9: ...r HtGH 40 0 of full power 9 90 of full power i 30 of full power MED LOW DEFROST 8 80 of full power 2 20 of full power 7 70 of full power MED HIGH 1 1Do0of full power LOW 6 6O b of full power 0 timer fan and light will be off 5 50 of full power MED DO THIS 1 Put food in the oven and close the door 2 Touch COOK 3 Touch Number Pads for the cooking times you want 4 Touch COOK POWER 5 Touch a Number Pa...

Страница 10: ... START The cycle will cook at the new Cook Power for the original time OR l Touch COOK POWER twice if you want to change a lower Cook Power to HIGH l Touch START Using AIrTO SET AUTO SETprovides ten preset times One to nine minutes at HIGH cook power can be set by touching AUTO SETand the corresponding number pad l 9 This provides a short cut method for setting commonly used cooking times The AUTO...

Страница 11: ...or 50 of full power The AUTO SETIndicator Light will Stay on while the oven is cooking in the pre programmed cycle If you selected a Cook Power other than high the Cook Power Indicator Light will also come on This shows the oven is cooking at a selected Cook Power The Display counts down the time to show how much cooking time is left When Auto Set ends End will show on the Display and 4 beeps will...

Страница 12: ...the guide on the interior oven frame or in your CONVECTION MICRO MENUS cookbook DO THIS 1 Put frozen food in the oven and close the door m a 2 Touch QUICK DEFROST 3 Touch Number Pads for the defrosting time you want THIS HAPPENS The QUICK DEFROST Indicator Light will come on and the Display will show four 0 s 4 Touch START The Display will show the numbers you touched in the order you touched them...

Страница 13: ...ts Firstpart 80 offullCookPower Second part 50 of full Cook Power Third part 20 of full Cook Power This automatic step down in Cook Power helps defrost food quickly and completely Changing or adding defrost time You can change the defrosting time before or after touching START Touch QUICK DEFROST l Touch numbers for new time Touch START Any new time setting made while QUICK DEFROST is operating wi...

Страница 14: ... cook at high power The QUICK DEFROST Indicator Light will come on and the Display will show four O s The Display will show the numbers you touched in the order you touched them This example shows 4 minutes 30 seconds The cooking cycle Indicator Light will come on and the Display will show four 0 s The Display will show the numbers you touched in the order you touched them This example shows 3 min...

Страница 15: ...he countdown will pause Close the door and touch STARTto complete the standing time When the standing time is over you will hear 2 beeps and the cooking cycle will start The COOK Indicator Light will be on during the cooking cycle The COOK POWER Indicator Light will also be on if you are using a Cook Power other than high The Display counts down the time to show how much time is left in the Cook c...

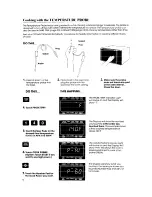
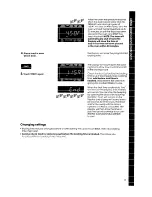
Страница 16: ...iling DO THIS THIS HAPPENS 4 Touch PROBE TEMP 5 Touch Number Pads for the desired final temperature between 90 F and 2009 6 Touch COOK POWER Option Touch START if you want to use high power 7 Touch the Number Pad for the Cook Power you want 16 3 Make sure the probe does not touch any part of the oven interior Close the door The PROBE TEMP Indicator Light will come on and the Display will show F Th...

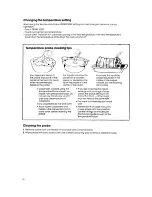
Страница 17: ... food or food from oven l stir foods during cooking when recommended l stir soups casseroles and drinks before serving l cover roasts with foil and let stand a few minutes after microwave cooking Remove foil if you decide to cook it longer l remove the probe from the oven when not cooking by temperature let probe or probe cable touch any part of the oven interior l let probe touch foil if used Foi...

Страница 18: ...ching Replace the probe center of the liquid fat or bone l Casseroles cooked using the l If you are cooking individual Temperature Probe should be servings such as mugs of soup made from precooked foods Do check the probe setting in sev not use raw meats raw vegeta eral of the items all the mugs bles and cream sauces in may not heat at the same rate casseroles Dry meat loaf mixtures don t work l D...

Страница 19: ...KEEPWARM then STARTif additional KEEPWARM time is desired l Foods cooked covered should be covered during KEEPWARM l Pastry items pies turnovers etc should be uncovered during KEEPWARM l Complete meals kept warm on a dinner plate should be covered during KEEPWARM l The use of more than one complete KEEPWARM about 1hour 40 minutes is not recommended The quality of some foods will suffer with extend...

Страница 20: ...enings the oven door glass door trim etc and interior oven surfaces can become hot enough to burn Do not touch or allow clothing or other flammable materials to contact these surfaces during or after use until they have had time to cool l Do not cover bottom of oven or oven racks with aluminum foil This would prevent proper air flow and result in poor cooking performance Using BAKE TIME The BAKE T...

Страница 21: ...The set temperature will stay on the Display and the oven will hold that temper ature up to 30 minutes or until the food has been placed in the oven and STARThas been touched NOTE The oven will automatically shut off and the Display will show the time of day if food has not been placed in the oven within 30 minutes The Display will show the programmed cooking time The Display will count down the c...

Страница 22: ...ob for 2 seconds then Errl Err will stay on the Display until probe is removed Remove probe Close door The Display will return to the previous display setting Touch START Using BROIL TIME The BROIL TIME cycle automatically cooks food Items at 450 F in convection cooking This cycle can be set up to 199 minutes 99 seconds of cooking time No other cooking cycle can be used with Broil Time This cycle ...

Страница 23: ...ust before the broiling time is up If food needs more cooking time add before broil time is finished This prevents the oven from going into another PREHEATcycle When the Broil Time cycle ends End will show on the Display and 4 beeps will sound You can stop the beeping by opening the door or by touching CANCEL End will remain on the Display and a beep will sound every 60 seconds to remind you that ...

Страница 24: ...O twice the desired cooking time then START The oven will preheat to set temperature and hold for up to 30 minutes Place food in the oven and touch START DO THIS THIS HAPPENS Ei ii l I 1 Touch ROAST TIME COMBO 2 Touch the Number Pads for the desired cooking time The COMBO Indicator Light will come on and the Display will show 0OO OO The Display will show the numbers you touched in the order you to...

Страница 25: ...ting before or after starting the oven touch TEMP RESET touch the number pads for new temperature setting then touch START l To change the microwave Cook Power before or after starting the oven touch COOK POWER touch the number pad for the new power level then START l The oven will not accept roasting time longer than 199 minutes 99 seconds It also will not accept a 5 digit number beginning with 2...

Страница 26: ...rammed for that pad will show on the Display for 5 seconds Then the Drsplay will return to the previous display 2 To stop the oven while it is running l Open the door The oven will stop You can restart it by closing the door and touching START l Touch CANCEL All instructions will be erased You must touch in new instructions 3 If you touch two instructions into the same cycle the second set of inst...

Страница 27: ... air intake open ings on the back and the bottom of the oven Blocking vent or air intake openings can cause poor cooking results Make sure the oven legs are in place Do not set the oven on anything that will block the air intake openings 2 Put the oven on a cart counter table or shelf that is strong enough to hold the oven the food and the utensils you put in it The control panel side of the unit ...

Страница 28: ...e installed by a qualified electrician Consult a qualified electrician if the ground ing Instructions are not completely under stood or if doubt exists as to whether the appliance is properly grounded It is NOT recommended to use an extension cord with your oven but if you find it neces sary to do so temporarily until a properly grounded and poloraized 3 prong recep tacle is installed use only a h...

Страница 29: ... directions provided with cleaner l Wash rinse and dry well with a soft cloth l Do not use abrasive or harsh cleansers l Clean after each use l Wipe down oven interior when cool l Follow directions provided with cleaner Do not let oven cleaner get in holes on the back wall of the oven cavity Top of oven CAUTION GREASE OR SOIL ACCUMULATION MAY CAUSE SLOWER COOKING TIMES OR CAUSE A FIRE HAZARD Soft ...

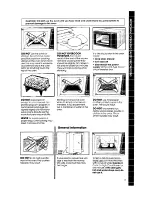
Страница 30: ...lly cylindri cal shaped containers may become overheated The liq uid may splash out with a loud noise during or after heating or when adding ingredients coffee etc resulting in harm to the oven and possible per sonal injury For best results stir any liquid several times before heating or reheating DO NOT heat store or use flammable or inflammable materials in or near the oven NEVER lean on the doo...

Страница 31: ...oil and set aside for 5 minutes They will finish cooking while standing If a fire should start in the oven cavity l keep door closed 0 turn oven off l disconnect the power supply at the cord fuse box or circuit breaker box Starting a microwave oven DO NOT use newspaper when it s empty is not recom or other printed paper in the mended If vou experiment oven Fire could result put a container of wate...

Страница 32: ... be running slower than usual l Has the oven been stored in a cold area The fan will run slower until the oven warms up to normal room temperature If smoke is coming from back of oven during broiling l This is normal just as in conventional broiling If the fan keeps running after convection cooking It is normal for the fan to keep running after convection cooking The fan will even run when the doo...

Страница 33: ...u prefer write to Mr Robert Stanley Division Vice President Whirlpool Corporation 2000 M 63 Benton Harbor Ml 49022 5 If you need FSP replacement parts FSP is a registered trademark of Whirlpool Corporation for quality parts Look for the sym bol of quality whenever you need a replace ment part for your Whirlpool appliance FSP replacement parts will fit right and work right because they are made to ...

Страница 34: ...Notes 34 ...

Страница 35: ...Notes ...

Страница 36: ...e the microwave product 3 Replace house fuses or correct house wiring 4 Replace owner accessible light bulbs B Repairs when microwave product is used in other than normal single family household use C Pick up and delivery This product is designed to be repaired in the home D Damage to microwave product caused by accident misuse fire flood acts of God or use of products not approved by Whirlpool E ...

Отзывы: