background image

25 

Interruptor de 
Encendido./ 
Electronic 
ignition switch 

Foco de Horno 
40 W. 
Oven bulb 40 W. 

Módulo de Encendido. / 
Ignition module. 
14 W. 

Interruptor 
de Luz de 
Horno./ 
Oven light 
switch. 

Troubleshooting 

Before calling to Service, prove the solutions here suggested. 

Problem 

Check over 

Solution 

Nothing works 

If wiring is properly connected and polarized energy supply 

Connect to a properly grounded 

Has blown a fuse in the house or tripped circuit breaker 

Replace fuse or reconnect the circuit 

If there is gas in your home, check if other gas appliances that use 
work 

Call your gas supplier 

If the stove is properly connected to the gas supply 

See the operating instructions or contact an expert. 

Burners do not work 

If there is gas in your home, check if other gas appliances that use 
work 

Call your gas supplier  

If clogged burner orifice 

Remove the burners and See the operating instructions 
of burners. 

Burner flames are uneven, 
yellow and / or noisy 

If you are properly positioned the burner caps 

Check burner operation section. 

Type of gas being used at home (LP Gas). 

If not using LP gas, the conversion must be made, 
contact an authorized service technician. 

The burner makes popping 

That is not the burner wet or cap. 

Let it dry 

The spark plug does not 
trigger 

The heater is connected to a power source 

Connect to properly grounded power 

There sparking and will not turn 

Call an authorized service 

Excessive heat around 
cookware on cooktop 

The size of the cooking utensil 

Check the location and size of pan. 

The oven does not work or 
does not light 

Cooking time and temperature selected 

See recipe and preheat schedule. 

Type of gas being used at home (LP Gas). 

If not using LP gas, the conversion must be made, 
contact an authorized service technician. 

The heater is connected to a power source 

Connect to a properly grounded 

The activation of the knob 

See the operation section of oven 

The oven burner flames 
are uneven, yellow and / or 
noisy 

Type of gas being used at home (LP Gas). 

If not using LP gas, the conversion must be made, 
contact an authorized service technician. 

The oven temperature is 
too high or too low 

The calibration setting oven temperature 

See the section "Adjust oven burner flame." 


Diagramas Eléctricos/ Wiring diagrams 


Modelos/ Models:

 LWF5050, LWF5150, LWF5350, & LWF6050. 


Modelos/ Models:

 LWF5550, LWF6550, LWF7650. 


Interruptor de 
Encendido./ Electronic 
ignition switch 

26 

Interruptor Luz de 
Horno./ Oven light 
switch. 

Foco de Horno  
40 W./ Oven bulb 
40W. 

Módulo de Encendido/ 
Ignition module. 

Interruptor de Luz 
de Horno en 
puerta./ Oven light 
switch in oven 
door. 

12-Apr-2013 19:18:08 EDT | RELEASED

In some European factories the letter "W" of the part code mentioned herein will be automatically

replaced by the number "4000" (e.g. "W12345678" becomes "400012345678")

Содержание LWF5050

Страница 1: ...N Y USO LEA CUIDADOSAMENTE ESTE INSTRUCTIVO ANTES DE USAR POR PRIMERA VEZ SU ESTUFA LWF5050 LWF5150 LWF5350 30 GAS RANGE INSTRUCTIONS MANUAL INSTALLATION AND USE GUIDE PLEASE READ THIS DOCUMENT CAREFULLY BEFORE USING YOUR RANGE FOR THE FIRST TIME 12 Apr 2013 19 18 08 EDT RELEASED In some European factories the letter W of the part code mentioned herein will be automatically replaced by the number ...

Страница 2: ...arantía 27 Servicio 29 TABLE OF CONTENTS Range safety 17 Electrical Specifications for Power Supply 17 Range installation 17 Recommendations 18 Installation 18 Location Requirements 18 Gas Supply Requirements 19 Connect the Gas Supply Line 19 Electrical Requirements 20 Accessories Installation 20 Testing your Range 20 Adjusting the flames 21 Range Use 22 Cooktop Controls 22 Power Shutdown 22 Cookt...

Страница 3: ...uridad Éste es el símbolo de alerta para seguridad Este símbolo es una alerta que lo previene de daños o incluso muerte a usted y a los demás Todos los mensajes de seguridad estarán seguidos del símbolo de alerta de seguridad y además de la palabra PELIGRO o ADVERTENCIA Estas palabras significan Usted puede sufrir heridas o incluso la muerte si no sigue las instrucciones inmediatamente Usted puede...

Страница 4: ...mador 4 coronas ó Rápido 10 800 kJ h 10 8 MJ h 10 200 BTU 1 Quemador Simmer ó Semirápido 3 800 kJ h 3 8 MJ h 2 800 BTU 1 Quemador de horno 13 600 kJ h 13 6 MJ h 13 000 BTU Instalación de la Estufa Conserve estas instrucciones para referencia futura Leer las instrucciones técnicas antes de instalar este artefacto Leer las instrucciones de uso antes de encender este artefacto Antes de la instalación...

Страница 5: ...el gabinete B 33 0 cm max Profundidad del gabinete superior C 76 2 cm ancho min Requerido en el gabinete superior D Distancia min 61 cm a partir de la cubierta que permita abrir el capelo E 76 5 cm min de ancho de apertura F Esta área sombreada es la recomendada para salida de la instalación eléctrica G Esta área sombreada es la recomendada para la instalación del tubo de gas rígido H 5 1 cm espac...

Страница 6: ...uede ser distinta de acuerdo con el tipo de línea de suministro tamaño y ubicación 1 Para conectar su estufa utilice el material especificado en la siguiente figura 2 Una vez conectado su línea de gas ABRA el paso de gas y verifique que no existan fugas vertiendo espuma de jabón en las conexiones y curvas de los tubos 3 Verifique que el tubo de cobre no esté dañado o doblado de manera que obstruya...

Страница 7: ...rizada Terminada la conexión a la línea de gas conecte la estufa a la corriente eléctrica Características Eléctricas Nominales Voltaje 105 140 V Frecuencia 50 60 Hz Corriente 1 0 A Max Instalación de Accesorios Instalación del Respaldo Estufa en algunos modelos Si su estufa cuenta con respaldo para su correcta instalación siga los siguientes pasos 1 Desempaque el respaldo que se encuentra en la pa...

Страница 8: ...lama no enciende después de 5 segundos o la chispa no se oye realice los siguientes pasos a Retorne la perilla a la posición de apagado y suelte el interruptor si su estufa es de encendido de botón b Asegúrese de haber conectado el cable tomacorriente sin él el interruptor y las bujías no pueden trabajar c Verifique que haya suministro de gas ya sea en el tanque o en la línea También revise que la...

Страница 9: ... no se genera la chispa o la flama del quemador no enciende revise lo siguiente a Asegúrese de haber conectado el cable tomacorriente sin corriente eléctrica la bujía no puede trabajar b Si la flama no enciende gire la perilla a la posición de apagado y verifique que haya suministro de gas ya sea en el tanque o en la línea También revise las conexiones y tubos podrían estar doblados o bloqueados c...

Страница 10: ...ra 6 Si la flama estaba amarilla es necesario abrir la ventana Cuando la flama es inestable o se separa del quemador es necesario cerrar ligeramente la ventana 7 Cuando termine de ajustar la ventana apriete el tornillo del regulador y retorne el quemador a su posición original alineándolo con la esprea posterior y revisando que los cables salgan hacia la parte posterior de la estufa 8 Coloque el t...

Страница 11: ...ueda provocar un mal funcionamiento de su estufa Tapa del quemador Estándar Cuando use los quemadores superiores mantenga siempre la tapa del quemador en su lugar La tapa limpia del quemador ayudará a prevenir el encendido inadecuado y las llamas desiguales Siempre limpie la tapa del quemador después de un derrame y como rutina quite y limpie las tapas y bases tal como lo indica la sección Cuidado...

Страница 12: ... parrilla Cerciórese de que ningún utensilio para hornear esté directamente encima del otro Quemador Ø de recipiente 4 coronas De 24 a 26 cm Super De 24 a 26 cm Estandar De 16 a 22 cm Simmer De 8 a 14 cm ANTES DE USAR POR PRIMERA VEZ Lavar el comal con agua con jabón limpie y seque totalmente cubra la superficie del comal con aceite vegetal y limpie el exceso con una toalla de papel No dejar vacío...

Страница 13: ...n del quemador En el evento de que se extingan accidentalmente las llamas del quemador apague el control del quemador y no intente volver a encender por lo menos durante 1 min Parrillas del horno Dependiendo del modelo de su estufa las parrillas interiores del horno pueden ser deslizadas de manera manual o pueden tener un sistema para hacerlas auto deslizables cuando se abre la puerta de horno Des...

Страница 14: ...ones de las etiquetas de los productos de limpieza comerciales A menos que se indique lo contrario se recomienda utilizar agua jabón y un paño suave o una esponja como material primario de limpieza No utilice sosa cáustica o productos de limpieza que la contengan para limpiar la estufa De no seguir esta instrucción se ocasionarán daños permanentes en las superficies donde se aplique Cubierta Acero...

Страница 15: ...or por su cuenta Póngase en contacto con un técnico de reparación competente Quemadores tipo simmer en algunos modelos NO COLOQUE LAS TAPAS DE LOS QUEMADORES MIENTRAS ESTÉN HÚMEDAS HÁGALO HASTA QUE ESTÉN BIEN SECAS Perillas de Control Método de limpieza Trapo húmedo Para mantener en buen estado su quemador simmer de su estufa es necesario realizarles limpieza periódica o cada vez que haya un derra...

Страница 16: ... Llame a su proveedor de gas Si la estufa está bien conectada al suministro de gas Vea las instrucciones de operación o póngase en contacto con un especialista Quemadores superiores no funcionan Si hay gas en su casa verifique si otros aparatos domésticos que empleen gas funcionan Llame a su proveedor de gas Si están obstruidos los orificios del quemador Retire los quemadores y Ver las instruccion...

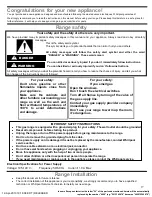
Страница 17: ...ations and damage IMPORTANT SAFETY INSTRUCTIONS This gas range is equipped with a grounded plug for your safety The wall outlet should be grounded Reset all components before starting the product Unplug the range or turn off the power supply before giving maintenance to the range Don t cut or remove the grounded plug from the cable If the power supply cord is damaged it must be replaced by the man...

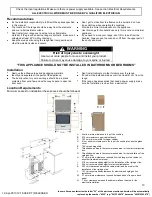
Страница 18: ... be installed make sure it is at least 61 cm from the range If the range has accessories that need a power supply make sure the installation is close from a wall outlet Location Requirements Minimum spaces for installation these spaces should be followed A 46 min minimum distance to top of the cooktop B 33 0 cm maximum upper cabinet depth C 76 2 cm minimum width for upper cabinet D 61 cm minimum c...

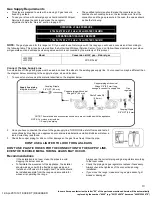
Страница 19: ...e TURN ON the shutoff valve and test all connections by brushing on an approved noncorrosive leak detection solution Bubbles will show a leak Correct any leak found 3 Check the cooper piping for kinks or other damage so the gas flows freely throw the pipe DON T USE A LIGHTER TO LOOK FOR GAS LEAKS DON T USE PLASTIC HOSES FOR THE CONNECTION TO THE SUPPLY LINE EVEN THE FLEXIBLE METAL TUBING LEAKS MAY...

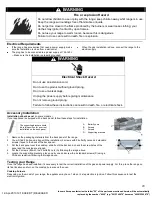
Страница 20: ...il the back end check the screw holes of the panel and the cooktop are aligned 4 Put the 2 screws B with the 2 butterfly nuts A following the image above 5 Locate the supporting brackets place one by one and screw the 4 standard screws C using a Phillips screwdriver following the image above Testing your Range Once the range has been installed it s necessary to test the correct installation of the...

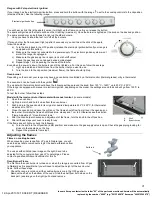
Страница 21: ...50 C to 250 C To test the burner follow these steps Model with thermal control or thermostat with manual control in some models 1 Open the oven door 2 Light up a match and hold it close from the oven burner 3 Push and turn the oven knob to its original or desired temperature 235 C 250 C for thermostat models set to 150 C 4 Close the oven door and open the grill door The flame should flow from all ...

Страница 22: ...ure the pigtail is set to the back of the range 8 Place the screw with the washer holding the frontal range frame and the burner Tighten the screw 9 Connect the power cable or turn on the power supply 10 Turn on the burner again following the steps on section Testing your Range Oven Burner If the flame is steady and blue the range is ready to use Otherwise wait until the range is cold and return t...

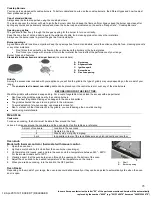
Страница 23: ... and soap and dry Put a coat of vegetable oil and clean the excess with a paper towel Don t leave the griddle empty nearby the cooktop burners Don t preheat the griddle Damage can happen to the non stick surface The griddle shouldn t be used to cook grill or in the microwave To avoid splashing fat when cooking use moderate oil and fat Don t cut meat or other food directly in the griddle you could ...

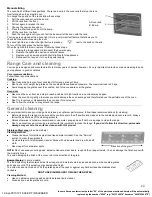
Страница 24: ...ance of the oven Don t try to remove or disassemble the oven door for any reason Don t allow the children to play around the range General cleaning It s very important to keep your range clean to keep an optimum performance follow these recommendations for cleaning Before cleaning the range make sure all the controls are in the off position and make sure the cooktop and oven are cold Always follow...

Страница 25: ...ome models To keep the cooktop burners fully functional it s necessary to perform periodic cleaning or clean every time a liquid spills over the burner Follow these steps 1 Remove the grates 2 Remove the cap the burner and wash with soapy water and a sponge Rinse deeply and dry 3 Clean the gas line opening with a wet cloth 4 When the burners are dry replace each one along with the burner cap Make ...

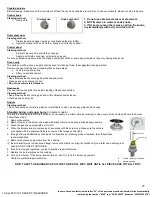
Страница 26: ...nected to a power source Connect to properly grounded power There sparking and will not turn Call an authorized service Excessive heat around cookware on cooktop The size of the cooking utensil Check the location and size of pan The oven does not work or does not light Cooking time and temperature selected See recipe and preheat schedule Type of gas being used at home LP Gas If not using LP gas th...

Страница 27: ...27 27 12 Apr 2013 19 18 08 EDT RELEASED In some European factories the letter W of the part code mentioned herein will be automatically replaced by the number 4000 e g W12345678 becomes 400012345678 ...

Страница 28: ...27 28 12 Apr 2013 19 18 08 EDT RELEASED In some European factories the letter W of the part code mentioned herein will be automatically replaced by the number 4000 e g W12345678 becomes 400012345678 ...

Страница 29: ...7 29 12 Apr 2013 19 18 08 EDT RELEASED In some European factories the letter W of the part code mentioned herein will be automatically replaced by the number 4000 e g W12345678 becomes 400012345678 ...

Страница 30: ...C V Unidad Celaya Carretera Panamericana Km 280 C P 38020 Celaya Gto Tel 01 461 6 18 55 00 30 12 Apr 2013 19 18 08 EDT RELEASED In some European factories the letter W of the part code mentioned herein will be automatically replaced by the number 4000 e g W12345678 becomes 400012345678 ...

Страница 31: ...OTAS NOTES 31 12 Apr 2013 19 18 08 EDT RELEASED In some European factories the letter W of the part code mentioned herein will be automatically replaced by the number 4000 e g W12345678 becomes 400012345678 ...

Страница 32: ...OTAS NOTES 32 12 Apr 2013 19 18 08 EDT RELEASED In some European factories the letter W of the part code mentioned herein will be automatically replaced by the number 4000 e g W12345678 becomes 400012345678 ...

Отзывы: