background image

9

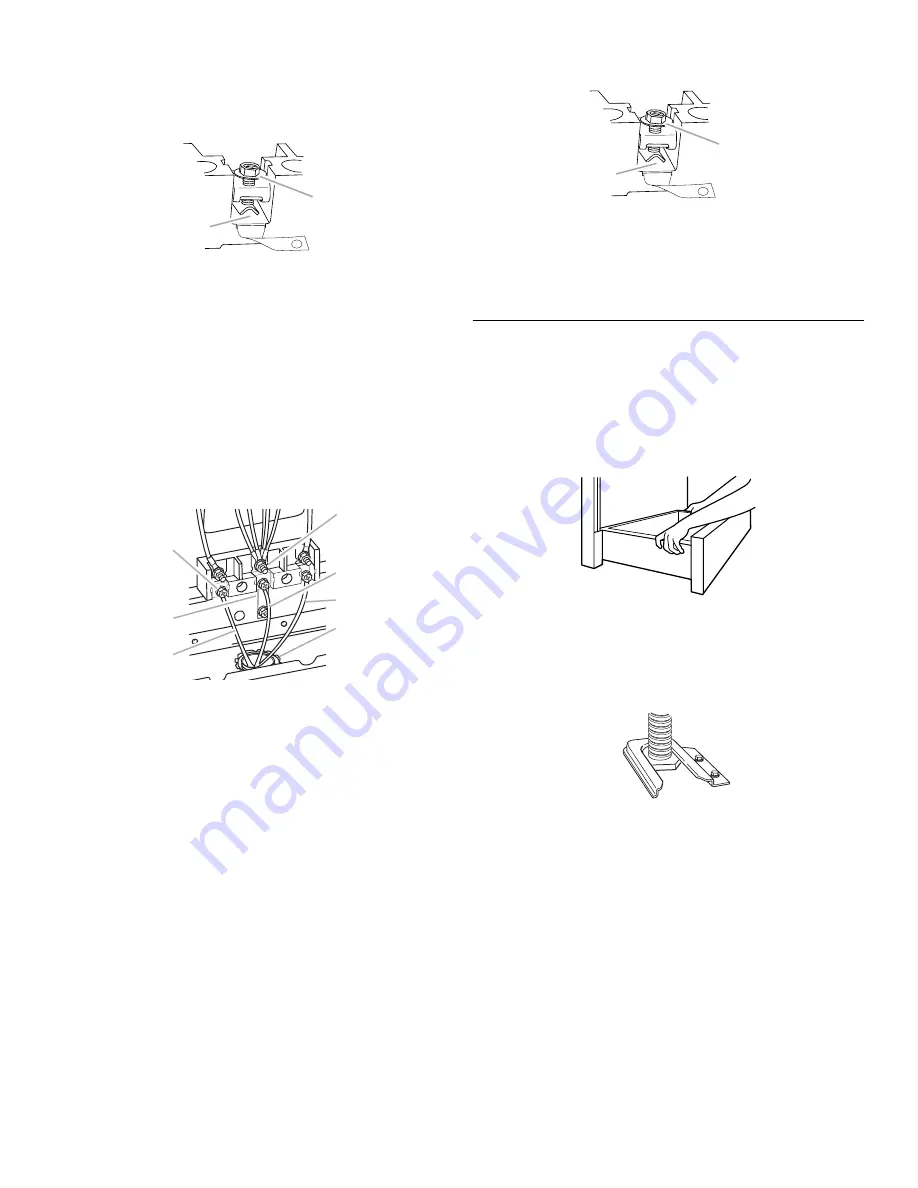
3. Loosen (do not remove) the hex washer head screw and insert 

the neutral (white) wire under the screw clamp at the bottom 
of the center position terminal connector.

4. Insert the other 2 wires (lines 1 and 2) under the other 2 screw 

clamps.

5. Securely tighten the hex washer head screws to 35 in.-lbs 

minimum torque to make proper electrical connection.

6. Tighten the locking ring of the conduit connector.
7. Replace the terminal block cover.

3-wire connection: Direct wire

Use this method only if local codes permit connecting ground 
conductor to neutral supply wire.
1. Loosen (do not remove) the hex washer head screws and 

insert the neutral (white) wire under the screw clamp at the 
bottom of the center position terminal connector.

2. Insert the other 2 wires (lines 1 and 2) under the other 2 screw 

clamps.

3. Securely tighten the hex washer head screws to 35 in.-lbs 

minimum torque to make a proper electrical connection.

4. Tighten the locking ring of the conduit connector.
5. Replace the terminal block cover.

Verify Anti-Tip Bracket Location

1. Move range close to cabinet opening.
2. Remove cardboard or hardboard from under range. Gently 

move range into its final location.

3. Pull drawer open to first stop position. Lift front of drawer to 

clear white wheels in drawer guides. Remove drawer and set it 
aside on a protected surface.

4. Making sure the anti-tip bracket is installed:

Look for the anti-tip bracket securely attached to floor.

Slide range back so rear range foot is under anti-tip 
bracket.

5. If installing the range in a mobile home, you must secure the 

range to the floor. Any method of securing the range is 
adequate as long as it conforms to the standards in the 
“Location Requirements” section.

A. Insert wire under screw clamp.
B. Hex washer head screw

A. Line 1
B. Ground-link

C. Hex washer head screw
D. Silver-colored terminal 

block screw

E. Neutral (white) wire

F. Line 2

G. UL listed conduit 

connector and power 
supply cable

A

B

A

B

C

D

E

F

G

A. Insert wire under screw clamp.
B. Hex washer head screw

A

B

Содержание GR563LXS

Страница 1: ...sly injured if you don t follow All safety messages will tell you what the potential hazard is tell you how to reduce the chance of injury and tell you what can happen if the instructions are not followed Your safety and the safety of others are very important We have provided many important safety messages in this manual and on your appliance Always read and obey all safety messages This is the s...

Страница 2: ...dimensions are minimum clearances The floor anti tip bracket must be installed To install the anti tip bracket shipped with the range see Install Anti Tip Bracket section Grounded electrical supply is required See Electrical Requirements section IMPORTANT Some cabinet and building materials are not designed to withstand the heat produced by the oven for baking and self cleaning Check with your bui...

Страница 3: ...rotected wood or metal cabinet A 27 68 9 cm depth with handle 28 71 6 cm depth with handle KitchenAid models only B 46 119 1 cm overall height 46 116 8 cm overall height KitchenAid models only C 36 91 4 cm cooktop height D 29 75 9 cm width E 24 63 cm depth A B C D E A 4 10 2 cm min clearance from both sides of range to side wall or other combustible material B 18 45 7 cm upper side cabinet to coun...

Страница 4: ...onnections must conform with the rating of the range The wiring diagram is located on the back of the range or inside the storage drawer in a clear plastic bag If connecting to a 4 wire system This range is manufactured with the ground connected to the cabinet The ground must be revised so the green grounding wire of the 4 wire power supply cord is connected to the cabinet See Electrical Connectio...

Страница 5: ...floor To mount anti tip bracket to concrete or ceramic floor use a 4 8 mm masonry drill bit to drill 2 holes at the positions marked on the bracket template Remove template from floor 6 Tap plastic anchors into holes with a hammer 7 Align anti tip bracket holes with holes in floor Fasten anti tip bracket with screws provided Depending on the thickness of your flooring longer screws may be necessar...

Страница 6: ...cal Shock Hazard Disconnect power before servicing Use 8 gauge copper or 6 gauge aluminum wire Electrically ground range Failure to follow these instructions can result in death fire or electrical shock A Two mounting tabs each side B Terminal block cover C Hex head screws A B C If your home has And you will be connecting to Go to Section 4 wire receptacle NEMA type 14 50R A UL listed 250 volt min...

Страница 7: ... this method for New branch circuit installations 1996 NEC Mobile homes Recreational vehicles In an area where local codes prohibit grounding through the neutral 1 Remove the ground link screw from the range frame Save the ground link screw and cup washer Bend the ground link away from the range so that it does not contact the range 2 Connect the green ground wire from the power supply cord to the...

Страница 8: ...Allow enough slack in the wire to easily attach the wiring terminal block 5 Complete electrical connection according to your type electrical supply 4 wire or 3 wire electrical connection 4 wire connection Direct wire Use this method for New branch circuit installations 1996 NEC Mobile homes Recreational vehicles In an area where local codes prohibit grounding through the neutral 1 Remove the groun...

Страница 9: ...al connection 4 Tighten the locking ring of the conduit connector 5 Replace the terminal block cover Verify Anti Tip Bracket Location 1 Move range close to cabinet opening 2 Remove cardboard or hardboard from under range Gently move range into its final location 3 Pull drawer open to first stop position Lift front of drawer to clear white wheels in drawer guides Remove drawer and set it aside on a...

Страница 10: ...horoughly with a soft cloth For more information read the Range Care section of the Use and Care Guide 6 Read Range Use in the range Use and Care Guide 7 Plug into a grounded outlet Turn power on 8 Turn on surface burners and oven See the Use and Care Guide for specific instruction on range operation If range does not operate check the following Household fuse is intact and tight or circuit breake...

Страница 11: ...11 ANTI TIP BRACKET TEMPLATE Cut on dotted lines and place the left edge against the left side cabinet and the top edge against the rear wall Left edge Top edge ...

Страница 12: ...9762996 2005 All rights reserved 11 05 Printed in U S A ...

Отзывы: