background image

I

CONSUMER SERVICES TECHNICAL

EDUCATION GROUP PRESENTS

R-91

JOB AID

Part No. 4322583

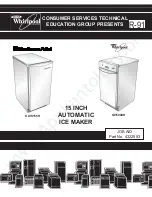
15 INCH

AUTOMATIC

ICE MAKER

KUIS155H

GI1500XH

www.Appliantology.org

Содержание GI1500XH

Страница 1: ...I CONSUMER SERVICES TECHNICAL EDUCATION GROUP PRESENTS R 91 JOB AID Part No 4322583 15 INCH AUTOMATIC ICE MAKER KUIS155H GI1500XH w w w A p p l i a n t o l o g y o r g ...

Страница 2: ...s for the 90 s Part Number 4321717 Rev A A companion VHS video tape Sweep Charge Procedures for the 90 s Part Number 4321718V is also available GOALS AND OBJECTIVES The goal of this Job Aid is to provide detailed information that will enable the service technician to properly diagnose malfunctions and repair of the 15 inch automatic ice maker The objectives of the Job Aid are The service technicia...

Страница 3: ...TION THEORY OF OPERATION Operating Systems 3 Operational Cycles 6 SECTION THREE COMPONENT ACCESS COMPONENT ACCESS COMPONENT ACCESS COMPONENT ACCESS COMPONENT ACCESS Component Location 9 Accessing the Control Box 10 Accessing Component in the Control Box 11 Accessing the Component Compartment 13 SECTION FOUR TROUBLESHOOTING AND DIAGNOSIS TROUBLESHOOTING AND DIAGNOSIS TROUBLESHOOTING AND DIAGNOSIS T...

Страница 4: ...G ELECTRICAL SHOCK HAZARD Disconnect power before servicing the ice maker Replace all panels before operating the ice maker Failure to do so can result in death or electrical shock w w w A p p l i a n t o l o g y o r g ...

Страница 5: ...V w w w A p p l i a n t o l o g y o r g ...

Страница 6: ...VI CORPORATION w w w A p p l i a n t o l o g y o r g ...

Страница 7: ...the only appliance plugged into the receptacle Do not use an extension cord Do not use a receptacle that is controlled by a wall switch ELECTRICAL GROUND IS REQUIRED ON THIS APPLIANCE DO NOT UNDER ANY CIRCUM STANCES REMOVE THE POWER SUPPLY CORD GROUND PRONG WATER CONNECTION REQUIREMENTS Materials needed for installation OD copper tubing outlet saddle type shut off valve part no 541057 x tube union...

Страница 8: ...2 NOTES w w w A p p l i a n t o l o g y o r g ...

Страница 9: ...r or freezer The refrigerant used in this unit is R 134a There are two very important additions to the refrigeration system in the ice maker Hot Gas Valve This valve allows high pressure refrigerant gas to bypass the condenser and flow through the condenser accumulator tube Condenser Accumulator Tube the hot gas pushes liquid refrigerant in the accumulator tube into the evaporator helping to evenl...

Страница 10: ...art in Section Five TROUBLESHOOTING and DIAGNOSTICS page 16 A water softener or polyphosphate feeder will not cure all the problems associated with hard water but they can be used to reduce scale buildup in the ice maker NOTE Some polyphosphate feeders will cause a slime buildup in the water system when the water supply has a low mineral content DISTRIBUTOR EVAPORATOR FREEZING PLATE CUTTING GRID W...

Страница 11: ... maker s electrical system provides power for the refrigeration and water systems to operate and controls the operational cycling of the ice maker Wiring Diagram shows unit in Ice Making Mode w w w A p p l i a n t o l o g y o r g ...

Страница 12: ...of the heat exchanger to the compressor During ICE MAKING cycle some of the hot gas that is in the condenser accumulating tube condesnses to a liquid and remains in the accumulating tube During the later stages of the ICE MAKING cycle as the ice slab forms on the evaporator freezing plate some of the refrigerant passing through the evaporator will not evaporate into a gas but will remain a liquid ...

Страница 13: ...g water to flow into the water reservoir pan As the reservoir fills the mineral laden water from the previous ICE MAKING cycle is flushed out the overflow tube As a result of the hot gas flow and the and the ice sliding off evaporator plate the temperature rises and the evaporator thermistor switches the unit to the ICE MAKING cycle This cycling between the ICE MAKING cycle and the HARVEST cycle c...

Страница 14: ...UMP COMPRESSOR LED DIAGNOSTICS 5 CLEAN CYCLE 47 MINUTES 5 5 5 5 Clean Cycle Electrical System In the electrical system power is supplied to the water recirculating pump through the service control switch Water System In the water system water recirculating pump circulates the cleaning solution that has been added to the reservoir up to the distributor across the evaporator and back into the reserv...

Страница 15: ...Voltage Transformer Light Switch Electronic Control Board Push Button Switches LED Evaporator Plate Cutter Grid Water Recirculating Pump Compressor Condenser Fan Water Inlet Valve Condenser Hot Gas Valve Behind condenser w w w A p p l i a n t o l o g y o r g ...

Страница 16: ...doors Fig 3 7 Removing the Control Box Escutcheon 1 Disconnect the Ice Maker fro the electrical power supply 2 Remove the two 2 Phillips Head screws securing the control box escutch eon to the mounting plate Fig 3 8 Re move the control box escutcheon from the mounting plate and disconnect the wires from the switch assembly terminals Set the con trol box escutcheon aside 3 Remove the four 4 Hex hea...

Страница 17: ...ad screw from the key slot in the left side mounting bracket and pull the cutter grid from the cabinet 5 Remove the four 4 Hex head screws securing the control box to the top of the ice maker cabinet Fig 3 5 NOTE The screws at the front of the control box are recessed Three 3 Screws Fig 3 4 Remove This Screw Loosen This Screw ACCESSING THE COMPONENTS IN THE CONTROL BOX This procedure is the same f...

Страница 18: ...button switch assembly can be removed with the control box remaining in the service posi tion 1 Disconnect the wires from the switch assembly terminals 2 Remove the decorative overlay from the front of the control box Fig 3 10 3 Press in on the four locking tabs at the back of the switch assembly and push the entire switch assembly NOTE If the push button switch assembly must be replaced the servi...

Страница 19: ...tion It may be necessary to disconnect the water supply line and drain line from the ice maker 3 Turn the front leveling legs out until they disengage from the cabinet Fig 3 14 4 Remove the two 2 front bolts securing the component compartment base to the cabinet 5 Tilt the entire ice maker cabinet back far enough to gain access to the component compart ment Fig 3 15 Be careful not to kink any of t...

Страница 20: ...resent in these lines Have a small pail available to bleed lines Fig 3 18 Removing the Hot Gas Solenoid The hot gas valve can be serviced with the unit tilted back in the service position 1 Disconnect the wiring harness plug from the solenoid terminals 2 Remove the hex head screw securing the solenoid to the mounting bracket Fig 3 19 Fig 2 19 Screw Solenoid The water valve can be serviced with the...

Страница 21: ...trates Temporary Hardness Calcium or Magnesium Carbonates Staining Aesthetics only Scale Scale 1 Ice Machine Cleaner P N 8171307 2 Water softener AND iron filter 1 Abrasive cleaning 2 Polyphosphate feeder or water softener reduces or eliminates need for abrasive cleaning 1 Liquid or nickel safe ice machine cleaner 2 Polyphosphate feeder or water softener reduces frequency of cleaning by 50 RECOMME...

Страница 22: ... 8 7 VAC 3 The transformer cutter grid and electronic control board remain energized in ON and CLEAN modes THERMISTOR OPERATING PARAMETERS EVAPORATOR THERMISTOR ICE THICKNESS NORMAL THICK THIN CUT IN CUT OUT WATER VALVE OFF during harvest Temperature 52 5 F 3 52 5 F 3 52 5 F 3 Resistance 18 7kΩ Ω Ω Ω Ω 1 18 7kΩ Ω Ω Ω Ω 1 18 7kΩ Ω Ω Ω Ω 1 Temperature 6 5 F 3 4 5 F 3 8 5 F 3 Resistance 69 3kΩ Ω Ω Ω ...

Страница 23: ...17 SECTION FIVE TECH TIPS WIRING DIAGRAM Wiring Diagram shows unit in Ice Making Mode w w w A p p l i a n t o l o g y o r g ...

Страница 24: ...st Mode NOTE If the unit is run throught the Ice Maing Mode with no water running across the Evaporator Plate a complete frost pattern will appear After three 3 minutes the unit will go into the Harvest Mode w w w A p p l i a n t o l o g y o r g ...

Страница 25: ...itch on the Electronic Control Board closes for five 5 seconds in consecutive order LED remains on through entire Diagnostic Cycle 3 Last 47 Minutes of Diagnostics Clean Mode LED reamins on throughout entire Clean Cycle w w w A p p l i a n t o l o g y o r g ...

Страница 26: ... THICKNESS NORMAL THICK THIN CUT IN CUT OUT WATER VALVE OFF during harvest Temperature 52 5 F 3 52 5 F 3 52 5 F 3 Resistance 18 7kΩ Ω Ω Ω Ω 1 18 7kΩ Ω Ω Ω Ω 1 18 7kΩ Ω Ω Ω Ω 1 Temperature 6 5 F 3 4 5 F 3 8 5 F 3 Resistance 69 3kΩ Ω Ω Ω Ω 1 73 5kΩ Ω Ω Ω Ω 1 65 3kΩ Ω Ω Ω Ω 1 Temperature 40 F 3 40 F 3 40 F 3 Resistance 25 9kΩ Ω Ω Ω Ω 1 25 9kΩ Ω Ω Ω Ω 1 25 9kΩ Ω Ω Ω Ω 1 ICE BIN THERMISTOR BIN SHUT OFF...

Страница 27: ... Ice Thickness 1 3 4 6 THIN 1 3 4 6 THICK P1 CODE 1 3 4 6 NORMAL P1 CODE P1 CODE Cut Out Values 6 5 F 3 69 3kΩ Ω Ω Ω Ω 1 Cut Out Values 4 5F 3 73 5kΩ Ω Ω Ω Ω 1 Cut Out Values 8 5F 3 65 3kΩ Ω Ω Ω Ω 1 w w w A p p l i a n t o l o g y o r g ...

Страница 28: ...tor from short cycling and over heating 3 If the the drain outlet becomes clogged to the point where water will not be allowed to be pumped out or a large volume of water enters the reservoir quickly the high water shut off probe will come in contact with the water If this occurs the signal sent to the electronic control board will trigger a complete shut down of the ice machine The pump motor wil...

Страница 29: ...ectrical tape around the center of the figure 8 Place the wrapped cord between the compressor and the drain pump Install the plug on the power cord to the electrical outlet of the drain pump 10 Line up the two 2 holes at the rear of the pump with the two holes in the unit base and install two 2 8 x hex head screws Fig 3 11 Secure the vent tube to the back of the ice maker using three 3 clamps and ...

Страница 30: ...t Defined YEAR OF INTRODUCTION H 1999 COLOR CODE W White N Almond B Black ENGINEERING CHANGE 0 Basic Release 1 First Revision 2 Second Revision G I 1500 X H N 0 KITCHENAID MODEL NUMBER DESIGNATOR MODEL NUMBER PRODUCT GROUP K KITCHENAID PRODUCT IDENTIFICATION UI Undercounter Ice Maker MERCHANDISING SCHEME S Standard MODEL SIZE 15 15 Width FEATURE VARIATION 5 50 Pounds YEAR OF INTRODUCTION H 1999 CO...

Страница 31: ...lities 3 Damage resulting from accident alteration misuse abuse fire flood acts of God improper installation or installation not in accordance with local electrical or plumbing codes or use of product not approved by KitchenAid 4 Replacement parts or repair labor costs for units operated outside the Untied States 5 Pickup and delivery This product is designed to be repaired in the home 6 Repairs t...

Страница 32: ...ation misuse abuse fire flood acts of God improper installation or installation not in accordance with local electrical or plumbing codes or use of product not approved by Whirlpool 4 Replacement parts or repair labor costs for units operated outside the Untied States 5 Pickup and delivery This product is designed to be repaired in the home 6 Repairs to parts or systems resulting from unauthorized...

Страница 33: ...27 w w w A p p l i a n t o l o g y o r g ...

Страница 34: ...28 w w w A p p l i a n t o l o g y o r g ...

Страница 35: ...29 w w w A p p l i a n t o l o g y o r g ...

Страница 36: ...30 w w w A p p l i a n t o l o g y o r g ...

Страница 37: ...31 w w w A p p l i a n t o l o g y o r g ...

Страница 38: ...32 w w w A p p l i a n t o l o g y o r g ...

Страница 39: ...33 w w w A p p l i a n t o l o g y o r g ...

Страница 40: ...34 w w w A p p l i a n t o l o g y o r g ...

Отзывы: