8
Assembly Instructions
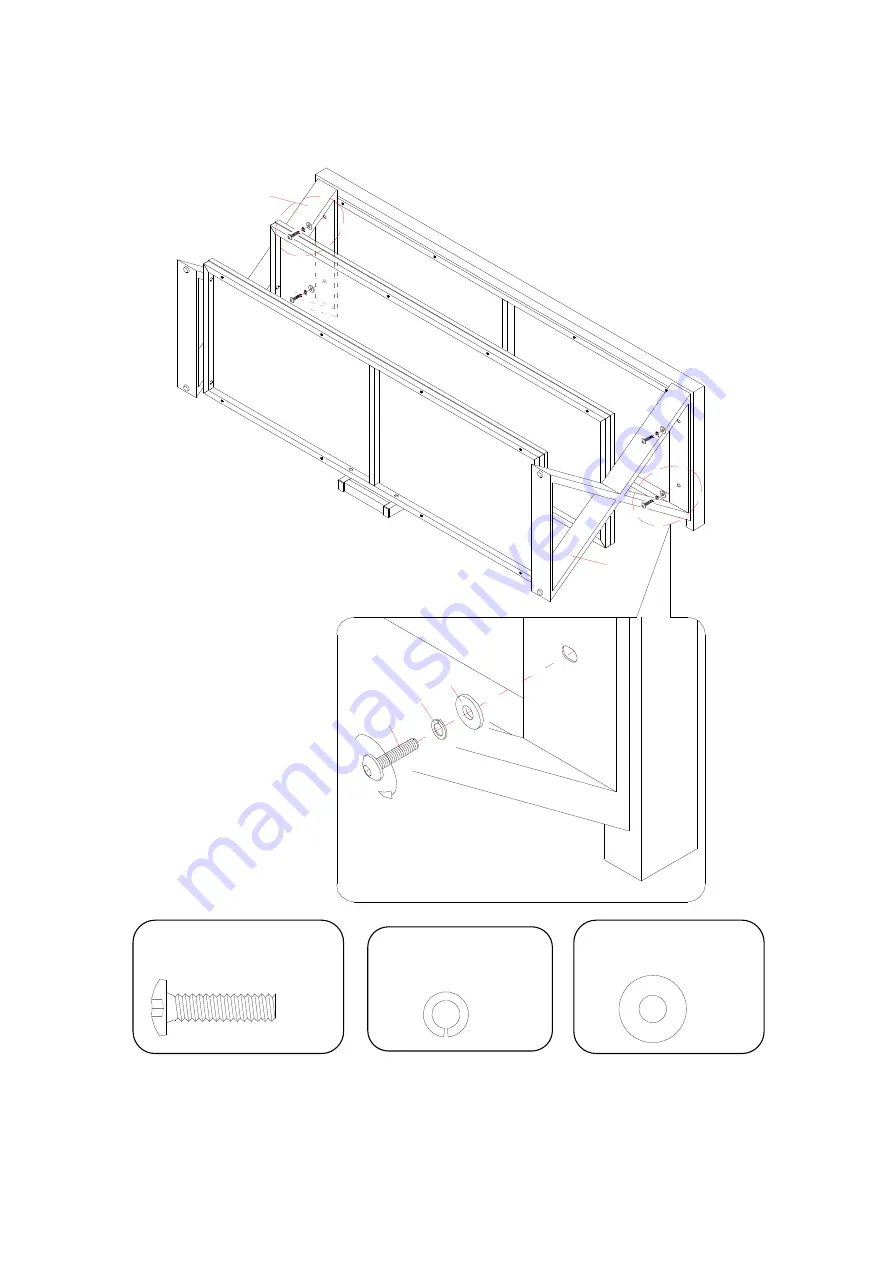
8. Fasten the Top Panel (A) into place with four 1” Bolts (2) and four Washers (4 and 5).
Flat Washer
(4 used in this step)
⑤
Lock Washer
④
1” Bolt
②
E
F
A
E/F
2
4
5
Страница 1: ...sing DO NOT return this item to the store where it was purchased Please call our toll free customer service number and have your instructions and parts list ready to provide the model name part name o...
Страница 2: ...amages When properly installed this restraint can provide protection against the unexpected tipping of the unit due to small tremors bumps or climbing The restraint is only a deterrent and is not a su...
Страница 3: ...f Qty 1 D Back Frame Qty 1 E Left Leg Qty 1 F Right Leg Qty 1 G Cable Wheel Qty 2 1 5 8 Bolt 2 1 Bolt 3 1 1 4 Bolt Qty 4 1 extra Qty 4 1 extra Qty 12 1 extra 4 Lock Washer 5 Flat Washer 6 Acrylic Stop...
Страница 4: ...easier 1 Unpack the unit and confirm that you have all the hardware and required parts 2 Locate the Back Frame D on a level and protective surface with the flush surfaces facing up 3 Fasten the Top Pa...
Страница 5: ...ructions 4 Fasten the Middle Shelf B to the Back Frame D with two 1 1 4 Bolts 3 and two Washers 4 and 5 B D 3 4 5 UP B D Flat Washer 2 used in this step Lock Washer 2 used in this step 1 1 4 Bolt 2 us...
Страница 6: ...ructions 5 Attach the Bottom Shelf C to the Back Frame D with two 1 1 4 Bolts 3 and two Washers 4 and 5 C D 3 4 5 UP C D Flat Washer 2 used in this step Lock Washer 2 used in this step 1 1 4 Bolt 2 us...
Страница 7: ...r Shelf Frames B and C with three 1 1 4 Bolts 3 and three Washers 4 and 5 7 Repeat the same procedure to attach the Right Leg F on the other side Flat Washer 6 used in this step Lock Washer 6 used in...
Страница 8: ...bly Instructions 8 Fasten the Top Panel A into place with four 1 Bolts 2 and four Washers 4 and 5 Flat Washer 4 used in this step Lock Washer 4 used in this step 1 Bolt 4 used in this step E F A E F A...
Страница 9: ...Wheels G onto the backside of the Back Frame D and tighten with the enclosed hex wrench 11 The cable wheels allow you to organize route and separate your component cords and cables to minimize tangli...
Страница 10: ...12 Remove the paper backing from the acrylic stopper 6 then properly align the acrylic stopper into the cut out on the acrylic stopper template on the top panel A Press down on the acrylic stopper to...
Страница 11: ...taining the Tipping Restraint Hardware to attach the tip over restraint to the Back Frame and the wall NOTE Young children can be seriously injured by tipping furniture You must install the Tipping Re...
Страница 12: ...in a climate controlled environment Extreme temperature and humidity changes can cause fading warping shrinking and splitting of wood It is advised to keep furniture away from direct sunlight as sun m...