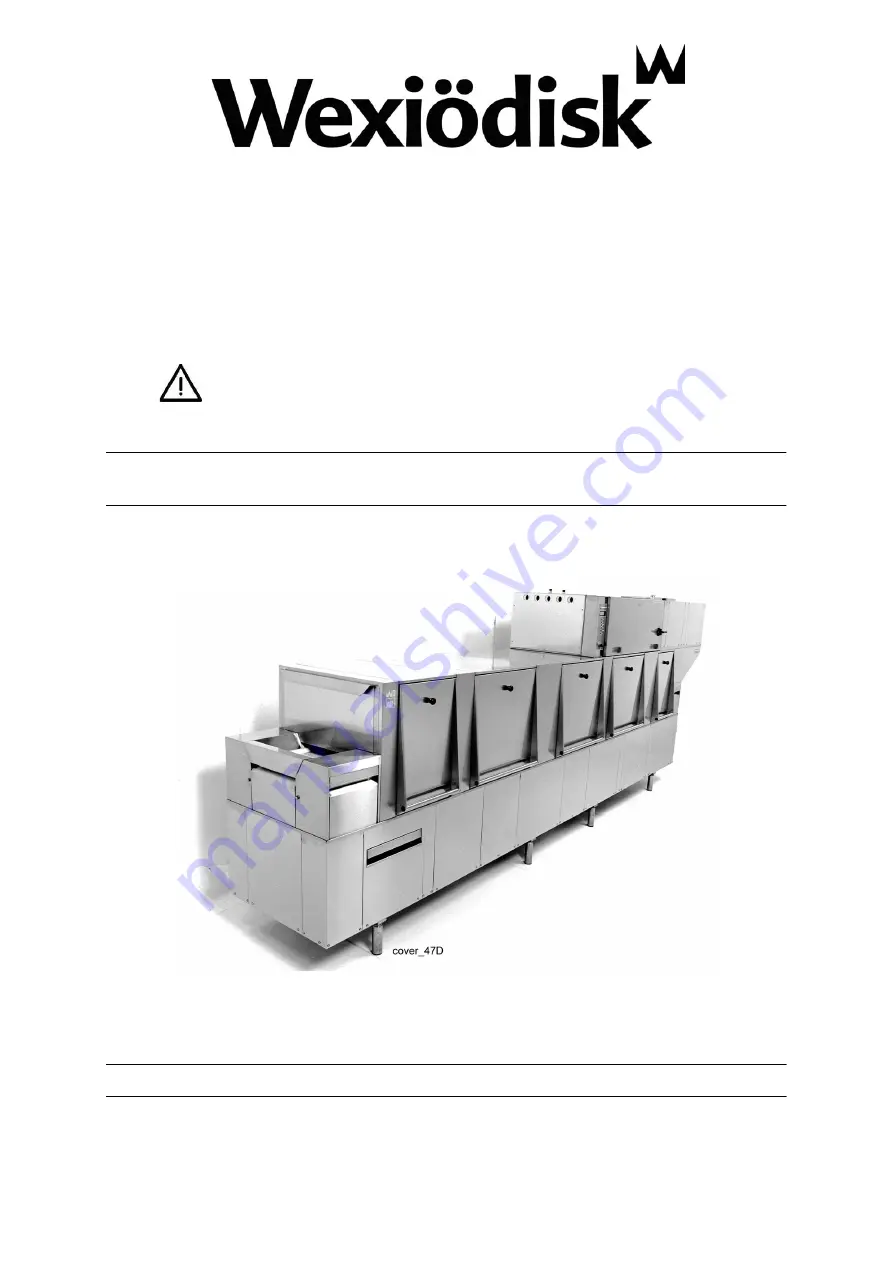
CUTLERY DISHWASHER
WD-ACS 47D
(Original documentation)
Read the manual before using the machine!
Installation and user manual
S/N: (En)
Valid from: 202003
Rev.: 1.0
Страница 1: ...CUTLERY DISHWASHER WD ACS 47D Original documentation Read the manual before using the machine Installation and user manual S N En Valid from 202003 Rev 1 0 ...
Страница 2: ......
Страница 3: ...on 7 2 5 1 High temperatures 7 2 5 2 Risk of crushing 7 2 5 3 Risk of slipping 7 2 5 4 Sounds 7 2 6 Cleaning the machine 7 3 Installation instructions 8 3 1 General information 8 3 2 Requirements for the installation site 8 3 2 1 Lighting 8 3 2 2 Ventilation 8 3 2 3 Power supply 8 3 2 4 Water 9 3 2 5 Steam optional 9 3 2 6 Drain waste pipe 9 3 2 7 Space for servicing 9 3 3 Transport and storage 10...
Страница 4: ...ating instructions 18 4 1 Before washing 19 4 1 1 Machine design 19 4 1 2 Preparations before filling 21 4 1 3 Filling and heating the machine 21 4 2 Washing 22 4 2 1 Selecting the contact time wash time 22 4 2 2 Feeding loads into the machine 22 4 2 3 Emergency stop 22 4 2 4 Checking the wash result 23 4 2 5 Changing the water 24 4 3 After use Cleaning 24 4 3 1 Incorrect cleaning methods 25 4 3 2...
Страница 5: ...us temperatures and any alarms are also shown The capacity requirements of the machine can be found in the TECHNICAL DATA chapter The electronics in the machine are RoHS compatible Before the machine is started up and used the following points should be ob served The SAFETY INSTRUCTIONS chapter must be studied carefully before commissioning the machine Installation of the machine must be performed...
Страница 6: ... why a static electricity wristband must be used when handling the electronics at all times This symbol explains the right way to perform a task in order to prevent poor re sults and or damage to the machine This symbol identifies recommendations and hints to help you get the best results when washing to increase the machine s lifespan and reduce the risk of emer gency shutdown This symbol explain...
Страница 7: ...al number 3 Year of manufacture 4 Enclosure protection class 5 Voltage 6 Number of phases with or without neutral 7 Frequency 8 Main fuse 9 Motor output 10 Electrical heating output 11 Max output 1 3 Checking that the machine and manual correspond Check that the type description on the rating plate corresponds with the type de scription on manual cover page If manuals are missing it is possible to...
Страница 8: ... s documentation 4 Year of manufacture of the product 5 The EU Directives with applicable provisions to which all the machines special machines and accessories comply 6 Harmonised standards for the Directives specified and which the ma chines special machines and accessories meet wherever relevant 7 Model designation and serial number of the machines special machines and accessories the document a...
Страница 9: ...nd servicing must be performed by an authorised engineer in accordance with local and national rules in effect for such work with water and drainage systems electricity ventilation and steam We recommend that the work is performed by the manufacturer or one of the manufacturer s authorised service companies To further improve safety during installation operation and servicing the operator and the ...
Страница 10: ... care and maintenance For authorised service companies please see www wexiodisk com or contact Wexiödisk AB The regular checks described in the manual must be carried out in accord ance with the instructions 2 2 Transport Handle the machine with care during unloading and transport there is a risk of it tipping over Never lift or move the machine without using the wooden packaging to support the st...
Страница 11: ... parts before during and after washing Be careful therefore to avoid crushing injuries In connection with ser vice or repairs that require the hood to be open it must be secured by means of a prop for example 2 5 3 Risk of slipping The floor should be kept dry to eliminate any risk of slipping Mop up any water and leftover food that has been spilt 2 5 4 Sounds The machine is not silent during oper...
Страница 12: ...es need to be drilled in the machine the holes must be fitted with an edge strip or similar protection 3 2 Requirements for the installation site 3 2 1 Lighting In order to ensure the best possible working conditions during installation opera tion servicing and maintenance make sure that the machine is installed in a well lit room 3 2 2 Ventilation The machine produces heat and steam when in opera...
Страница 13: ...ations The machine s capacity requirements are stipulat ed in TECHNICAL SPECIFICATIONS 3 2 6 Drain waste pipe There must be a waste pipe with an effective trap for the machine s waste water and for water used for rinse cleaning The machine s capacity requirements for drainage are stipulated in TECHNICAL SPECIFICATIONS 3 2 7 Space for servicing A 1 metre area should be left clear in front of the ma...
Страница 14: ...rwise the machine may become damaged When transporting the machine without a normal wooden pallet always check that none of the components underneath the machine can be damaged A Pumps B Spacers If the machine is not being installed immediately it must be stored in a frost free area where the air is dry 3 4 Unpacking Check that all parts have been delivered by comparing them with the delivery note...
Страница 15: ...e are non live Remove the protective plastic on the sides which are to be stood against a wall The distance between the wall and machine should be at least 100 mm Place the machine in position and check that it and any accessories are horizon tally level Adjust the height with the legs Check with a spirit level that is standing level Place the spirit level on the join be tween the machine tank and...
Страница 16: ...s 12 3 6 Connections 1 Hot water connection 2 Electrical connection 3 Cold water connection 4 Main switch 5 Drain waste pipe connection 6 Floor drain 7 Condensing water connection option 8 Steam connection option 3 1 2 4 5 7 8 2 6 3 1 8 7 ACS 47D_06 2 ...
Страница 17: ...POWER SUPPLY FAILURE CHECK EMERGENCY STOP After completing the installation switch on the main switch and all circuit break ers 3 6 2 Water connection regardless of any options A shut off cock must be installed on the incoming pipe It is important that the water supply has sufficient pressure to ensure the correct flow of water to the machine The required water flow and pressure can be found in th...
Страница 18: ...t 500 mm in front of the machine to allow access for service and repairs 3 6 4 Steam connection option The connection for steam 8 is fitted with a filter The machines are supplied as standard without a shut off valve for steam A shut off valve must be installed on the incoming pipe 3 6 5 Condensing water connection option A connection for condensation 7 is only provided on steam heated machines Th...
Страница 19: ...ection 2 is on the pipe leading to the booster heater for the final rinse water 1 water outlet for detergent 2 drying agent connection Use the same make and type of detergent and drying agent Avoid making unnecessary holes in the machine If possible the equipment should be placed on a wall next to the machine For information about electrical connections see the electrical diagram 3 7 Setting adjus...
Страница 20: ...Filling the machine Close the doors Switch on the main switch and turn the knob to 1 Fill the machine with water in accordance with the OPERATING INSTRUC TIONS Note It takes approximately 10 minutes to fill the system The booster heaters fill automatically when the doors are closed The machine has a fill ing check function for the booster heaters When the function is activated a check is carried o...
Страница 21: ...ashed items are dried The chemical wash pump will not stop until the washed items have been removed from the machine 6 Final check Empty the machine and turn off the power using the main switch Re tighten all the connections on the circuit breakers and contactors 7 Final check Empty the machine and turn off the power using the main switch Washing Care daily weekly and other frequencies Recommendat...
Страница 22: ... be done with the machine Prior to use Regarding the way in which the machine should be used Following use In the event of error messages and troubleshooting The use of the machine is dependent on how the machine is equipped If the machine will not be used for a longer period the power to the machine should be turned off using the main switch the water supply turned off and ma chine should be left...
Страница 23: ...uctions 19 4 1 Before washing 4 1 1 Machine design Machine design ACS 47D_08_R1 1 2 3 4 5 6 7 8 9 10 11 12 13 23 14 16 15 14 14 17 14 18 16 14 17 19 20 24 19 23 14 19 21 14 26 27 27 28 31 28 29 28 25 30 30 29 32 22 ACS 47D_08 2 19 13 33 35 34 ...
Страница 24: ...diagnostic messages for service engineers only 11 Button for resetting alarm 12 On Off 13 Emergency stop 14 Door 15 Photocell 16 Pre rinse nozzle 17 Washer arm removable 18 Chemical wash nozzle 19 Partition removable 20 Recirculating final rinse nozzle 21 Final rinse nozzle 22 Main switch 23 Intake guard 24 Grill 25 Filter 26 Final rinse strainer 27 Outlet seal 28 Rubber sleeve 29 Pump filter 30 T...
Страница 25: ...f foam produces poor wash re sults and can damage the machine Steel wool must not be used for pre treating the dishware Only detergent and drying agent intended for industrial machines may be used If using liquid detergent and drying agent the same make and type of de tergent and drying agent should be used 4 1 3 Filling and heating the machine The doors 14 must be closed Press button 12 to switch...
Страница 26: ...iled items select the longest contact time in the case of lightly and normally soiled items select a shorter contact time 4 2 2 Feeding loads into the machine Before feeding in the items remove coarse food residues and soak dried food residues Note Ordinary washing up liquid must not be used for soaking The washing stage will start when cutlery drops onto the belt and activates the photocell 15 4 ...
Страница 27: ...tergent residue on the item this may mean that the flow through the wash arms during the final rinse is too low The fi nal rinse flow can be checked and adjusted by a service technician The duration of the final rinse may also play a part Increase the contact time if necessary Cleaning the machine Insufficient cleaning of the machine af fects the results of the washing Ensure better cleaning of th...
Страница 28: ...eal 27 Refit the strainers 30 32 Refill the machine See Filling and heating the machine Automatic emptying of wash tanks option Automatic emptying of wash tank 1 will start when the pushbutton 33 next to the control panel is pressed Wash tank 02 and the final rinse tank will be emptied when pushbutton 34 is pressed Refill the machine See Filling and heating the machine 4 3 After use Cleaning HACCP...
Страница 29: ...cleaning purposes Never use a pressure washer to clean the floor within 1 metre of the machine The supplier cannot be held liable for any faults caused by the use of pressure washers on the machine and any such use may invalidate the warranty There is a risk of splashing even if the floor is hosed down Steel wool and pressure washers must not be used for cleaning 4 3 2 Emptying Remove the filters ...
Страница 30: ... sleeves can become deformed leading to the risk of water leakage in the tanks Clean the washer arms 17 Clean the doors 14 Wipe the rubber strips on the doors which are fitted at the top of the back of the doors Rinse all the inside surfaces of the machine and clean the tanks Clean the final rinse filter 26 Empty the final rinse tank and clean the filter 25 The filter is placed be hind the lower d...
Страница 31: ...ents Decalcify the machine when necessary 4 3 5 Annual checks Safety valve for condensing battery There is a safety valve on the pipe upstream of the dishwasher s cold water con nection The opening function for this valve must be checked 2 3 times a year Proceed as follows Loosen the screws that hold the cover plate over the water connections to the dishwasher to the left of the filter for recircu...
Страница 32: ...meone has pressed the emergency stop button If the machine has been stopped using the emergency stop button reset the button by turning it in the direction of the arrows Then press button 8 LOW TEMP TANK The washing temperature is too low Washing can still take place Reset the alarm by pressing button 11 Contact ser vice personnel LOW TEMP FINAL RINSE The rinsing temperature is too low Washing can...
Страница 33: ...eve is not sealing against the bottom plate Check that the level pipe is closed Change the rubber sleeve if it is damaged The machine does not start washing The doors are not closed Close the doors Outward feed conveyor limit switch has been activated Remove any cutlery from the limit switch Noise from the washing pump Low water level Foam in the tank Check the level Change the wa ter The machine ...
Страница 34: ...sting of five sides at a distance of 1 m from all edges of the machine Other voltages on request TECHNICAL DATA Pump motor chemical wash kW 2x2 35 Pump motor final rinse kW 0 11 Fan motor kW 2x0 75 Feed motor kW 0 11 Booster heater kW 18 Drying zone kW 9 Tank heater chemical wash kW 24 Tank volume l 160 Enclosure protection class IP 55 CAPACITY AND OPERATING DATA Pump capacity l min 2x500 Washing ...
Страница 35: ...ssure bar 1 5 2 5 Main fuse 400 V 3N A 35 Max connection area 400 V 3N L1 L3 N PE Cu mm 50 Steam internal thread R1 Condensation connection internal thread R WATER DRAIN AND VENTILATION CONNECTIONS Water quality hardness dH 2 7 Hot water connection 55 70 C internal thread R Cold water connection 5 12 C internal thread R Water connection PP pipe ø mm 50 Floor drain capacity litres sec 3 Heat load r...