


- FRAME LINEA CABINET INSTALL GUIDE -
(2018-05-07)
9/14
D. CABINET INSTALLATION
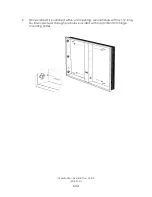
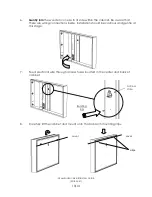
1.
In the case of SURFACE MOUNTED, the FRAME mirror cabinet must be wall-
mounted with the MONARCH mounting clips provided with the furniture as seen
in the exhibit below. These Monarch mounting clips are used to mount cabinet
on wall, for levelling and installation support. The cabinet is secured to the wall
using se
curity tie-down, 3" long #10 wood screws at wall post, however this is to
be done at a later step and after wooden console and electrical preparation as
explained in next sequence of steps.
Monarch mounting clip
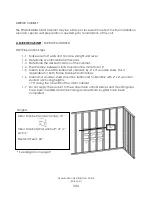
CAUTION:
Cabinet is to be hung onto the Monarch Clips provided
NOTE:
Mounting clips and shelf pins are packaged with glass shelves.
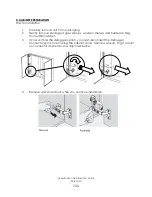
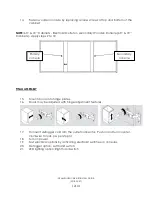
2.
Align and level mounting clips according to horizontally reinforced studs and
desired cabinet height.
3.
Space mounting clips evenly along width of cabinet.
4.
Install mounting Clips to the wall using 3" long #10 wood screws. Fasten securely.
5.
Unfasten wooden consoles by removing access screws at top and bottom of the
cabinet.
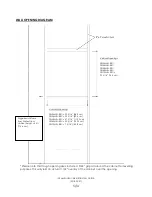
WALL – Back view
Level
WALL
Access screws
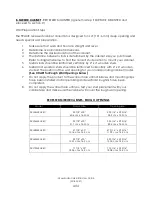
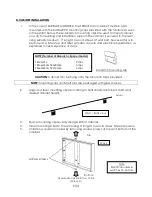
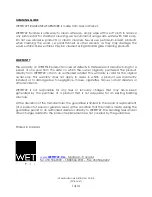
NOTE (Number of Monarch clips per model)
FRL24MEL:
2 clips
FRL36MEL & FRL48MEL:
3 clips
FRL60MEL & FRL72MEL:
4 clips
Top
Bottom
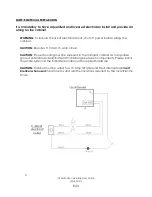
Note
Electrical outlets &
switches on bottom


