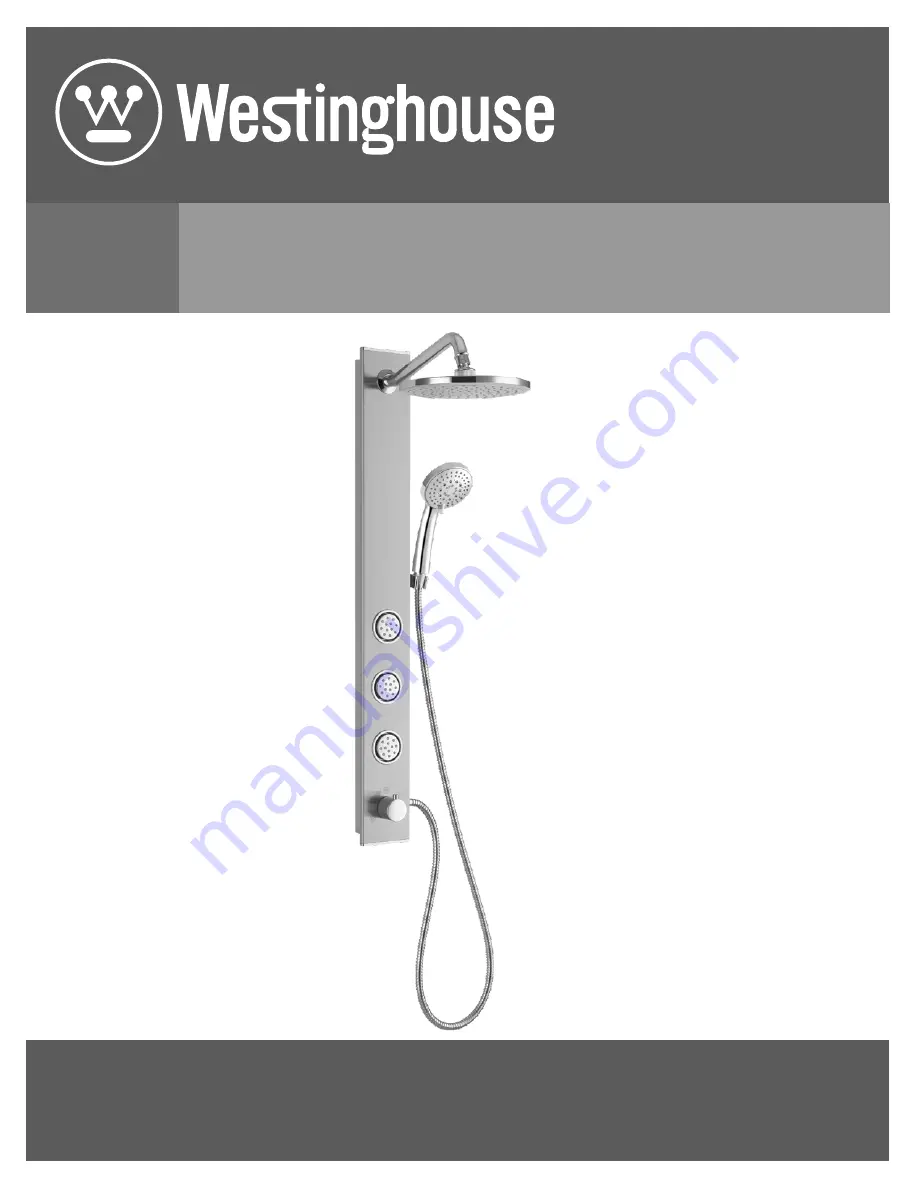
# QB025
ULTIMATE RAIN & MASSAGE SHOWER SPA
SPA-DOUCHE À MASSAGE ET À EFFET DE PLUIE
DELUXE
DE LUXE
OWNER’S MANUALMANUEL DE L’UTILISATEUR
Страница 1: ...QB025 ULTIMATE RAIN MASSAGE SHOWER SPA SPA DOUCHE MASSAGE ET EFFET DE PLUIE DELUXE DE LUXE OWNER S MANUAL MANUEL DE L UTILISATEUR...
Страница 2: ...uff marks If any damage is noticed do not install 2 Use this product only in the manner intended by the manufacturer If you have any questions contact the manufacturer 3 Installation work and plumbing...
Страница 3: ...f use of this product costs incurred for labour or materials removal and installation of replacement units or any other incidental or consequential damages Costs relating to obtaining access for repai...
Страница 4: ...QB025 4 Pre Installation TOOLS MATERIALS REQUIRED NOT SUPPLIED Measuring tape Carpenter s square Wrenches Phillips screwdriver Electric drill with 1 4 in 7 mm drill bit Pencil Safety gloves Safety gog...
Страница 5: ...cover pre installed 1 BB Bottom bracket 1 C Mesh gasket 1 R Nut pre installed 1 CC Screws and washers 3 D Check valve pre installed 1 S Shower column 1 DD Aluminum plate cover 2 E Long brass connecto...
Страница 6: ...lumn S and secure it with the nut R see Fig 5 S T R Fig 5 Place the rubber washer N onto the L fitting M Connect the L fitting M to the shower arm T see Fig 6 T M N Fig 6 Check that the rubber washer...
Страница 7: ...B Pre installed in E Fig 9 Align the thread sealed end of the long brass connector E with the threaded end of the recently removed old shower arm The open end of the long brass connector should extend...
Страница 8: ...r Outlet Brass Connector Assembly G H J Fig 12 With a dry rag clean the wall between the brass connector and the shower valve Thoroughly clean a palm sized area of the wall approximately 22 5 below th...
Страница 9: ...f you are not using wall screws skip this step Wall Screws Optional AA BB CC Fig 14 If you prefer NOT to use wall screws to secure the bottom bracket BB to the wall simply peel the backing off the bot...
Страница 10: ...installation Check water connections for proper flow make sure there are no leaks Do not forget to use the rubber washers to prevent leaks from the connections If you find that the water pressure or v...
Страница 11: ...ig 24 Fig 25 Fig 26 Troubleshooting Make sure that the rubber washers N U are properly installed to prevent leaks Make sure that you drill holes according to the instructions and that you secure the s...
Страница 12: ...er washer 1 2 QHB105 2 E Long brass connector 55 mm QHB114 1 V Shower head QHB107 1 F Short brass connector 28 mm QHB118 3 W Handheld shower head QHB111 1 G Stainless steel washers QHB101 2 Y Hose QHB...
Страница 13: ...rer qu elle ne comporte aucun dommage Si des dommages sont not s ne pas installer 2 Cet appareil ne peut tre utilis autrement que pour l usage pr vu par le fabricant Consulter le fabricant pour toutes...
Страница 14: ...utre dommage caus par un incident ou accessoire Les co ts encourus pour obtenir l acc s pour la r paration ou le remplacement sont la responsabilit de l utilisateur Nos obligations se limitent la r pa...
Страница 15: ...omposer le 1 877 333 0098 pour obtenir de l aide FRAN AIS Pr installation OUTILS MAT RIAUX REQUIS NON INCLUS Ruban mesurer querre de charpentier Cl Tournevis Phillips Perceuse lectrique avec foret de...
Страница 16: ...le maille 1 R crou pr install 1 CC Vis et rondelles 3 D Clapet de non retour pr install 1 S Colonne de douche 1 DD Bande de recouvrement en aluminium 2 E Connecteur en laiton long 55 mm 1 T Bras de do...
Страница 17: ...eur Fig 2 Ins rez le bras de douche T dans la colonne de douche S et fixez le l aide de l crou R voir fig 5 S T R Fig 5 Placez la rondelle en caoutchouc N sur le raccord en L M Fixez le raccord en L M...
Страница 18: ...cien bras de douche que vous venez de retirer L extr mit ouverte du long connecteur en laiton doit d passer de 5 8 po 1 1 8 po de 16 29 mm la marque dessin e sur le bras de douche comme le montre la f...
Страница 19: ...n douche Connecteur en laiton Fig 12 Avec un chiffon sec nettoyez le mur entre le connecteur en laiton et le robinet de douche Nettoyez soigneusement une surface du mur de la taille de la paume d une...
Страница 20: ...s AA BB CC Fig 14 Si vous pr f rez NE PAS utiliser de vis murales pour fixer le support inf rieur BB au mur d collez simplement la pellicule de protection de l adh sif double face BB situ sur le suppo...
Страница 21: ...le V rifiez les raccordements d eau pour vous assurer que le d bit est correct assurez vous qu il n y a pas de fuites N oubliez pas d utiliser les rondelles en caoutchouc pour viter les fuites au nive...
Страница 22: ...aoutchouc N U sont correctement install es afin d viter les fuites Assurez vous de percer les trous conform ment aux instructions et de fixer la colonne de douche S l aide du ruban adh sif double face...
Страница 23: ...t C Rondelle maille QHB117 1 U Rondelle en caoutchouc 1 2 po QHB105 2 E Connecteur en laiton long 55 mm QHB114 1 V Pomme de douche QHB107 1 F Connecteur en laiton court 28 mm QHB118 3 W Douche t l pho...
Страница 24: ...Laurent Qu bec H4S 2C3 1 877 333 0098 cs conglomkb com service available in English and French Monday Friday from 8 30 am 5 00 pm EST service disponible en anglais et fran ais du lundi au vendredi 8h3...