background image

5

 0800 328 5708

  •  

www.westhillbikes.com

3. Adjustments 

3.1 Adjusting the handlebar

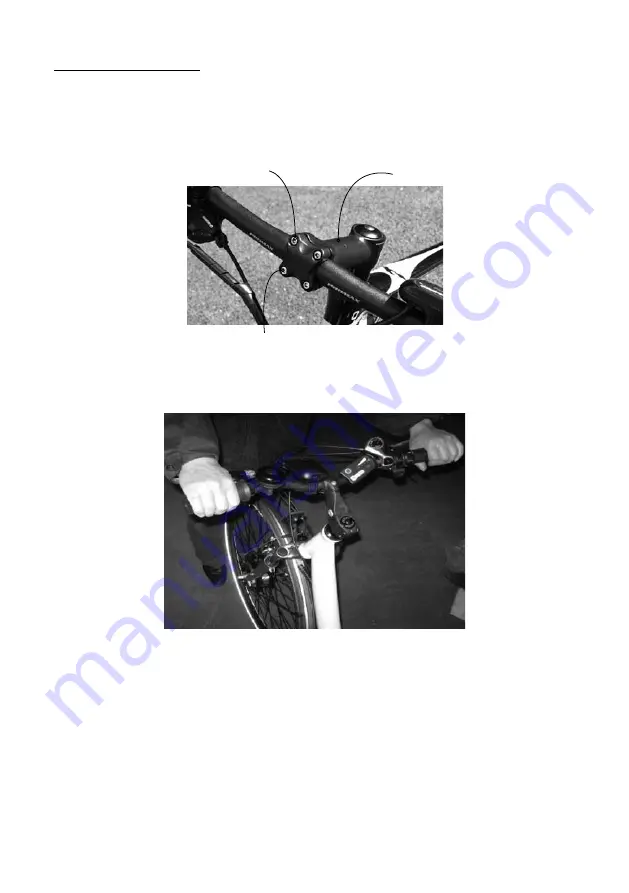
Place the handlebar onto the handlebar stem, place on the cover, and fix with the 

• 

two screws. The tighten torque should not be less than 18Nm. 

Handlebar 

stem cover

Hexagon socket screws

Handlebar stem

To align the handlebars, face your bike and hold the front wheel between your 

• 

legs. Turn the handlebars so that they are perpendicular to the front wheel. 

Содержание AEC-TDE16Z

Страница 1: ...Electric Bike User Manual ...

Страница 2: ...intaining The Brakes 7 3 5 Adjusting The Gear Change Rear Derailleur 8 4 How To Use 10 4 1 Input The Battery 10 4 2 Turn On The Power 11 4 3 Control Panel 11 4 4 Front And Rear Lights 11 4 5 Caution Whilst Riding 12 4 6 Caution Whilst Parked 12 4 7 Charging The Battery 12 4 8 Battery And Charger Maintenance 12 4 9 Battery And Charger Precautions 13 5 Bicycle Inspection And Care 14 5 1 Regular Clea...

Страница 3: ... Dealer s Customer Service Do not ride through deep puddles Water could enter the hub motor causing short circuits and irreparable damage The two metallic contacts located on the battery box are the positive and negative battery terminals Avoid touching them especially with wet hands and do not use metal objects to connect them in order to avoid high current electric discharge that could cause sev...

Страница 4: ...x Speed 25km Speed Range 0 25Km h Range Per Charge 35km Controller Under Voltage Value 31 5 0 5V Weight 23Kg Over Current Value 15 0 5A Battery Spec Type Lithium ion Charger Current AC110v 240v 50 60 hZ Capacity 10Ah Output DC41 7V Rated Voltage 36V Packing 1500 x 280 x 770mm Note Maximum travel distance on a fully charged battery is measured at a condition of 20 C no wind flat road total bike wei...

Страница 5: ...lebar stem place on the cover and fix with the two screws The tighten torque should not be less than 18Nm Handlebar stem cover Hexagon socket screws Handlebar stem To align the handlebars face your bike and hold the front wheel between your legs Turn the handlebars so that they are perpendicular to the front wheel ...

Страница 6: ...e saddle post must be inserted at least to the circular safety mark engraved on the tube Adjust the saddle height by straddling the saddle with both feet touch ing the ground and without using the stand The saddle should be parallel to the ground for maximum comfort The tightening torque for the saddle mounting screw and saddle post mount ing screw should not be less than 18Nm Quick release Safety...

Страница 7: ...rench and a tightening torque of 6 8 Nm to secure the cable to the brake body Align the brake pads 1 mm below the upper edge of the wheel rim Position the brake pads 1 mm from the wheel rim using the adjustment screw located on the brake lever Check that the wheels spin freely without being hindered by the brake pads Check if the spinning wheels touch the rim on one side if so adjust the screw Che...

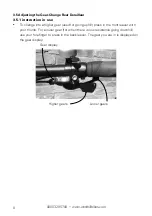
Страница 8: ...in use To change into a higher gear used for going uphill press in the front leaver with your thumb For a lower gear for when there is low resistance going downhill use your forefinger to press in the back leaver The gear you are in is displayed on the gear display Higher gears Lower gears Gear display ...

Страница 9: ...and fix it by the derailleur cable nut Turn the low adjustment screw so that the guide pulley moves to a position direct ly below the largest sprocket Tighten the adjust nut when the real gear is lower than the gear shift shows loosen the adjust nut when the rear gear is upper than the gear shift shows It is OK when the gear changes correctly and smoothly Outer line of smallest sprocket Top adjust...

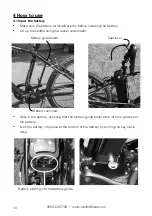
Страница 10: ... the battery Lift up the saddle using the leaver underneath Battery guide board Battery terminals Seat lever Slide in the battery ensuring that the battery guide board slots into the grooves of the battery Lock the battery into place at the bottom of the battery by turning the key clock wise Battery slotting into the battery guide ...

Страница 11: ...harge the battery immediately 4 3 Control Panel The performance is controlled by pedalling You can change the electric assist ance by press mode button on the power display If on LOW mode the electric assistance is low if on MED mode the electric assistance is stronger if on HIGH mode the electric assistance is strongest 4 4 Front and rear lights Push the light button on the power display to turn ...

Страница 12: ...rged disconnect the charger from the wall outlet before disconnecting the charger from the battery Charge the battery not less than 12hours for the first 3 times Be sure to use the charger supplied together with the battery use of other charg ers will invalidate the warranty 4 8 Battery and charger maintenance If the battery needs to be stored for an extended period it should be kept at around 50 ...

Страница 13: ...battery is not in use for an extended period of time remove the battery from the load for storage If you have any questions about this battery or its usage please contact the Cus tomer Service Department Never disassemble the battery 4 9 2 Charger Charge the battery after you buy this e bike or the power is low Make sure the charger is as least 1M away from computers TV s fridge washing machine an...

Страница 14: ...ake pads wheels tyres or plastic parts 5 2 Regular maintenance every 1 2 months Always carry out the following checks Check the handlebar attachment and saddle post are correctly inserted and tightened Check the wheel hub mounting nuts are correctly tightened Check the wheel rims are not cracked and that no spokes are loose or broken Check the tyres are not worn or cut Check the tyres are correctl...

Страница 15: ...ransmission lubricants for the chain freewheel and gears every 1 2 months or if the driveline is dry Grease the brake pins front wheel hub saddle post and pedal pins every 1 2 months or in case of excessive friction Do not lubricate or grease the speed controller brake pads or wheel rims Parts that should be lubricated Parts that should not be lubricated Head set Brake cable Front brake Rim Chain ...

Страница 16: ...Need help Contact us West Hill Nr Exeter Devon United Kingdom EX11 1LQ 0800 328 5708 sales fw3group com ...

Отзывы: