WESTERN DIGITAL SERIAL ATA HARD DRIVE
INSTALL THE HARD DRIVE - 3
INSTALLATION GUIDE
Install the Hard Drive
Jumper Settings
Western Digital Serial ATA hard drives ship from the factory with a jumper shunt in the
Default position (across pins 1 and 2). It is not necessary to move the jumper shunt on the
drive for workstation or desktop use.
For more information on advanced jumper settings, refer to page 18.
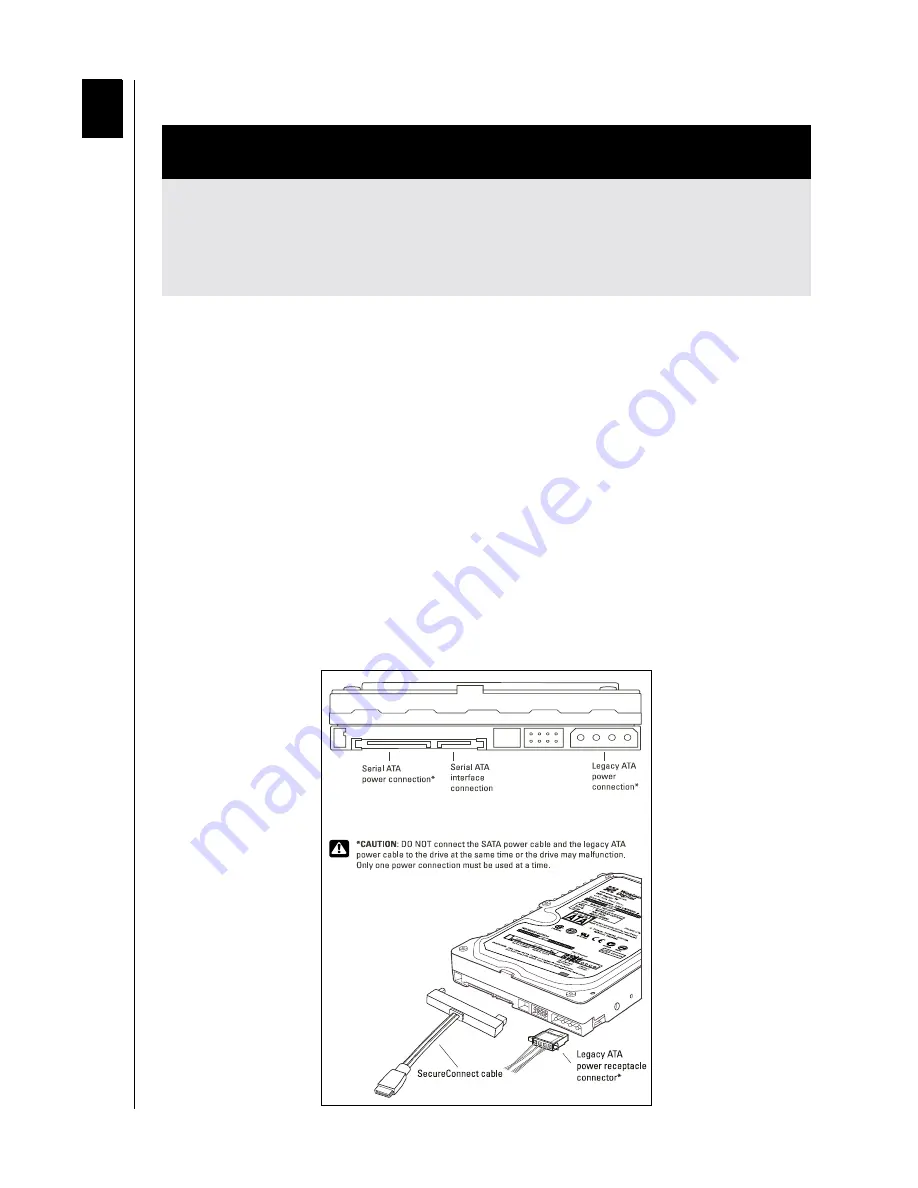
Connect the Drive
Note: Western Digital's Serial ATA cable with SecureConnect (included in the kit) is
recommended for use with all Western Digital Serial ATA hard drives.
1. Connect the SATA interface cable to the hard drive:
Connect the larger end of the WD SATA cable directly to the SATA interface connection
on the hard drive. The SATA connectors are keyed to ensure proper insertion.
IMPORTANT - for WD 7200 RPM SATA hard drive kits only; for all other WD SATA
hard drive kits, skip to "Jumper Settings" below.
If Installing Your New Western Digital Hard Drive as an Upgrade From a Previously
Installed Hard Drive:
To ensure the optimal settings for your drive configuration, we
recommend you run the Installation Tutorial in the Windows version of Data Lifeguard
Tools prior to the hardware installation to generate your custom installation instructions.
For instructions, see page 8.
2


