Western Digital ShareSpace Скачать руководство пользователя страница 4

WD ShareSpace | 3

Power Button

The power button turns the device on or off. To turn on the device, press the power button and hold down until 
the LED flashes once, then release. The LED remains off (up to 30 seconds) as the device powers up. Holding 
the button down for four seconds powers off the device.

Network Storage System Setup

You must set up your network storage system so it can be discovered on the network to which your computer is 
attached. Follow the steps below to configure your network storage system and map a network drive in 
Windows 2000/XP/Vista. Skip to page 5 for Mac instructions.

Windows 2000/XP/Vista

1. Turn on your computer and wait for the operating system to load.

2. Insert the software CD into the CD-ROM drive.

Note:

 If AutoPlay is disabled on your computer, you must install the utilities manually. Click 

Start

 and 

point to 

Computer

 (Windows Vista) or 

My Computer

, then double-click Setup.exe in the root directory 

of the CD.

3.

Windows Vista

:


Click

 Run setup.exe

,


then click

 Allow

.

4. Click 

Accept

 in the Terms of Agreement screen.

5. If you have connected the device properly as shown in the Connect screen, click 

Next

.

6. The Application Installer screen displays a list of options including software, documentation, and a 

registration link. All applications are selected by default. Deselect any applications you do not want to 
install, then click 

Start

. Or, click 

Cancel

 to exit and no applications will be installed.

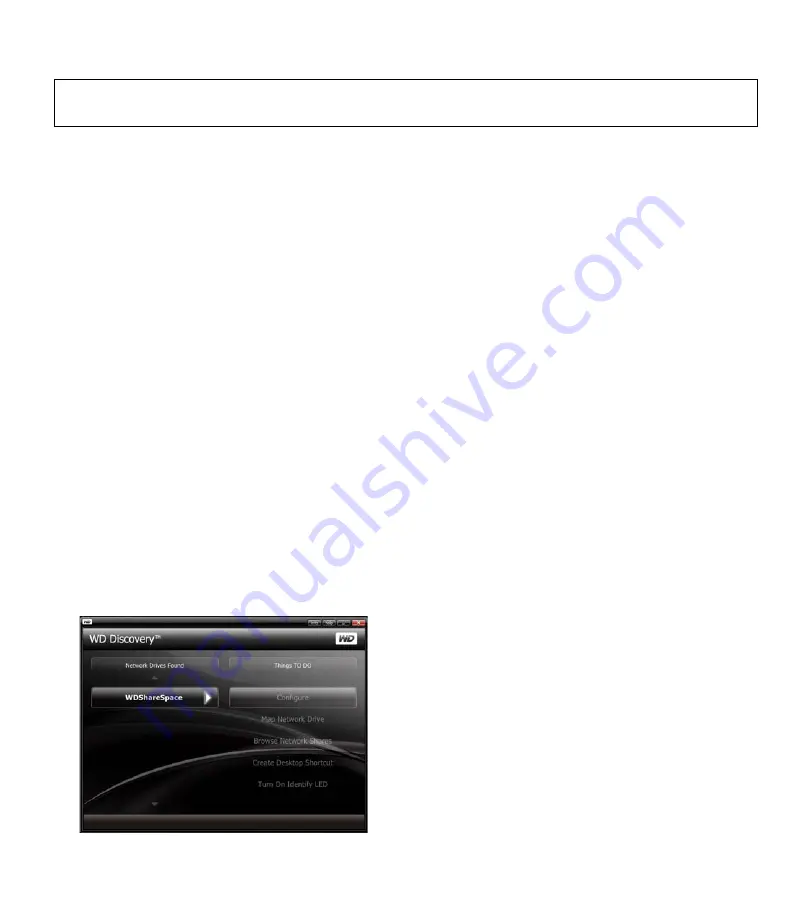
7. The WD Discovery™ screen appears. Click on 

WDShareSpace

 in the Network Drives Found list and point 

to and click 

Configure

.

Important:  

The device powers on automatically upon initial connection to power, which may take up to 

three minutes. During this time, do not press the power button.

Содержание ShareSpace

Страница 1: ...Quad and Dual drive Network Storage Systems WD ShareSpace Quick Install Guide ...

Страница 2: ...forms Ethernet connection network adapter router switch or hub port Broadband internet connection Note Compatibility may vary depending on user s hardware configuration and operating system Registering Your Product Registering your device enables access to WD services such as news about your product tips and updates Registration is quick and easy Go to register wdc com and follow the instructions ...

Страница 3: ... located on the back of the unit 4 Plug the AC adapter into an electrical outlet The unit powers up automatically after approximately 30 seconds indicated by a steady green LED illuminated on the power button 1 Power button 5 Power port 2 LED indicators 6 Reset button 3 Auto backup button 7 Ethernet port 4 USB port 1 Auto backup 8 USB ports 2 and 3 9 Kensington security slot Important Wait for the...

Страница 4: ...disabled on your computer you must install the utilities manually Click Start and point to Computer Windows Vista or My Computer then double click Setup exe in the root directory of the CD 3 Windows Vista Click Run setup exe then click Allow 4 Click Accept in the Terms of Agreement screen 5 If you have connected the device properly as shown in the Connect screen click Next 6 The Application Instal...

Страница 5: ...lick Login Follow the onscreen prompts to complete setup of the network storage system 9 Return to the WD Discovery screen and click Map Network Drive in the Things To Do list 10 Enter the user name and password you set during system setup step 8 in the Login screen Click OK 11 Click Yes ...

Страница 6: ...nd drop files into the network drive folders using My Computer or Windows Explorer 14 See the complete user manual on the CD for all other basic and advanced device management functions Macintosh 1 Turn on your computer and wait for the operating system to load 2 Open the Safari web browser 3 Click the Bookmarks link in the upper left corner of the screen 4 Click Bonjour then click WDShareSpace 5 ...

Страница 7: ... want to access then click OK The share appears as a shared drive icon on the desktop For instructions on creating an alias to make the shared drive icon permanent on the desktop go to support wdc com and search the knowledge base for answer ID 2541 Note Configuration is a read only share containing only a Help file and the login page 10 See the complete user manual on the software CD for all othe...

Страница 8: ...umérique de la classe B est conforme à la norme NMB 003 du Canada This Class B digital apparatus complies with Canadian ICES 003 Underwriters Laboratories Inc Approved for US and Canada CAN CSA C22 2 No 60950 1 UL 60950 1 Information Technology Equipment Safety Part 1 General Requirements File E101559 This product is intended to be supplied by a listed limited power source double insulated or dire...

Страница 9: ...wdc com accident or mishandling while in the possession of someone other than WD Subject to the limitations specified above your sole and exclusive warranty shall be during the period of warranty specified above and at WD s option the repair or replacement of the Product The foregoing warranty of WD shall extend to repaired or replaced Products for the balance of the applicable period of the origi...

Отзывы: