MY PASSPORT
USER MANUAL
USING THE DRIVE WITH A MAC
– 54
Using the Drive with a Mac
The My Passport drive is formatted as a single NTFS partition for compatibility with all
updated Windows operating systems. To use the drive on Mac OS X operating systems,
and to use Time Machine, if you want, you must reformat the drive to a single HFS+J
partition.
This chapter includes the following topics:
Reformatting the Drive
Restoring the WD Software and Disk Image
Installing the Drive on Mac Computers
Reformatting the Drive
Go to
and refer to Knowledge Base answer ID 3865 for information
about reformatting the drive.
See “Troubleshooting” on page 55 for more information about reformatting a drive.
Restoring the WD Software and Disk Image
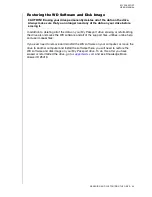
In addition to deleting all of the data on your My Passport drive, reformatting the drive
also removes the WD software and all of the support files, utilities, online help, and user
manual files. If you want to duplicate the drive management and drive lock features on
your Mac computer, you can download and install the WD Security and WD Drive
Utilities applications.
The WD SmartWare software is not available for use with Mac computers for this model
of My Passport drive.
After you have reformatted the drive for Mac computers, go to
and see
Knowledge Base answer ID 6743.
Installing the Drive on Mac Computers
After you have reformatted your drive for use on Mac computers:
1.
Turn on your computer.
2.
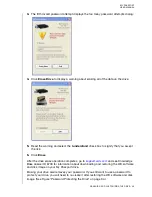
Connect the drive to your computer using the USB 3.0 cable as shown in Figure 3 on
3.
After connecting the drive, verify that the My Passport icon displays on your
desktop.
4.
If you have downloaded and are going to install the WD Security and WD Drive
Utilities applications, see “Connecting the Drive and Getting Started” in the
My
Passport for Mac User Manual
that is on the drive.
CAUTION! Reformatting the drive erases all its contents. If you have already
saved files on the drive, be sure to back them up before reformatting it.
1
9


