background image

My Book World Edition | 2

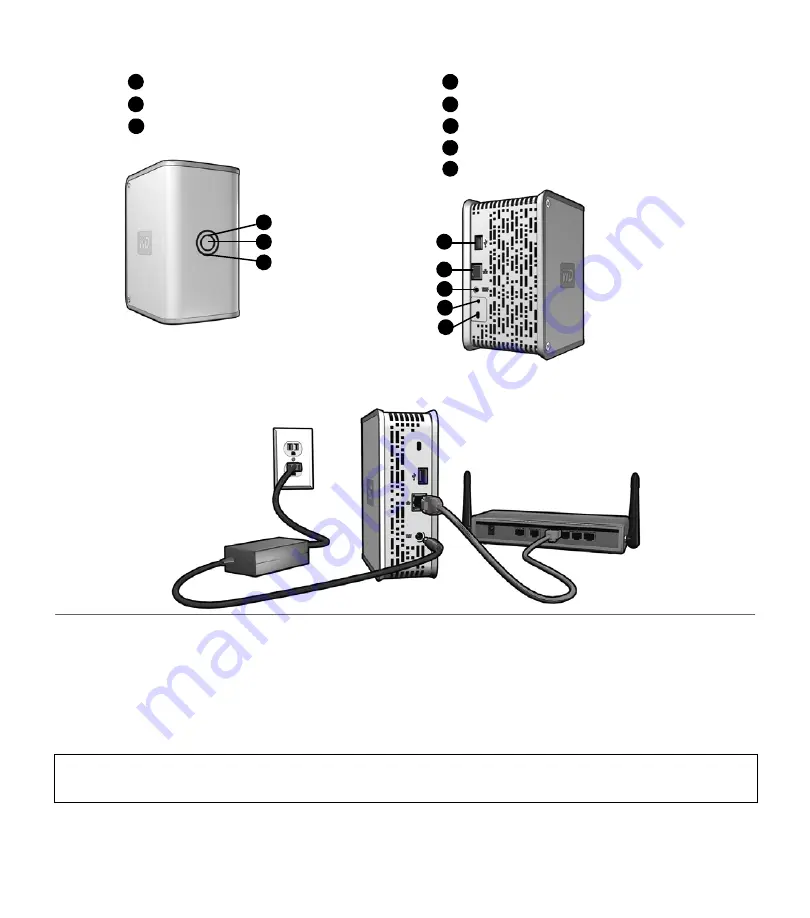
My Book World Edition Front and Rear View

Hardware Setup

1. Connect one end of the Ethernet cable into the Ethernet port located on the back of the unit.

2. Connect the other end of the Ethernet cable directly into a router or network switch port.

3. Plug the AC adapter into an electrical outlet.

4. Connect the other end of the adapter into the DC power supply socket located on the back of the unit. The 

unit powers up automatically after approximately 30 seconds indicated by an LED illuminated on the outer 
ring

.

If you wish to reformat the device to RAID 1, refer to the full user manual provided on the CD.

Important:  

Wait for the drive to finish powering up (approximately three minutes) before installing 

WD Anywhere Access or the Initial Setup Wizard.

Capacity Gauge LED (inner ring)

A

Power Button

B

Power/Activity LED (outer ring)

C

A

B

B

C

USB Port

D

Ethernet Port

E

F

Recovery Button

G

D

E

F

G

Power Port

Kensington Security Slot

H

H

Содержание My Book World Edition

Страница 1: ...Single and Dual drive Remote Access Storage Systems My Book World Edition Quick Install Guide...

Страница 2: ...ware configuration and operating system Registering Your Product Registering your My Book device enables access to WD services such as news about your product tips and updates Registration is quick an...

Страница 3: ...ply socket located on the back of the unit The unit powers up automatically after approximately 30 seconds indicated by an LED illuminated on the outer ring If you wish to reformat the device to RAID...

Страница 4: ...and displays the My Book World Edition main menu In Step 1 click Install If AutoPlay is disabled on your computer you must install utilities manually Click the Start button and point to My Computer Do...

Страница 5: ...ber names in the Computer Name name by which WD Anywhere Access references your computer and Storage Device Name name of the My Book World Edition device fields then click Next Note The Storage Device...

Страница 6: ...next to the EMC logo in Step 2 For more information on EMC Retrospect Express including user documentation visit www emcinsignia com supportupdates 9 Return to the WD Installer screen and click Exit 1...

Страница 7: ...authority to operate this equipment The following booklet prepared by the Federal Communications Commission may be helpful How to Identify and Resolve Radio TV Interference Problems This booklet is S...

Страница 8: ...com accident or mishandling while in the possession of someone other than WD Subject to the limitations specified above your sole and exclusive warranty shall be during the period of warranty specifie...

Отзывы: