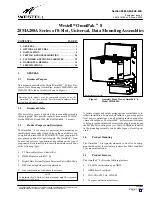


Section 28M-A20-8A0-20A
030-101678 Rev. A
R
0803IARA
5
into an interior locking flange on the cover when the module
door is closed).
2.2.5.1
Facility 4-Pin Wirewrap Connectors
Eight, 4-pin wirewrap connectors are available for Facility con-
nections on the OmniPak
t
8. These connectors are located
under the Facility Compartment cover near the top of the PCB.
The connectors are labelled CKT1 through 8, one for each cir-
cuit. Each connector has pins for T", R", T1", and R1".
2.2.5.2
Facility 50-Pin/25-Pair Connectors
Two 50-pin/25-pair Telco connectors for Facility connections are
also located under the Facility Compartment cover (Paragraph
2.1.1) at the top of the mounting. The left connector, P1, is la-
belled FACILITY RCV IN. The right connector, P2, is for
FACILITY XMT OUT.
2.2.6
Customer Connections
For ease of use, three types of connectors are available for Cus-
tomer connections: either wirewrap pins, RJ48C/S jacks, or one
25-pair RJ48H-type connector, as described hereunder.
2.2.6.1
Customer 4-Pin Wirewrap Connectors
On each OmniPak
t
8, in a separate internal compartment un-
der the assembly’s module area, are eight, 4-pin, wirewrap
connectors for customer connections. These connectors are lo-
cated under a Customer Wirewrap Pin cover (Paragraph 2.1.3)
at the bottom of the mounting. The connectors are labelled
CKT1 through 8, one for each circuit. Each connector has pins
for CT", CR", CT1", and CR1". A cut-out near the bottom,
right side of the assembly provides Customer wirewrap pin wir-
ing access through a strain-relief gasket or grommet.
2.2.6.2
RJ48C/S Jacks (Exterior Access)
Under the module compartment of the OmniPak
t
8 are eight
RJ48C/S jacks for customer connections. The jacks are labelled
CKT 1 (corresponds with slot/circuit 1) through CKT 8 (corre-
sponds with slot/circuit 8). A 2-position switch, labelled S" at
the top and C" at the bottom, is provided immediately to the
right of each RJ jack, which options the jack for either RJ48S or
RJ48C functionality.
2.2.6.3
RJ48H 50-pin/25-pair Connector (Exterior Access)
A third method for making customer connections is through an
RJ48H-type, 25-pair connector, located under the module
compartment near the bottom of the assembly, labelled CUS-
TOMER INTERFACE".
3.
INSTALLATION
Installation consists of inspecting the equipment for damages,
following proper safety precautions, gathering the required
tools and equipment, determining the mounting location,
mounting the OmniPak
t
8, and making all appropriate ground-
ing, power, and wiring connections. The following paragraphs
provide detailed instructions for performing these procedures.
- INSPECTION NOTE -
Visually inspect the unit for damages prior to installation. If the
equipment was damaged in transit, immediately report the damage
to the transportation company and to Westell.
3.1
Following Safety Precautions
CAUTION
Risk of electric shock. Voltages up to 140 VDC (with reference to
ground) may be present on telecommunications circuits.
- PRECAUTIONARY STATEMENT -
- Never install telephone wiring during a lightning storm.
- Never install telephone jacks in wet locations unless the jack is
specifically designed for wet locations.
- Never touch uninsulated telephone wires or terminals unless
the telephone line has been disconnected at the network
interface.
- Use caution when installing or modifying telephone lines.
- This equipment is intended to be used behind devices that
provide primary lightning protection.
- This installation should conform to NEBS (New Equipment
Building Specification) requirements and in accordance with
NEC and Local Codes, as required.
- This equipment is to be installed in a restricted access location.
Important Safety Instructions (Please Save)
When using your telephone/telecommunications equipment,
always follow basic safety instructions to reduce risk of fire,
electric shock, injury to person and damage to equipment, in-
cluding the following
:
CAUTION
For maximum air flow and compliance with NEBS fire safety re-
quirements, do not dress the cables along perforated sections of
the mountings top surface.
A.
Read and understand all instructions.
B.
Follow all warnings and instructions marked on product.
C.
Do not place this product on an unstable cart, stand or table: the
product may fall, causing serious damage to product.
D.
Slots and openings in the assembly are provided for ventilation. To pro-
tect it from overheating, these openings must not be blocked or covered.
This product should never be placed near or over a radiator or heat
register. This product should not be placed in a built-in installation
unless proper ventilation is provided.
E.
This product should be operated only from the type of power
source indicated on the marking label.
F.
Never push objects of any kind into this product through holes or
slots as they may touch dangerous voltage points or short out parts
that could result in the risk of fire or electrical shock. Never spill liq-
uid of any kind on the product.
3.2
Gathering Tools and Supplies
The following tools and supplies are recommended to mount
or install the OmniPak
t
8.
j
Screwdrivers
(flat-head and Phillips-head)
j
Screws or other appropriate wall fasteners
(see note below)


