13
EN
OPERATING
INSTRUCTIONS
NOTE:
Before using the tool, read the
instruction book carefully.
Intended Use
This tool is intended for hammer drilling in concrete, brick
and stone. It is also suitable for drilling without impact in
wood, metal, ceramic and plastic.
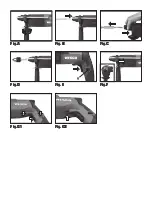
1. ADJUSTING THE AUXILIARY HANDLE (SEE A)
For your personal safety we recommend using the auxiliary
handle at all times.
To adjust the handle, loosen the bottom of the handle anti-
clockwise and rotate the handle around the handle collar
until the handle is in the desired position. Tighten fully.
2. FITTING SDS+ DRILL BIT (not supplied)
(See B)
Clean and lightly oil the drill bit before inserting. Insert the drill
bit with a twisting motion until it latches. The drill bit locks
itself. Check the drill bit is locked in place by pulling on it.
WARNING! Do not need press chuck
locking sleeve when you insert drill bit
into SDS+ chuck.
3. REMOVE SDS+ DRILL BIT (See C)
Pull the Chuck Locking Sleeve in the direction of arrow,
then hold the drill bit and remove it from SDS+ chuck.
4. USE KEY CHUCK WITH SDS+ ADAPTOR
(Not supplied)(See D)
To work with tool without SDS+ shank, a suitable key chuck
with SDS+ adaptor must be used.
Inserting/Removing key chuck with SDS+ adaptor is the
same operation as SDS+ drill bit.
5. OPERATING THE SAFETY ON/OFF
SWITCH (SEE E)
Press the On/Off Switch in for operation, release the switch
to stop.
6. SWITCH LOCK-ON BUTTON
Depress the On/Off Switch then the Lock On Button(6). Your
switch is now locked on for continuous use. To switch off
your tool just depress and release the On/Off Switch.
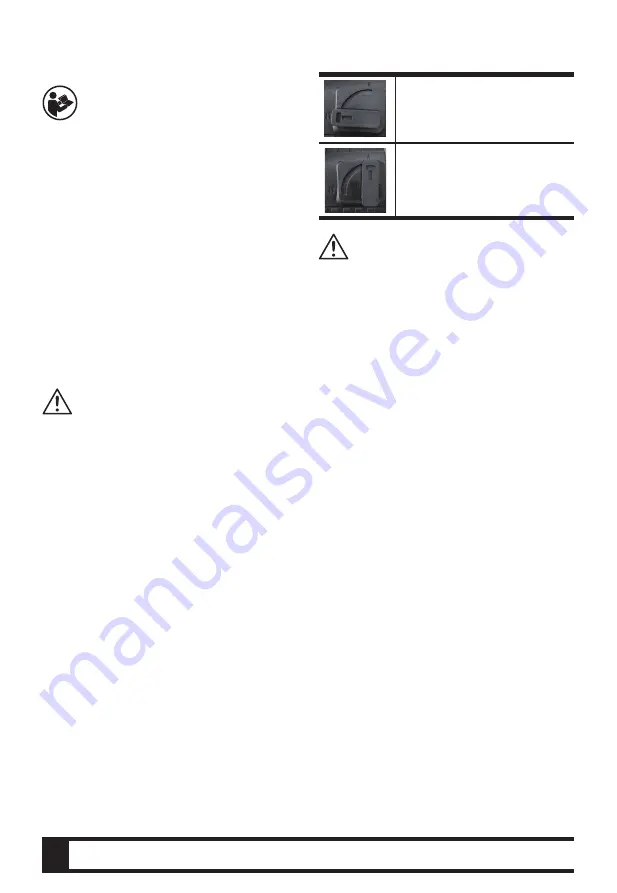
7. FUNCTION MODE SELECTION
The operation of the gearbox for each application is set with
the Function Mode Selection Switch. To change between
functions, rotate the Function Mode Selection Switch to the
desired operating mode.
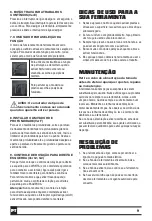
For simultaneous drilling and
impacting of concrete or masonry,
choose the Hammer drilling position.
For drilling into steel, wood and
plastics choose the Rotary drilling
position.
WARNING!
The operating mode selector switch
may be actuated only at a standstill.
8. USING THE DEPTH GAUGE(See F).
Rotate the Depth Gauge Locking Screw for Depth Gauge
anti-clockwise, insert Depth Gauge into the handle. Adjust
the Depth Gauge to desired depth. Rotate the handle
clockwise to tighten the Depth Gauge.
9. FORWARD AND REVERSE ROTATION
CONTROL (See G1, G2)
For drilling usage, switch the forward and reverse rotation
control to the right(with the drill pointing away from you).
Then you can lock the On/Off switch for continuous use
following step 6.
For releasing a jammed drill bit, switch the forward and
reverse rotation control to the left(with the drill pointing
away from you).
NOTE:
Never move the forward and reverse rotation
control whilst the drill in operation or the on/off switch is
locked as this will damage the drill.
WORKING HINTS FOR
YOUR TOOL
1. Reduce the pressure on the drill bit when it is about to
break through. This will prevent the drill from jamming.
2. When drilling a large hole, first drill a pilot hole using a
smaller drill bit.
3. Always apply pressure to your drill bit in a straight line,
and if possible at right angles to the workpiece.
4. Never change the operating mode whilst the drill is
running.
5. Do not apply excessive pressure to the tool when
drilling. Expressive force does not speed up the work.
Содержание WS3160K
Страница 1: ...Martelete SDS plus PT P05 Rotary Hammer EN P10 WS3160K WS3160KU...
Страница 2: ......
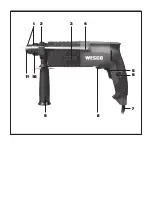
Страница 3: ...1 2 3 4 5 6 7...
Страница 4: ...Fig A Fig B Fig C Fig D Fig E Fig F Fig G1 Fig G2...
Страница 15: ......


