

ASSEMBLY INSTRUCTIONS
MODEL 36512
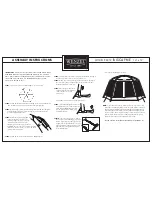
B I S C AY N E
14’ x 12’
IMPORTANT:
WE ADVISE YOU TO ASSEMBLE THE SCREEN HOUSE ONCE
BEFORE GOING CAMPING TO BECOME FAMILIAR WITH THE ASSEMBLY.
NOTE: PLEASE LOOK AT THE REPLACEMENT PARTS DIAGRAM TO SEE HOW
YOUR FRAME IS ASSEMBLED. IT IS RECOMMENDED TO HAVE TWO
ADULTS BE INVOLVED IN SET UP.
STEP 6:
Insert the end of each of the steel poles into the bottom opening of
the plastic joint at the corners of the screen house roof.
STEP 7:
With a person on opposite sides of the screen house, push up on
the screen house frame, raising two opposite poles at the same time.
Continue until all poles are raised.
STEP 8:
Place the open end of each
upright over the fast feet located at
each of the six corners of the
screen house.
Adjust frame until screen house is in upright position.
STEP 9:
Insert stakes through the stake loops
located at each corner of the screen house.
Stake down by hammering each stake
into the ground at a 45° angle, using
a hammer or mallet.
STEP 10:
There are four guy ropes located on
the Screen House. Extend the guy ropes and
make a loop at opposite end of guy rope by
using a slider (as shown) and place loop over
plastic stake. Adjust slider to make guy rope
tight and stake to the ground. Stakes have
been included for this.
Screen house should appear as shown.
NOTE:
To take down screen house, follow steps above in the reverse order.
Place stakes into stake bag and poles into carry bag, which are provided.
The screen house should be folded into equal parts to distribute the bulk.
Start a small tight roll, the width of the carry bag and roll tightly, to allow
the air to escape. Once rolled, tie a string or rope around screen house to
hold into place. Place screen house, frame and stakes into carry bag.
Make sure screen house is clean and dry before storing.
SCREEN HOUSE NOT INTENDED FOR PERMANENT OUTDOOR USE.
STEP 1:
Spread screen house out flat with frame pole sleeves on top.
STEP 2:
Extend the fiberglass frame poles by pulling out each section and placing
it into the metal connectors. You will have three fiberglass poles (A).
STEP 3:
While leaving screen house flat on the ground, insert the three fiberglass
poles through the yellow pole sleeves making sure to follow the seam lines
across the opening at the center.
STEP 4:
Attach the six plastic joints (C) to the
ends of the fiberglass roof poles. The
smaller opening of the corner joints with
“teeth” fit over the end ferrules on the
fiberglass poles .Flex the poles into an arch
and attach the joints to the screen house by inserting
the metal “S” hooks at the eave corners to the small
openings of the plastic joints.
STEP 5:
Extend the six steel, wire-coded poles into individual poles.