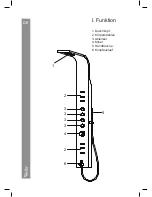
Wellis Mariner Скачать руководство пользователя страница 4

EN

2

1

Parts List

Please unpack and inspect all packages and components carefully, and

make sure they are complete. Examine for shipping damage. If some

parts are damaged or missing, notify your dealer immediately.

6

Before assembly, flush the water

supply pipes thoroughly to

remove debris(allow the water to

run with the main stopcock open

for about 3 mins), otherwise dirt

particles might affect the function

of the shower panel!

Note!

For lnstallation You may Require the Following Tools 

Содержание Mariner

Страница 1: ...Mariner shower panel INSTRUCTION MANUAL Mariner dusch panel BEDIENUNGSANLEITUNG Panneau de douche Mariner MODE D EMPLOI Mariner zuhanypanel HASZNÁLATI UTASÍTÁS EN DE FR HU WZ00085 WZ00086 Mariner ...

Страница 2: ...I Function 1 Shower Head 2 Body jets 3 Diverter 4 Mixer 5 Hand shower 6 Spout 1 2 2 6 3 3 3 3 4 5 086 085 I Function 1 Shower Head 2 Body jets 3 Diverter 4 Mixer 5 Hand shower 6 Spout EN ...

Страница 3: ...s might affect the function of the shower panel Note For lnstallation You may Require the Following Tools Parts List Please unpack and inspect all packages and components carefully and make sure they are complete Examine for shipping damage If some parts are damaged or missing notify your dealer immediately 6 Before assembly flush the water supply pipes thoroughly to remove debris allow the water ...

Страница 4: ...EN 2 1 ater er to pen dirt ction ...

Страница 5: ...panel ensure thatthere are no hidden cables or pipework within the wall NOTE Drill the holes in the wall Insert the wall plugs insidethe holes Tighten the screws to the wallwith wall mounting brackets Hang the shower panel on the mounting bracket Select th Volume a Push and shower o required N o t e Before drilling any holes for fixing your shower panel ensure that there are no hidden cables or pi...

Страница 6: ...e altered to suit individual requirements The dimensions are for reference only wall Dimensions Choose a suitable place to install the shower panel adjust the shower panel s vertical position based on the user s height and your sanitary room Usually install the panels at the distance of 210cm from the top to the ground but you can assemble according to your preference 15cm 96cm Select the shower f...

Страница 7: ......

Страница 8: ...I Function 1 Shower Head 2 Body jets 3 Diverter 4 Mixer 5 Hand shower 6 Spout 1 2 2 6 3 3 3 3 4 5 086 085 I Funktion 1 Duschkopf 2 Körperstrahlen 3 Ablenker 4 Mixer 5 Handdusche 6 Knopfauslauf DE ...

Страница 9: ...pen for about 3 mins otherwise dirt particles might affect the function of the shower panel Note For lnstallation You may Require the Following Tools Parts List Please unpack and inspect all packages and components carefully and make sure they are complete Examine for shipping damage If some parts are damaged or missing notify your dealer immediately 6 Before assembly flush the water supply pipes ...

Страница 10: ...2 1 ater er to pen dirt ction DE ...

Страница 11: ...sure that there are no hidden cables or pipework within the wall COLD HOT Wall mounting Insert the wall plugs inside the holes Tighten the screws to the wall with wall mounting brackets Note T T 1 2 3 wall Drill the holes in the wall Hang the shower panel on the mounting bracket wall wall 6mm Drill 25mm Dime Cho vert inst can Anbringung an der Wand Bevor Sie irgendwelche Löcher bohren um Ihre Dusc...

Страница 12: ...g mit einer Entfernung von 210cm von Boden befestigt aber Sie können es je nach Ihrem Belieben aufbauen Achtung Die Größe kann verstellt werden je nach den individuellen Anforderungen Die Größe sind nur als Referenz gedacht DE Select the shower function required by rotating the control knobs Push and pull to select the hand shower or spout Volume and temperature control Select the shower function ...

Страница 13: ......

Страница 14: ...I Function 1 Shower Head 2 Body jets 3 Diverter 4 Mixer 5 Hand shower 6 Spout 1 2 2 6 3 3 3 3 4 5 086 085 I Fonction 1 Tête de Douche 2 Jets de corps 3 Déviateur 4 Mélangeur 5 Douche à main 6 Bec FR ...

Страница 15: ...topcock open for about 3 mins otherwise dirt particles might affect the function of the shower panel Note For lnstallation You may Require the Following Tools Parts List Please unpack and inspect all packages and components carefully and make sure they are complete Examine for shipping damage If some parts are damaged or missing notify your dealer immediately 6 Before assembly flush the water supp...

Страница 16: ...2 1 ater er to pen dirt ction FR ...

Страница 17: ...el ensure that there are no hidden cables or pipework within the wall COLD HOT Wall mounting Insert the wall plugs inside the holes Tighten the screws to the wall with wall mounting brackets Note T T 1 2 3 wall Drill the holes in the wall Hang the shower panel on the mounting bracket wall wall 6mm Drill 25mm Dime Cho vert inst can Montage mural Avant de percer des trous pour la fixation de votre p...

Страница 18: ...s panneaux à la distance de 210cm du haut au sol mais vous pouvez monter selon vos préférences Remarque La hauteur peut être modifiée pour répondre à des exigences particulières Les dimensions sont seulement pour référence nction de n des ande FR Select the shower function required by rotating the control knobs Push and pull to select the hand shower or spout Volume and temperature control Select ...

Страница 19: ......

Страница 20: ...unction 1 Shower Head 2 Body jets 3 Diverter 4 Mixer 5 Hand shower 6 Spout 1 2 2 6 3 3 3 3 4 5 086 085 HU I Működés 1 Zuhanypanel fej 2 Testvízsugarak 3 Áramláskapcsoló 4 Keverő 5 Kézi zuhany 6 Kifolyócső ...

Страница 21: ... 3 mins otherwise dirt particles might affect the function of the shower panel Note For lnstallation You may Require the Following Tools Parts List Please unpack and inspect all packages and components carefully and make sure they are complete Examine for shipping damage If some parts are damaged or missing notify your dealer immediately 6 Before assembly flush the water supply pipes thoroughly to...

Страница 22: ...HU 2 1 ater er to pen dirt ction ...

Страница 23: ...hower panel ensure that there are no hidden cables or pipework within the wall COLD HOT Wall mounting Insert the wall plugs inside the holes Tighten the screws to the wall with wall mounting brackets Note T T 1 2 3 wall Drill the holes in the wall Hang the shower panel on the mounting bracket wall wall 6mm Drill 25mm Dime Cho vert inst can Falra szerelés Mielőtt lyukakat fúrna a zuhanypanel rögzít...

Страница 24: ...a 210 cm magasságban szerelje fel a zuhanypanelt de választhat egy másik magasságot is Megjegyzés A magasság módosítható az egyéni igényeknek megfelelően A méretek csak viszonyítási alapként szolgálnak HU Válassza ki a zuhanyfunkciót a szabályzógomb elfordításával Nyomja meg és húzza fel a kézizuhany vagy a kifolyócső kiválasztásához Mennyiség és hőmérséklet szabályozás Select the shower function ...

Страница 25: ......

Страница 26: ......

Страница 27: ......

Страница 28: ......

Отзывы: