background image

3–23

Additional Programming

✽✽

1

2

3

4

5

6

7

8

9


Programmable Output Delay Example

The SCANTEAM 3210 is programmed as follows:

 Intercharacter Delay = 10ms

 Interfunction Delay = 50ms

 Bar Code Suffix = Tab and Carriage Return

When a bar code symbol containing the characters “123” is scanned,

the 3210 will output the following to the terminal / computer:

1

2

3

Tab

Carriage Return

10ms
delay

10ms
delay

10ms
delay

50ms
delay

data from

3210

data to

terminal

Содержание SCANTEAM 3210 Series

Страница 1: ...Decoded Output ...

Страница 2: ... 1998 Welch Allyn Inc All rights reserved ...

Страница 3: ...ation in this publication does not represent a commitment on the part of Welch Allyn Welch Allyn shall not be liable for technical or editorial errors or omissions contained herein nor for incidental or consequential damages resulting from the furnishing performance or use of this material This document contains proprietary information which is protected by copyright All rights are reserved No par...

Страница 4: ... to try to correct the interference by one or more of the following measures FCC Class B Compliance Statement Caution Any changes or modifications made to this device that are not expressly approved by Welch Allyn Inc may void the user s authority to operate the equipment Note To maintain compliance with FCC Rules and Regulations cables connected to this device must be shielded cables in which the...

Страница 5: ... CE mark on the product indicates that the system has been tested to and conforms with the provisions noted within the 89 336 EEC Electromagnetic Compatibility Directive and the 73 23 EEC Low Voltage Directive Welch Allyn shall not be liable for use of our product with equipment i e power supplies personal computers etc that is not CE marked and does not comply with the Low Voltage Directive ...

Страница 6: ... Chapter 2 Quick Start Programming Menu Section Page 2 1 Introduction 2 1 2 2 Plug and Play Single Scan Programming 2 2 Programming Instructions 2 2 IBM PC Interface 2 5 RS 232 Wand Emulation Interface 2 6 2 3 Terminal Selection Programming 2 7 Programming Instructions 2 7 Supported Terminals 2 10 Terminal Selection Menu 2 11 2 4 Program Carriage Return Suffix 2 12 2 5 Clear Bar Code Suffix 2 12 2...

Страница 7: ...ion 3 18 Keyboard Emulation Mode 3 21 Intercharacter Delay Selection 3 22 Interfunction Delay Selection 3 22 Intermessage Delay Selection 3 22 Output Mode Selection 3 24 Buffer Scans 3 24 Function Code Transmit 3 25 Laser Redundancy 3 27 Country Code Selection 3 28 3 4 Industrial Symbology Programming 3 30 Codabar Selection 3 31 Code 39 Selection 3 35 Interleaved 2 of 5 Selection 3 38 Code 2 of 5 ...

Страница 8: ...andshake Selection 3 67 3 7 Data Formatter Bar Code Editor Programming 3 68 Require Data Format 3 69 Format Editor Selection 3 70 Delete All Formats 3 73 3 8 Trigger and Reread Delay Programming 3 74 Trigger Mode Selection 3 75 Reread Delay Selection 3 76 Good Read Delay Selection 3 77 3 9 Wand Emulation Programming 3 78 Output Polarity Selection 3 79 Transmission Rate Selection 3 80 3 10 Status C...

Страница 9: ...3 AT XT PS2 Keyboard Wedge 5 3 RS 232 5 4 Wand Emulation 5 5 5 5 General Dimensions 5 6 Chapter 6 Maintenance and Troubleshooting Guide Section Page 6 1 Maintenance 6 1 Cleaning the Scan Window 6 1 Inspecting Cords and Connectors 6 1 Replacing the Interface Cable 6 2 6 2 Troubleshooting 6 3 Customer Support Limited Warranty Hex ASCII Conversion Chart Index Sample Bar Codes inside back cover ...

Страница 10: ...standard symbologies and is bar code programmable allowing you to change its operating and decoding parameters to match your application FLASH memory is a standard feature enabling software upgrades to be downloaded from a PC The 3210 also offers low current consumption to extend the battery life of portable data terminals About This Manual This operating guide and programming menu provides instal...

Страница 11: ... carton The shipping carton should contain Check to make sure everything you ordered is present Keep the shipping carton to return the scanner for servicing Check for damage during shipment Report damage immediately to the carrier who delivered the carton ...

Страница 12: ...1 3 Getting Started 1 3 Scanner Identification SCANTEAM 3210 Identification Label ITEM 3210 D 13 0 1 0 0 1 0 2 0 0 0 0 ...

Страница 13: ...canner Install the scanner by following the steps shown below Disconnect power to the terminal computer by turning the host system power switch to the OFF position Connect the interface cable to the scanner and to the terminal computer 1 2 3 ...

Страница 14: ...ore power to the terminal computer by turning the host system power switch to the ON position You must program the 3210 to work with your terminal or computer by scanning the appropriate programming bar code s For further instructions see Chapter 2 section 2 2 or 2 3 ...

Страница 15: ...1 6 Getting Started The 3210 is ready to scan bar code for your application ...

Страница 16: ...ing Techniques The scanning technique for a single bar code on a page or an object is shown below Move the 3210 Vertically The illustration below shows where to aim the red illuminated beam over the bar code for a good read Decode ...

Страница 17: ...ue for multiple bar codes on a page or object is shown below Move the 3210 Horizontally Note The techniques shown are for a 3210 with automatic trigger To scan with a manual trigger aim the 3210 at a bar code and press the trigger like step 2 ...

Страница 18: ... 3210 for any supported terminal computer Program Carriage Return CR Suffix Use the single bar code in Section 2 4 to program a carriage return suffix in the 3210 To Clear Bar Code Suffix Use the single bar code in Section 2 5 to clear bar code suffix in the programmed 3210 To Reset Factory Default Settings Use the single bar code in Section 2 6 to reset the 3210 to factory default settings Additi...

Страница 19: ...es RS 232 and Wand Emulation Interfaces Note If your terminal or computer isn t included in the list above see Terminal Selection Programming Section 2 3 Programming Instructions To program the SCANTEAM 3210 using the Plug and Play bar codes starting on page 2 5 Locate the Plug and Play single bar code you need for your terminal or computer ...

Страница 20: ...2 3 Quick Start Programming Scan the appropriate Plug and Play single bar code Note Programming bar codes will not output data to your terminal ...

Страница 21: ... the 3210 for terminal interface scan the sample bar code below to check that the 3210 is set up correctly for your terminal Sample Code 39 Bar Code Note Other Sample Bar Codes are inside the back cover of this Operating Guide and Programming Menu ...

Страница 22: ...M AT PS 2 or XT compatibles IBM PC AT and Compatibles Interface also PS 2 30 286 50 55SX 60 70 70 061 70 121 80 IBM PS 2 and Compatibles Interface for PS 2 25 30 models IBM PC XT and Compatibles Interface Each bar code above also programs a carriage return CR suffix Factory default for PC Keyboard Emulation configurations ...

Страница 23: ...t 7 data bits parity bit 1 stop bit 8 Bit Data Wand Emulation Interface Scan the following Plug and Play bar code to program the 3210 for Wand Emulation Code 39 or Same Code Format Code 39 Format Interface Same Code Format Interface Factory default for PC Keyboard Emulation configurations These bar codes also program the following parameters programmable option setting Transmission Rate 25 inches ...

Страница 24: ...g Use this section to program the 3210 to work with any supported terminal or computer Programming Instructions To program the SCANTEAM 3210 using the Terminal Selection menu Locate the two digit terminal I D number for your terminal or computer on the Supported Terminals chart page 2 10 Scan the Program Terminal Interface bar code found on the Terminal Selection menu page 2 11 ...

Страница 25: ...2 8 Quick Start Programming Scan the bar code representing the first digit of the terminal I D number also on page 2 11 Scan the bar code representing the second digit of the terminal I D number ...

Страница 26: ...ar Code Suffix Terminal Selection Programming Example You want to connect the SCANTEAM 3210 to an Esprit terminal model 400 The Supported Terminals Chart next page lists a terminal I D number of 03 for the Esprit 400 terminal First scan Program Terminal Interface bar code on page 2 11 Then scan the Terminal I D number bar codes 0 and 3 The 3210 has been set up and will transmit data to the Esprit ...

Страница 27: ...C Style A4 DEC VT 510 520 PC Style Keyboard 05 Esprit 200 400 05 HP Vectra Mini Din 03 HP Vectra Din 01 IBM PC XT 01 IBM PS 2 25 30 02 IBM AT PS 2 30 286 50 55SX 03 60 70 70 061 70 121 80 3153 Olivetti M19 M200 01 Olivetti 240 250 290 380 P500 03 RS232 TTL 00 Wand Emulation Code 39 61 Wand Emulation Same Code 64 ...

Страница 28: ... Programming Terminal Selection Menu Scan the bar code below to program a terminal interface Scan the two digit terminal I D number for the terminal interface you want set up see chart on page 2 10 0 1 2 3 4 5 6 7 8 9 ...

Страница 29: ...ing this code clears all previously programmed prefixes and suffixes 2 5 Clear Bar Code Suffix If your application doesn t need a bar code suffix such as carriage return CR you may scan the bar code below to clear Bar Code Suffix 2 6 Reset Factory Settings Scan the bar code below to reset the SCANTEAM 3210 scanner to the factory settings The factory settings are indicated by asterisks on the progr...

Страница 30: ...y programmable feature Additional programming selections include Prefixes and Suffixes Output beeper delays output mode country codes Industrial Symbologies Retail Symbologies RS 232 baud rate parity data format protocols Data Formatter CCD Operation Wand Emulation and Laser Output Status Check After you ve programmed the SCANTEAM 3210 the information represented by the programming bar codes is st...

Страница 31: ... that section and Scan the ENTER bar code to enter programming mode Scan the DEFAULT bar code to set factory settings Factory settings are indicated by asterisks Scan the EXIT bar code to exit programming mode Changing Settings To change the default values turn to the programming selection you want to change Scan the ENTER bar code to enter programming mode unless noted otherwise Scan the Selectio...

Страница 32: ...in any programming section you may use the bar codes below to DEFAULT DEFAULT resets the scanner to factory settings ESCAPE ESCAPE stops the programming sequence programming selections are unchanged EXIT EXIT stops the programming sequence any changed programming selections are saved ...

Страница 33: ... section to program the 3210 for Bar Code Prefix and Suffix selections Scan the bar codes below to default the 3210 to factory settings for bar code prefix and suffix selections ENTER Prefix Suffix Program Mode DEFAULT All Prefix Suffix Selections EXIT Prefix Suffix Program Mode ...

Страница 34: ...ming Bar Code Prefix Selection Code I D Transmit ENTER Program Mode Scan the bar code below to program Code I D Transmit then choose enable or disable Code I D Transmit Enable Yes Disable No EXIT Program Mode Code I D Chart ...

Страница 35: ...amming Bar Code Prefix Selection AIM I D Transmit ENTER Program Mode Scan the bar code below to program AIM I D Transmit then choose enable or disable AIM I D Transmit Enable Yes Disable No EXIT Program Mode AIM I D Chart ...

Страница 36: ...SCII Chart F and F bar codes save the prefix assignment EXIT Prefix Selection bar code exits programming mode Bar Code Suffix Example To program a carriage return suffix for ALL symbologies scan the following bar codes ENTER Suffix Selection Assign ASCII Character Suffix 9 9 on Symbology Bar Code chart 0 D on ASCII Bar Code chart F F on ASCII Bar Code chart EXIT Suffix Selection ENTER Suffix Selec...

Страница 37: ... the bar code below to start assigning an ASCII character prefix Assign ASCII Character Prefix Refer to the chart below then scan the two bar codes on the next page that represent the bar code symbology requiring a prefix Symbology Chart To erase prefix selections for ALL symbologies scan F F and then EXIT ...

Страница 38: ...3 9 Additional Programming 1 2 3 4 5 6 7 8 9 A B C D E F ...

Страница 39: ...9 2A 2B 2C 2D 2E 2F 0 1 2 3 4 5 6 7 8 9 30 31 32 33 34 35 36 37 38 39 3A 3B 3C 3D 3E 3F A B C D E F G H I J K L M N O 40 41 42 43 44 45 46 47 48 49 4A 4B 4C 4D 4E 4F P Q R S T U V W X Y Z _ 50 51 52 53 54 55 56 57 58 59 5A 5B 5C 5D 5E 5F a b c d e f g h i j k l m n o 60 61 62 63 64 65 66 67 68 69 6A 6B 6C 6D 6E 6F p q r s t u v w x y z DEL 70 71 72 73 74 75 76 77 78 79 7A 7B 7C 7D 7E 7F Scan two o...

Страница 40: ...3 11 Additional Programming 0 1 2 3 4 5 6 7 8 9 A B C D E F ...

Страница 41: ...n the bar code below to start assigning an ASCII character suffix Assign ASCII Character Suffix Refer to the chart below then scan the two bar codes on the next page that represent the bar code symbology requiring a suffix Symbology Chart To erase suffix selections for ALL symbologies scan F F and then EXIT ...

Страница 42: ...3 13 Additional Programming 1 2 3 4 5 6 7 8 9 A B C D E F ...

Страница 43: ...9 2A 2B 2C 2D 2E 2F 0 1 2 3 4 5 6 7 8 9 30 31 32 33 34 35 36 37 38 39 3A 3B 3C 3D 3E 3F A B C D E F G H I J K L M N O 40 41 42 43 44 45 46 47 48 49 4A 4B 4C 4D 4E 4F P Q R S T U V W X Y Z _ 50 51 52 53 54 55 56 57 58 59 5A 5B 5C 5D 5E 5F a b c d e f g h i j k l m n o 60 61 62 63 64 65 66 67 68 69 6A 6B 6C 6D 6E 6F p q r s t u v w x y z DEL 70 71 72 73 74 75 76 77 78 79 7A 7B 7C 7D 7E 7F Scan two o...

Страница 44: ...3 15 Additional Programming 0 1 2 3 4 5 6 7 8 9 A B C D E F ...

Страница 45: ... Programming Use this section to program the 3210 for Output selections Scan the bar codes below to default the 3210 to factory settings for output selections ENTER Output Program Mode DEFAULT All Output Selections EXIT Output Program Mode ...

Страница 46: ...ng Beeper Selection ENTER Program Mode Scan the bar code below to program Beeper selection then choose the volume you want Beeper Selection Beeper Off Beeper Low Volume Beeper Medium Volume Beeper High Volume EXIT Program Mode ...

Страница 47: ...ng Keyboard Style Selection ENTER Program Mode Scan the bar code below to program Keyboard Style selection then choose the keyboard style you want Keyboard Style Selection Style A Style B Style C Style D Style F Yes No Style G ...

Страница 48: ...nd C cannot be used with one another however they be combined with other styles All styles with Yes No bar codes can be scanned in combination with all other styles For example you can combine style F with G First scan F then scan G If Style D is combined with another style D must be scanned first For example scan D before scanning B to enable both the CTRL ASCII and the CAPS LOCK functions Scanni...

Страница 49: ... No No Yes Yes No LOCK LOCK w 122 keys 9 Not Used std No No No 10 Not Used std No No No D E 11 Not Used std No No No D E 19 Not Used std No No No D E 23 std No No No 24 std No No No D E 25 std No No No D E 35 std CAPS SHFT No No No LOCK LOCK 45 std CAPS SHFT No No No LOCK LOCK 46 std CAPS SHFT No No No LOCK LOCK 71 std CAPS SHFT No No No LOCK LOCK 84 std CAPS SHFT No No No LOCK LOCK 97 std obĆ obĆ...

Страница 50: ...s supported IBM PC XT XT CAPS LOCK Keyboard Style SHIFT LOCK Gr DOS SHIFT LOCK IBM PC AT AT CAPS LOCK SHIFT LOCK CTRL ASCII Gr DOS SHIFT LOCK IBM PS2 50 80 NORM CAPS LOCK SHIFT LOCK Gr DOS SHIFT LOCK CTRL ASCII CTRL ASCII Keyboard Emulation Mode For IBM PC AT terminal ID 03 only ENTER Program Mode Scan the bar codes below to program Keyboard Emulation Mode then enable or disable the selection Keyb...

Страница 51: ...between 00 and 99 multiples of 5ms Scan the bar code below to start Interfunction Delay selection Interfunction Delay Selection Scan two of the Numeric Bar Codes next page to set the delay to any value between 00 and 99 multiples of 5ms Scan the bar code below to start Intermessage Delay selection Intermessage Delay Selection Scan two of the Numeric Bar Codes next page to set the delay to any valu...

Страница 52: ...lows Intercharacter Delay 10ms Interfunction Delay 50ms Bar Code Suffix Tab and Carriage Return When a bar code symbol containing the characters 123 is scanned the 3210 will output the following to the terminal computer 1 2 3 Tab Carriage Return 10ms delay 10ms delay 10ms delay 50ms delay data from 3210 data to terminal ...

Страница 53: ...to program Buffer Scans then choose enable or disable If enabled the 3210 accepts a second scan while transmitting the current scan to the terminal If disabled the 3210 won t accept additional scans until the current scan is output to the terminal Buffer Scans Enable Yes Disable No Programming the 3210 for Wand Emulation mode disables the Buffer Scans Output option EXIT Program Mode ...

Страница 54: ...can the bar code below to start Output Mode selection Output Mode Selection Scan the bar code below to program Function Code Transmit then choose enable or disable Refer to Chapter 4 for Function Code tables Supported Interface Keys Function Code Transmit Enable Yes Disable No EXIT Program Mode ...

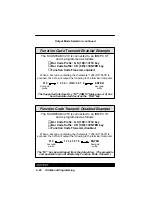
Страница 55: ...fix ENTER bar code suffix The Supported Interface Key HT IBM XT table page 4 4 has been translated and sent as the TAB key Function Code Transmit Disabled Example The SCANTEAM 3210 is connected to an IBM PC XT and is programmed as follows Bar Code Prefix GS 1D F10 key Bar Code Suffix CR 0D ENTER key Function Code Transmit disabled When a bar code containing the characters 1234 HT 5678 is scanned t...

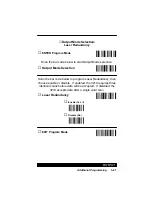
Страница 56: ...utput Mode selection Output Mode Selection Scan the bar code below to program Laser Redundancy then choose enable or disable If enabled the 3210 requires three identical scans before data will be accepted If disabled the 3210 accepts data after a single valid scan Laser Redundancy Enable Yes Disable No EXIT Program Mode ...

Страница 57: ...ar code below to start Country Code selection Country Code Selection Refer to the chart below to find the numeric value of the country keyboard you require Country Code Scan two of the Numeric Bar Codes next page that represent the Country Code you want programmed EXIT Program Mode ...

Страница 58: ...3 29 Additional Programming 0 1 2 3 4 5 6 7 8 9 ...

Страница 59: ...ogy selections Scan the bar codes below to default the 3210 to factory settings for industrial symbology selections ENTER Industrial Symbology Program Mode DEFAULT All Industrial Symbology Selections EXIT Industrial Symbology Program Mode Examples of Industrial bar codes may be found on page 3 34 in this programming section ...

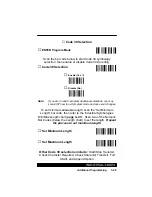
Страница 60: ...w to exit program mode and save your changes To set minimum allowable length scan the Set Minimum Length bar code then refer to the Industrial Symbologies Min Max Length chart page 3 47 Scan two of the Numeric Bar Codes below the Length chart to set the length Repeat the process to set maximum length Set Minimum Length Set Maximum Length Other Codabar selections include Start Stop Transmit Check C...

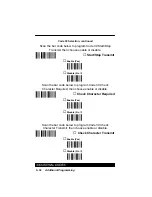
Страница 61: ...r disable Start Stop Transmit Enable Yes Disable No Scan the bar code below to program Codabar Check Character Required then choose enable or disable Check Character Required Enable Yes Disable No Scan the bar code below to program Codabar Check Character Transmit then choose enable or disable Check Character Transmit Enable Yes Disable No ...

Страница 62: ... code below to program Codabar Concatenation then choose enable or disable Concatenation Enable Yes Disable No Scan the bar code below to program Codabar Concatenation Required then choose enable or disable Concatenation Required Enable Yes Disable No EXIT Program Mode ...

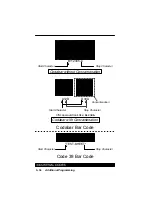
Страница 63: ...ar Bar Code Start Character Stop Character Codabar without Concantenation A12D D34A Start Character Stop Character Codabar with Concantenation Concantenation Scan would look like A1234A TEST SHEET Code 39 Bar Code Start Character Stop Character ...

Страница 64: ...XIT now to exit program mode and save your changes To set minimum allowable length scan the Set Minimum Length bar code then refer to the Industrial Symbologies Min Max Length chart page 3 47 Scan two of the Numeric Bar Codes below the Length chart to set the length Repeat the process to set maximum length Set Minimum Length Set Maximum Length Other Code 39 selections include Start Stop Transmit C...

Страница 65: ...r disable Start Stop Transmit Enable Yes Disable No Scan the bar code below to program Code 39 Check Character Required then choose enable or disable Check Character Required Enable Yes Disable No Scan the bar code below to program Code 39 Check Character Transmit then choose enable or disable Check Character Transmit Enable Yes Disable No ...

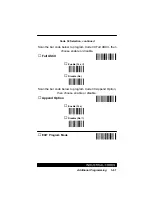
Страница 66: ...Scan the bar code below to program Code 39 Full ASCII then choose enable or disable Full ASCII Enable Yes Disable No Scan the bar code below to program Code 39 Append Option then choose enable or disable Append Option Enable Yes Disable No EXIT Program Mode ...

Страница 67: ...rogram additional selections you may scan EXIT now to exit program mode and save your changes To set minimum allowable length scan the Set Minimum Length bar code then refer to the Industrial Symbologies Min Max Length chart page 3 47 Scan two of the Numeric Bar Codes below the Length chart to set the length Repeat the process to set maximum length Set Minimum Length Set Maximum Length Other Inter...

Страница 68: ...w to program Interleaved 2 of 5 Check Digit Required then choose enable or disable Check Digit Required Enable Yes Disable No Scan the bar code below to program Interleaved 2 of 5 Check Digit Transmit then choose enable or disable Check Digit Transmit Enable Yes Disable No EXIT Program Mode ...

Страница 69: ...If you don t need to program additional selections you may scan EXIT now to exit program mode and save your changes To set minimum allowable length scan the Set Minimum Length bar code then refer to the Industrial Symbologies Min Max Length chart page 3 47 Scan two of the Numeric Bar Codes below the Length chart to set the length Repeat the process to set maximum length Set Minimum Length Set Maxi...

Страница 70: ...ote If you don t need to program additional selections you may scan EXIT now to exit program mode and save your changes To set minimum allowable length scan the Set Minimum Length bar code then refer to the Industrial Symbologies Min Max Length chart page 3 47 Scan two of the Numeric Bar Codes below the Length chart to set the length Repeat the process to set maximum length Set Minimum Length Set ...

Страница 71: ...m additional selections you may scan EXIT now to exit program mode and save your changes To set minimum allowable length scan the Set Minimum Length bar code then refer to the Industrial Symbologies Min Max Length chart page 3 47 Scan two of the Numeric Bar Codes below the Length chart to set the length Repeat the process to set maximum length Set Minimum Length Set Maximum Length Other Code 11 se...

Страница 72: ...ditional Programming Code 11 Selection continued Scan the bar code below to program Code 11 2 Check Digits Required then choose enable or disable 2 Check Digits Required Enable Yes Disable No EXIT Program Mode ...

Страница 73: ...on t need to program additional selections you may scan EXIT now to exit program mode and save your changes To set minimum allowable length scan the Set Minimum Length bar code then refer to the Industrial Symbologies Min Max Length chart page 3 47 Scan two of the Numeric Bar Codes below the Length chart to set the length Repeat the process to set maximum length Set Minimum Length Set Maximum Leng...

Страница 74: ... don t need to program additional selections you may scan EXIT now to exit program mode and save your changes To set minimum allowable length scan the Set Minimum Length bar code then refer to the Industrial Symbologies Min Max Length chart page 3 47 Scan two of the Numeric Bar Codes below the Length chart to set the length Repeat the process to set maximum length Set Minimum Length Set Maximum Le...

Страница 75: ... Disable No Note For complete EAN 128 support the AIM code ID feature also should be enabled Refer to Page 3 6 EXIT Program Mode Disable All Symbologies ENTER Program Mode Scan the bar code below to Disable ALL Symbologies Caution You will not be prompted to verify this option Disable All Symbologies EXIT Program Mode Note All Retail Symbologies will be disabled also ...

Страница 76: ...3 47 Additional Programming Industrial Symbologies Min Max Length Chart 0 1 2 3 4 5 6 7 8 9 ...

Страница 77: ...y selections Scan the bar codes below to default the 3210 to factory settings for retail symbology selections ENTER Retail Symbology Program Mode DEFAULT All Retail Symbology Selections EXIT Retail Symbology Program Mode Examples of Retail bar codes may be found on pages 3 52 3 56 and 3 57 in this programming section ...

Страница 78: ... Version A Version E0 Version E1 Check Digit Transmit Number System Transmit Version E Expand 2 Digit Addendum and 5 Digit Addendum Scan the bar code below to program UPC Version A then choose enable or disable Version A Enable Yes Disable No Scan the bar code below to program UPC Version E0 then choose enable or disable Version E0 Enable Yes Disable No ...

Страница 79: ...able or disable Version E1 Enable Yes Disable No Scan the bar code below to program UPC Check Digit Transmit then choose enable or disable Check Digit Transmit Enable Yes Disable No Scan the bar code below to program UPC Number System Transmit then choose enable or disable Number System Transmit Enable Yes Disable No ...

Страница 80: ...en choose enable or disable Version E Expand Enable Yes Disable No Scan the bar code below to program UPC 2 Digit Addenda then choose enable or disable 2 Digit Addenda Enable Yes Disable No Scan the bar code below to program UPC 5 Digit Addenda then choose enable or disable 5 Digit Addenda Enable Yes Disable No ...

Страница 81: ... 52 Additional Programming UPC Selection continued EXIT Program Mode 0 31425 60789 5 12345 UPC A Bar Code System Check Digit 5 Digit Addendum 0 12345 00350 9 UPC A Bar Code System Check Digit NO Addendum ...

Страница 82: ...e below to start EAN symbology selection EAN Selection EAN selections include EAN JAN 13 EAN JAN 8 Check Digit Transmit 2 Digit Addendum 5 Digit Addendum and ISBN Enable Scan the bar code below to program EAN JAN 13 then choose enable or disable EAN JAN 13 Enable Yes Disable No ...

Страница 83: ...se enable or disable EAN JAN 8 Enable Yes Disable No Scan the bar code below to program EAN Check Digit Transmit then choose enable or disable Check Digit Transmit Enable Yes Disable No Scan the bar code below to program EAN 2 Digit Addenda then choose enable or disable 2 Digit Addenda Enable Yes Disable No ...

Страница 84: ...can the bar code below to program EAN 5 Digit Addenda then choose enable or disable 5 Digit Addenda Enable Yes Disable No Scan the bar code below to program EAN ISBN Enable then choose enable or disable ISBN Enable Enable Yes Disable No EXIT Program Mode ...

Страница 85: ...3 56 Additional Programming 97 80123 8 50595 EAN 8 Bar Code 8 Digits Check Digit 5 Digit Addendum 97 80123 8 EAN 8 Bar Code 8 Digits Check Digit NO Addendum ...

Страница 86: ...3 57 Additional Programming 9 780123 456793 50595 EAN 13 Bar Code 13 Digits Check Digit 5 Digit Addendum 9 781853 360824 EAN 13 Bar Code 13 Digits Check Digit NO Addendum ...

Страница 87: ... to program UPC EAN Addenda Required then choose enable or disable UPC EAN Addenda Required Enable Yes Disable No Scan the bar code below to program UPC EAN Format then choose to add a space or not to add a space between the UPC EAN code and addenda Addenda Format Space No Space EXIT Program Mode ...

Страница 88: ...eed to program additional selections you may scan EXIT now to exit program mode and save your changes To set minimum allowable length scan the Set Minimum Length bar code then refer to the Retail Symbologies Min Max Length chart page 3 62 Scan two of the Numeric Bar Codes below the Length chart to set the length Repeat the process to set maximum length Set Minimum Length Set Maximum Length EXIT Pr...

Страница 89: ... don t need to program additional selections you may scan EXIT now to exit program mode and save your changes To set minimum allowable length scan the Set Minimum Length bar code then refer to the Retail Symbologies Min Max Length chart page 3 62 Scan two of the Numeric Bar Codes below the Length chart to set the length Repeat the process to set maximum length Set Minimum Length Set Maximum Length...

Страница 90: ... All Symbologies ENTER Program Mode Scan the bar code below to Disable ALL Symbologies Caution You will not be prompted to verify this option Disable All Symbologies EXIT Program Mode Note All Industrial Symbologies will be disabled also ...

Страница 91: ...3 62 Additional Programming Retail Symbologies Min Max Length Chart 0 1 2 3 4 5 6 7 8 9 ...

Страница 92: ... Programming Use this section to program the 3210 for RS 232 selections Scan the bar codes below to default the 3210 to factory settings for RS 232 selections ENTER RS 232 Program Mode DEFAULT All RS 232 Selections EXIT RS 232 Program Mode ...

Страница 93: ...ogram Baud Rate selection then choose the baud rate you want Baud Rate Selection 300 bps bits per second 4800 bps bits per second 600 bps bits per second 9600 bps bits per second 1200 bps bits per second 19200 bps bits per second 2400 bps bits per second 38400 bps bits per second EXIT Program Mode ...

Страница 94: ...5 Additional Programming Parity Selection ENTER Program Mode Scan the bar code below to program Parity selection then choose the parity you want Parity Selection None Mark Space Odd Even EXIT Program Mode ...

Страница 95: ... Format Selection ENTER Program Mode Scan the bar code below to program Data Format selection then choose the data format you want Data Format Selection 7 Data Parity 1 Stop 7 Data Parity 2 Stop 8 Data Parity 1 Stop EXIT Program Mode ...

Страница 96: ...ble the CTS Handshake if your terminal computer doesn t have a CTS I O line Scan the bar code below to program CTS Handshake selection then choose enable or disable CTS Handshake Selection Enable Yes Disable No CTS Handshake only applies when the 3210 is in Serial Mode RS 232 TTL or True EXIT Program Mode ...

Страница 97: ... this section to program the 3210 for Data Formatter Bar Code Editor selections Scan the bar codes below to default the 3210 to factory settings for Data Formatter selections ENTER Data Formatter Program Mode DEFAULT All Data Formatter Selections EXIT Data Formatter Program Mode ...

Страница 98: ...Additional Programming Require Data Format ENTER Program Mode Scan the bar code below to program Require Data Format then choose enable or disable Require Data Format Enable Yes Disable No EXIT Program Mode ...

Страница 99: ...resent the terminal type 00 99 See Section 2 3 for a list of terminal I D numbers Code I D Refer to the Symbology chart page 3 8 then scan two bar codes from the Hex Value column that represent the Code I D of the symbology you want formatted Length Scan two bar codes representing the bar code length you require 00 99 Editor Command Sequences Refer to the Format Editor Commands chart page 3 72 Sca...

Страница 100: ...3 71 Additional Programming 0 1 2 3 4 5 6 7 8 9 A B C D E F ...

Страница 101: ...aracter 00 7F HEX 5 5 1 0 0 0 Syntax F4XXNN XX HEX ASCII character 00 7F HEX NN number of characters 00 99 DEC 1 0 5 0 0 Syntax F5NN NN number of characters 00 99 DEC 1 0 5 0 0 Syntax F6NN NN number of characters 00 99 DEC 1 0 Syntax F7 5 0 0 1 0 5 Syntax F8XX XX HEX ASCII character 00 7F 5 0 0 1 0 5 Syntax F9XX XX HEX ASCII character 00 7F 4 0 0 4 0 0 0 4 Syntax FA 0 5 0 0 0 0 0 5 Syntax FBXXFB F...

Страница 102: ...ete All Formats ENTER Program Mode Scan the bar code below to Delete ALL Formats then scan Yes if you are sure you want to delete all formats or No if you do not want to delete all formats Delete All Formats Yes No EXIT Program Mode ...

Страница 103: ...ion to program the 3210 for Trigger Reread Delay selections Scan the bar codes below to default the 3210 to factory settings for Trigger Reread Delay selections ENTER Trigger Reread Delay Program Mode DEFAULT All Trigger Reread Delay Selections EXIT Trigger Reread Delay Program Mode ...

Страница 104: ... the bar code below to program Trigger Mode selection then choose the trigger option you want Trigger Mode Selection Auto Trigger Manual Trigger Manual Trigger Switched Power Trigger Mode only available with RS 232 and Wand Emulation Interface configurations EXIT Program Mode ...

Страница 105: ...Selection ENTER Program Mode Scan the bar code below to program Reread Delay selection then choose the delay you want Reread Delay Selection Low 175 milliseconds Medium 450 milliseconds High 1 0 second Extra High 2 0 seconds EXIT Program Mode ...

Страница 106: ...ead Delay Selection ENTER Program Mode Scan the bar code below to program Good Read Delay selection then choose the delay you want Good Read Delay Selection None Low 500 milliseconds Medium 1 0 second High 1 5 seconds EXIT Program Mode ...

Страница 107: ... this section to program the 3210 for Wand Emulation selections Scan the bar codes below to default the 3210 to factory settings for wand emulation selections ENTER Wand Emulation Program Mode DEFAULT All Wand Emulation Selections EXIT Wand Emulation Program Mode ...

Страница 108: ...ming Output Polarity Selection ENTER Program Mode Scan the bar code below to program Output Polarity selection then choose the polarity you want Output Polarity Selection Wand Emulation White High Black High EXIT Program Mode ...

Страница 109: ... program Transmission Rate selection then choose the transmission rate you want Transmission Rate Selection 10 ips inches per second 120 ips inches per second 25 ips inches per second 150 ips inches per second 40 ips inches per second 200 ips inches per second 80 ips inches per second EXIT Program Mode ...

Страница 110: ...mats status One format per line will be printed out Show Formats ENTER Status Check Mode Scan the bar code to show the software revision level The software revision for the 3210 D will be printed out as WA34389XXX Show Software Revision There are no default settings for status check selections After Formats and or Software Revision have printed out the 3210 will automatically EXIT programming mode...

Страница 111: ...3 82 Additional Programming ...

Страница 112: ...terminals that can be used with the SCANTEAM 3210 Hand Held CCD scanner Function Code HEX ASCII Value Full ASCII CTRL NUL 00 2 SOH 01 A STX 02 B ETX 03 C EOT 04 D ENQ 05 E ACK 06 F BEL 07 G BS 08 H HT 09 I LF 0A J VT 0B K FF 0C L CR 0D M SO 0E N SI 0F O DLE 10 P DC1 11 Q DC2 12 R DC3 13 S DC4 14 T NAK 15 U SYN 16 V ETB 17 W CAN 18 X EM 19 Y SUB 1A Z ESC 1B FS 1C GS 1D RS 1E 6 US 1F ...

Страница 113: ... 2 Interface Keys The last five characters in the Full ASCII CTRL column 6 apply to US only The following chart indicates the equivalents of these five characters for different countries Country Codes i ...

Страница 114: ...06 BEL 07 BS 08 HT 09 LF 0A VT 0B FF 0C CR 0D SO 0E SI 0F DLE 10 DC1 11 DC2 12 DC3 13 DC4 14 NAK 15 SYN 16 ETB 17 CAN 18 EM 19 SUB 1A ESC 1B FS 1C GS 1D RS 1E US 1F RESERVED ENTER KP CAP LOCK RESERVED RESERVED RESERVED RESERVED CR ENTER RESERVED TAB RESERVED TAB DELETE CR ENTER INSERT ESCAPE F11 HOME PRINT BACKSPACE BACK TAB F12 F1 F2 F3 F4 F5 F6 F7 F8 F9 F10 ...

Страница 115: ...BS 08 HT 09 LF 0A VT 0B FF 0C CR 0D SO 0E SI 0F DLE 10 DC1 11 DC2 12 DC3 13 DC4 14 NAK 15 SYN 16 ETB 17 CAN 18 EM 19 SUB 1A ESC 1B FS 1C GS 1D RS 1E US 1F RESERVED CR ENTER CAPS LOCK RESERVED RESERVED RESERVED RESERVED CR ENTER RESERVED TAB RESERVED TAB DELETE CR ENTER INSERT RESERVED RESERVED HOME PRINT BACKSPACE BACK TAB RESERVED F1 F2 F3 F4 F5 F6 F7 F8 F9 F10 ...

Страница 116: ...4 5 Code 39 Chart FULL ASCII CODE 39 BAR CODE CHART U NUL A SOH B STX C ETX D EOT E ENQ F ACK G BEL H BS I HT J LF K VT L FF M CR N SO O SI ...

Страница 117: ...4 6 Code 39 Chart P DLE Q DC1 R DC2 S DC3 T DC4 U NAK V SYN W ETB X CAN Y EM Z SUB A ESC B FS C GS D RS E US ...

Страница 118: ...noncondensing 101 000 to 69 000 Pascals Sea level to 3 000 meters Functional after ten 5ft 1 5m drops Functional after 15KV discharge 3 000 lux in contact with bar code 5 2 Electrical Specifications parameter specification Operating Voltage Current Draw Standby Current In Rush Current Power Supply Noise Rejection Mean Time Between Failure MTBF 5 VDC 10 120mA while scanning 100µA untriggered with m...

Страница 119: ...ew Angle Minimum Reflective Difference MRD Scan Rate Field Width Illumination Working Distance Resolution 7 degrees 30 degrees 37 5 50 scans per second 2 2 inches 55mm at contact 660 nm Visible Red Light Emitting Diodes LED with focusing reflector Near contact 6 mil 0 153mm code density minimum ...

Страница 120: ... in scanner handle See chart below Pin Standard Welch Allyn Color Code Signal 1 N C Function Cord Shield 2 Blue Prog 1 3 Black Ground Supply Ground 4 Orange Terminal Clock Tclock 5 Green Tdata 6 5 Volt Power Connection 5VDC 7 White Kdata Keyboard Data 8 Kclock Keyboard Clock Braid Red Gray Terminal Data 1 8 8 Pin RJ41 Modular Connector ...

Страница 121: ...elow Pin Standard Welch Allyn Color Code Signal 1 N C Function Cord Shield 2 Blue Prog 1 3 Black Ground Supply Ground 4 Orange Receive Data Serial Data to Scanner RXD 5 Green TXD 6 5 Volt Power Connection 5VDC 7 White RTS Request to Send Data 8 CTS Clear to Send Data Braid Red Gray Transmit Data Serial Data from Scanner 1 8 8 Pin RJ41 Modular Connector ...

Страница 122: ...ector in scanner handle See chart below 1 8 8 Pin RJ41 Modular Connector Pin Standard Welch Allyn Color Code Signal 1 N C Function Cord Shield 2 Blue 5VDC 5 Volt Power Connection 3 Black Ground Supply Ground 4 Not Used N C 5 Green Barcode 6 5 Volt Power Connection 5VDC 7 Not Used N C 8 N C Braid Red Not Used Bar Code Data Output ...

Страница 123: ...5 6 Specifications and Pinouts 5 5 General Dimensions SCANTEAM 3210 Side View Front View Top View 3 4 View 5 83 in 14 8cm 2 97 in 7 5cm 5 84 in 14 8cm Belt Loop for portable applications ...

Страница 124: ... a mild detergent water solution If a detergent solution is used rinse with a clean tissue dampened with water only The scanner housing may also be cleaned the same way Do not submerge the scanner in water The scanner s housing is not water tight Caution Do not use abrasive wipers or tissues on the scan window abrasive wipers may scratch the window Never use solvents alcohol or acetone on the hous...

Страница 125: ...able Turn the power to the host system OFF To Replace the Interface Cable Disconnect the scanner cable from the terminal or computer Locate the small hole on the side of the scanner handle near the base see Figure below Straighten one end of a paper clip Insert the end of the paper clip into the small hole and press in This depresses the retention tab releasing the connector Pull the connector out...

Страница 126: ...trigger mode To change to Auto trigger mode see Section 3 7 Trigger Mode Selection Is the 3210 having trouble reading your bar codes If the 3210 isn t reading bar codes well check that the bar codes aren t smeared rough scratched or exhibiting voids aren t coated with frost or water droplets on the surface are enabled in the 3210 or the decoder the 3210 is connected to Is the bar code displayed bu...

Страница 127: ...bology selections see Sections 3 4 and 3 5 The 3210 won t read your bar code at all If the 3210 will not read your bar code Try scanning the Sample Bar Codes found inside the back cover If the 3210 reads the Sample Bar Codes check that your bar code is readable See Is the 3210 having trouble reading your bar codes on the previous page If the 3210 does not read the Sample Bar Codes either continue ...

Страница 128: ...ome options and now want the factory settings restored see Section 2 4 and scan the Factory Default Settings bar code If All Else Fails If you are still experiencing problems call your Distributor or Welch Allyn 315 685 8945 8 a m to 4 30 p m EST For more information on Customer Support or Warranty information see the two sections following this chapter ...

Страница 129: ...6 6 Maintenance and Troubleshooting ...

Страница 130: ... Welch Allyn Product Service Department at the address telephone number listed below to obtain a Return Material Authorization number RMA Welch Allyn Inc Data Collection Division Product Service Department 4619 Jordan Road P O Box 187 Skaneateles Falls New York 13153 0187 Product Service Department Telephone 315 685 4278 or 685 4360 Fax 315 685 4156 For service in Europe please contact your Welch ...

Страница 131: ... 682104 For service in Asia please contact your Welch Allyn representative at address below or your local distributor Welch Allyn Hong Kong Office 10 F Tung Sun Commercial Centre 194 200 Lockhart Road Wanchai Hong Kong Telephone Int 852 2511 3050 or 2511 3132 Fax Int 852 2511 3557 Help Desk If after reviewing the Troubleshooting Guide Section 6 2 you still need assistance installing or troubleshoo...

Страница 132: ...amaged by accident misuse neglect improper shipping and handling The warranty is valid only if the scanner has not been tampered with or serviced by any party unauthorized by Welch Allyn as a repair facility The responsibility to protect the scanner from static damage is solely that of the user THE WARRANTIES SET FORTH HEREIN ARE IN LIEU OF ANY AND ALL OTHER WARRANTIES EXPRESSED OR IMPLIED INCLUDI...

Страница 133: ... HEREIN SOME STATES DO NOT ALLOW THE EXCLUSION OR LIMITATION OF INCIDENTAL OR CONSEQUENTIAL DAMAGES SO THE ABOVE LIMITATIONS OR EXCLUSIONS MAY NOT APPLY TO YOU This warranty gives you specific legal rights and you may also have other rights which vary from state to state or country to country ...

Страница 134: ... V W X Y Z _ a b c d e f g h i j k l m n o p q r s t u v w x y z DEL CONTROL FUNCTION DEFINITIONS NUL SOH STX ETX EOT ENQ ACK BEL BS HT LF VT FF CR SO SI DLE DC1 DC2 DC3 DC4 NAK SYN ETB CAN EM SUB ESC FS GS RS US SP DEL Null or all zeros Start of heading Start of text End of text End of tranmission Enquiry Acknowledge Bell or alarm Backspace Horizontal tabulation Line Feed Vertical tabulation Form...

Страница 135: ...6 12 Hex ASCII Chart ...

Страница 136: ... 03 5 2 4 2 6 1 70 2 1 70 6 1 70 2 1 70 2 1 70 9 6 6 1 70 4 2 4 1 7 42 4 00 1 4 6 21 4 150 6 55 1 4 6 4 4 2 4 150 6 7 6 21 55 1 4 6 4 7 420 64 4 5574 6 223 1 4 0 15 215 5 3 1 6 16 4 44 6741 42 4 0 44 6741 7 465 3 70 4 4 2 5 4 2 5 27164 2 240 6 624 200 1 5 1 7564 0 2 2 5 1 1 6 2 4 6 70 4 4 2 5 6 0 2 2 5 1 1 6 0 2 2 0 2 2 4 2 5 1 1 6 1 1 29 4 4 2 7 ...

Страница 137: ... 8 1 11 2 414 8 4 314 3 4 9 7 1 97 1 5 9 438 77 39 7 3 8 77 39 3 2 9 3 1 7 8 5 7 9 3 419 4 7 551 4 8 9 43 9 3 77 39 3 7432 39 1 5 9 438 2 39 11 2 3 9 43 749 9 43 2 9 7 88 7 4 0 25 7 9 7 8 5 7 4 38 9 9 9 7 4 947 198 8 9 947 99 3 8 947 7 947 99 3 3 9 43 1 9 472 9 947 422 3 8 79 11 4 79 3 7 1 2 38 438 14 1 74 7 22 3 4 8 19 7 4 8 5 7 4 9 7 4 9 3 7 1 2 38 438 15 80 15 80 43 2 7 79 2 9 5 9 43 39 9 43 1 ...

Страница 138: ... 8 6 6 271 8 900 8 68 834 6 271 8 3 0 8 32 7 0 00 1 303 7 28 60 3 0 8 32 8 59 6 8 6 271 8 86 3 0 8 32 2 2 8 68 274 8 2 36 7 2 322 8367 28 6 0 322 8 32 322 8 2 8 22 6 28 6 0 40 1 28 40 2 8 28 6 0 3 6 92 8 32 3 7 3 6 92 8 32 0 8 327 47 3 6 8 0 68 0091 2 8 32 2 8 2 6 0 1 27 327 1 8 66 28 78 3 09 2 0 3 7 09 2 0 63 6 11 2 28 2 2 0 2 2 8 2 2 3 274 8 2 36 7 2 322 8367 40 2 8 28 6 0 2 1 8 2 096 7 2 0 3 2 ...

Страница 139: ...4 6 21 27164 2 6 21 16 4 4 6 4 6 21 16 4 71 6 21 6 21 16 40 55 6 21 2 4 07 6 21 2 2 4 6 6 21 76376 2 6 21 7 4 15 71 6 21 2 4 150 6 5 4 71 1 12765 2 4 1 07 6 21 6 1 7 1 42 4 00 1 16 4 5 1 203 6 5 1 203 6 5 1 203 6 5 15647 6 215 56 2 7 1 2 5 16 4 1 07 6 21 16 4 0 2 246 6 40 1 5 744 16 2157036 21 29 4 733 2 5 6 21 42 05 See also 427 5 226 1 7 4 2 26 16 4 2 1 224 6 42 4 0 44 6741 7 42 4 00 1 4 2 4 1 7...

Страница 140: ...51 8 7 4 7 7 4 3 9 43 4 7 382 9 8 1 3 1 95 9 1 8 74 7 22 3 3897 9 438 1 3 1 3 3 947 198 19 947 99 3 8 0 3 9 43 1 1 9 438 72 3 1 1 9 43 74 7 22 3 6 3 74 7 22 3 9 9 8 9 9 8 0 5 78 43 77 39 77 39 51 3 9 39 7 1 8 9 947 99 3 8 841 9 43 9 1 2 414 8 3 3 9 79 9 1 2 414 74 7 22 3 8 1 11 2 414 8 1 9 43 1 9 43 9 3 9 3 0 9 7 382 9 3 1 3 3 9 79 1 9 43 1 88 1 9 43 3 6 7 1 9 43 1 9 43 9 3 9 3 3 472 9 0 9 7 382 9...

Страница 141: ...54 3 2 062 8 5 9 04 2 8 5 4404 407 9 358 8 9 358 49 4 4 8 5 2 4 0 0 054 44 8 544 054 44 8 4 0 0 054 4404 407 9 46 104 80 2 3 8 4 0 0 054 2 04 6 8304 2 4 8 8304 2 2 054 85 8 3304 0 4 8 2 03 490549 1 4 2 4 88 4 9 1 5 583 9 5 5 8 09054 56604 85 8 3304 7 4 58 36 8 8 6658 4 8 9 4 536 0 2 9 4 536 0 2 9 6658 8304 29 8304 2 2 054 85 8 3304 3 525 8 5 9 3 525 8 8304 2 3 8 8304 2 2 054 4 8304 2 2 054 85 8 33...

Страница 142: ...1203 2 1 22 0 2 0 3 02 0 1 0 2 3 0 0 0 6 0 0 7 6 2 0 0 2 0 3 1 2 0 3 1 2 3 7 2 0 25 0 3 2 1 0 32 32 0 0 32 32 0 26 2 0 1 11 2 2 3 2 0 0 7 00 26 2 00 26 2 6 1 0 2 2 2 1 6 0 3 2 04 1 30 0 2 0 2 2 2 2 1 2 0 1 1 0 12 ...

Страница 143: ...viii Index ...

Страница 144: ... 1234567890 TEST SHEET 031323120786 5 addenda 56098 9780330290951 123456 6543210 11223344 44332211 9876 0013557900 SAMPLE BAR CODES Programming the DEFAULT All Retail Selections doesn t enable these symbologies ...

Страница 145: ...3210 DO UG Skaneateles Falls New York 13153 0187 Rev D P O Box 187 4619 Jordan Road Data Collection Division ...

Отзывы: