www.webasto.us
51
Webasto Product N.A., Inc.
DBW 2010/2020/300 COOLANT HEATERS
REPAIR
9.2.3
T
EMPERATURE
L
IMITER
, R
EPLACEMENT
9.2.3.1 R
EMOVAL
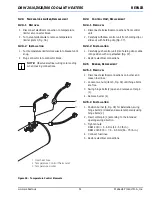
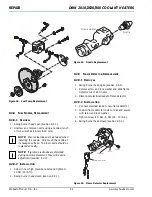
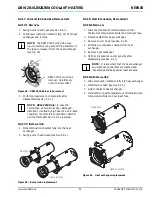
1. Disconnect electrical connection to temperature
limiter at connector block.
2. Turn counterclockwise to remove temperature
limiter (item 3, Fig. 36).
9.2.3.2 I
NSTALLATION
1. Turn temperature limiter clockwise into bracket until
snug.
2. Plug connector into connector block.
NOTE:
Observe electrical wiring color coding
when making connections.
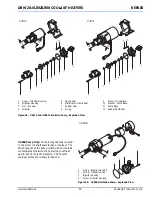
Figure 36:
Temperature Control Elements
9.2.4
C
ONTROL
U
NIT
, R
EPLACEMENT
9.2.4.1 R
EMOVAL
1. Disconnect all electrical connections from control
unit.
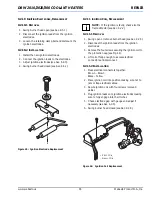
2. Carefully withdraw control unit from holding clip or
slide out with holding clip (Fig. 37).
9.2.4.2 I
NSTALLATION
1. Carefully push control unit (into holding clip or slide
into position with clip attached (Fig. 37).
2. Restore electrical connections.
9.2.5
B
URNER
, R
EPLACEMENT
9.2.5.1 R
EMOVAL
1. Disconnect electrical connections on burner and
loosen fuel lines.
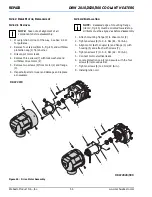
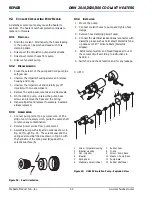
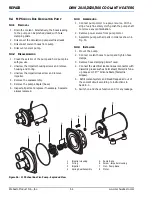
2. Loosen two nuts (item 3, Fig. 38) until hinge bolts
are free.
3. Swing hinge bolts (2) open and remove cotter pin
(1).
4. Remove burner (4).
9.2.5.2 I
NSTALLATION
1. Position burner (4, Fig. 38) for installation, swing
hinge bolts (2) closed and secure temporarily using
hinge bolts (2).
2. Insert cotter pin (1) according to the intended
opening swing direction.
3. Tighten nuts:
DBW 2010 = 5 - 6 Nm (44 - 53 lb-in.).
DBW 2020/300 = 7.5 - 8.5 Nm (66 - 75 lb-in.).
4. Connect fuel lines.
5. Restore electrical connections.
1
2
3
1 Overheat Fuse
2 Temperature Control Thermostat
3 Temperature Limiter

