WX-500-0315
© 2015 Wavetronix LLC. All rights reserved. Protected by US Pat. Nos. 6,556,916; 6,693,557; 7,426,450; 7,427,930; 7,573,400; 7,889,097; 7,889,098; 7,924,170; 7,991,542; 8,248,272; 8,665,113;
and Cdn. Pat. Nos. 2,461,411; 2,434,756; 2,512,689; and Euro. Pat. Nos. 1435036; 1438702; 1611458. Other US and international patents pending. Wavetronix, SmartSensor, Click, Com-
mand and all associated logos are trademarks of Wavetronix LLC. All other product or brand names as they appear are trademarks or registered trademarks of their respective holders.
Product specifications are subject to change without notice. This material is provided for informational purposes only; Wavetronix assumes no liability related to its use.
10
Set up data collection
The
Data Setup & Collection
link on the main screen lets you set up data collec-
tion. For a basic HD installation, you will need to configure the following settings.
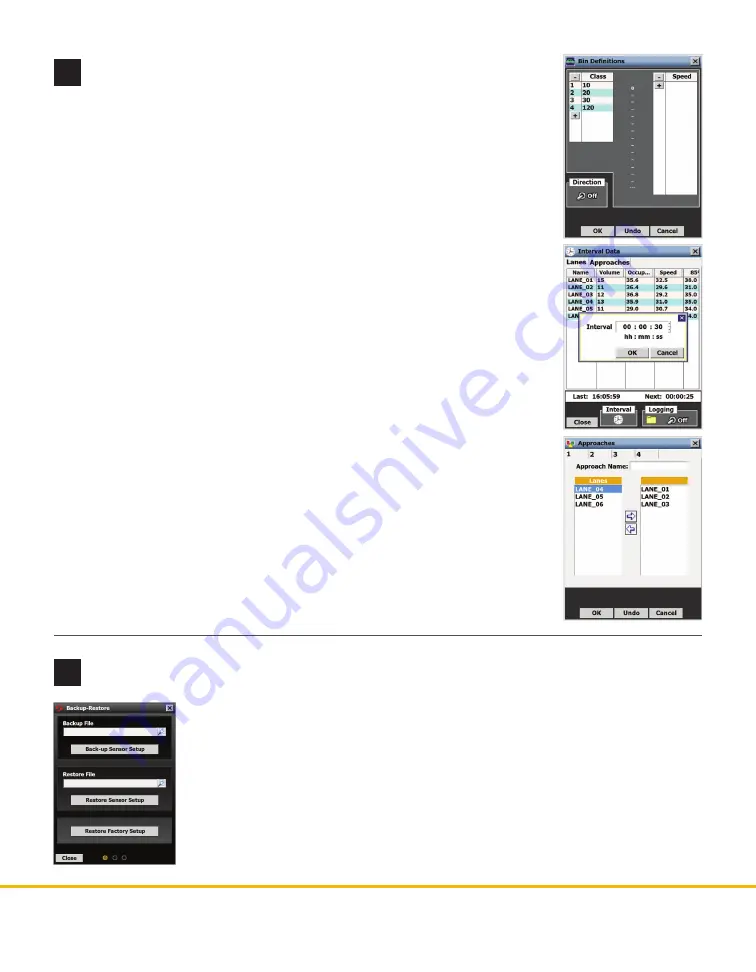
Definitions
Select
Data Setup & Collection
from the main screen, then click on
Bin Defini-
tions
. In this section you will define classifications of vehicles based on certain
criteria; once bins are set, data can be collected for these groups of vehicles.
˽
For class, use the
-
/
+
buttons under the class section to add or remove bins.
˽
For speed, use the
-
/
+
buttons under the speed section to add or remove bins.
˽
For any given bin, click on it and type or use the
-
/
+
buttons to change the
definitions.
Click
OK
when you’re done.
Interval Data
Click
Interval Data
on the Data Collection screen to change the interval (a defined
period of time in which data is collected about all vehicles that pass the sensor).
Once the screen is open, click the clock icon and change the time, then click
OK
.
Approaches
Click
Approaches
on the Data Collection screen to configure your approches (lane
groupings used in data collection). To create approaches:
1
Select the lane for the approach from the Lanes list on the left, then click the
right-facing arrow to assign them to the approach.
2
Repeat step 1 for all lanes you want in the approach.
3
Enter a name for your approach in the text field at the top of the window.
4
Click
OK
to save.
11
Create a backup
After configuring the sensor, you should always make a backup of the sensor settings.
1
Select
Tools
from the main menu, then click
Backup/Restore
.
2
Under the Back-up File heading, click on the magnifying glass. In the window
that opens, navigate to where you want the backup file to be stored. Give the
backup file a name, and then hit
OK
.
3
Click
Back-up Sensor Setup
.
To use a backup file, use the Restore Sensor Setup option on the same screen.


