STEP 3: Configure the mini appliance.
Now that you have logged on to the mini appliance browser interface, go to the
Settings
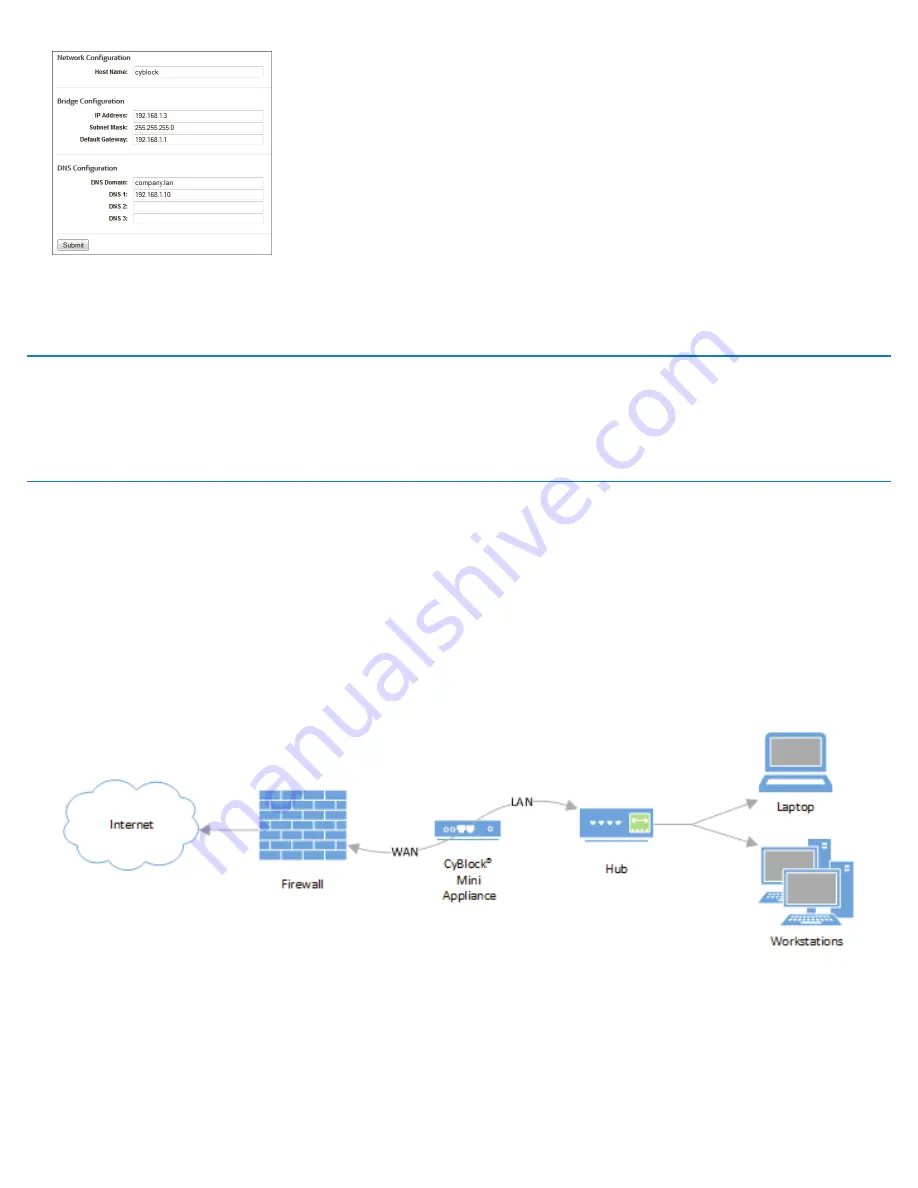
- Network - Configuration
screen
(Figure 5)
.
• In the
Host Name
field, enter a “friendly” name for the mini appliance.
• Next, enter an IP address that fits into your network IP scheme for CyBlock
Mini Appliance.
• Enter the subnet mask.
• Enter the default gateway IP address of your network.
• In the
DNS Domain
field, enter the DNS domain name (including suffix).
• In the
DNS 1
field, enter the IP address of your primary DNS server.
• If you have a secondary DNS server, enter that IP in the
DNS 2
field and so
forth.
• Click
Submit
to apply the configuration.
STEP 4: Configure your computer back to its original IP scheme.
Using the IP information you recorded before making the changes to connect to
the mini appliance, change your computer back to its original IP scheme using the
instructions in
STEP 2
.
STEP 5: Put the mini appliance into production.
The mini appliance can be put into production in the following ways:
Bridge Mode
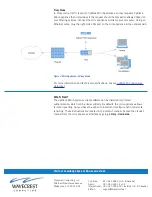
In Bridge mode, the mini appliance works as an inline device between your network
and the Internet. It acts like a bridge, allowing Internet traffic to flow transparently
through it. You want to place CyBlock Mini Appliance in front of all computers that you
want to filter and behind your firewall/cable modem. Using an Ethernet cable, plug
your filtered internal network traffic (LAN) into the right-side LAN port. Next, plug your
unfiltered traffic (WAN) into the left-side LAN port.
Figure 6: Mini Appliance in Bridge Mode
Figure 5: Network Settings Screen


