background image

F

G  

GARBAGE DISPOSAL

E

A

B

C

D

E

F

G

H

1-1/2”
HOLE

E

5.

6.

7.

8.

1.

2.

3.

4.

5.

6.

Unscrew and remove 
top clamp nut (D) 
from both threadings 
on piping. Slide 
gasket (E) off piping 
and remove.

Twist and pull air gap 
cover (A) off of upper 
cap nut (B). Unscrew 
and remove cap nut 
from piping (C). 

Slide gasket down and screw top clamp 
nut back onto piping. Adjust the two 
clamp nuts to fit countertop thickness. 

(No plumbers putty is required)

.

Screw cap nut back 
onto top of piping 
until snug. Slide air 
gap over cap nut and 
top clamp nut. Be 
sure to have overflow 
holes (F) facing sink.

Slide small intake hose 
(G) over small connector. 
Slide larger drainage hose 
(H) over large connector. 
Tighten hose clamps. 
Turn on water supply 
and check for leaks.

From underneath 
counter top, fit air 
gap piping upward 
through 1-1/2” 
hole.

CONTINUED FROM PREVIOUS PAGE

INSTALL SINGLE PORT AIR GAP (OPTIONAL)

Tighten clamp screws (E) 
securely with screwdriver. 

Hand tighten switch base back 
down to cover threads.

Slide other end of 
tubing (F) into tube 
fitting at bottom of 
control box (G).


Plug control box into undersink 
electrical outlet. Plug garbage 
disposal into either dual outlet. 

Содержание 5300

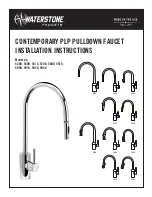
Страница 1: ...Model s 5300 5400 5410 5700 5800 5810 5900 5910 5930 5940 CONTEMPORARY PLP PULLDOWN FAUCET INSTALLATION INSTRUCTIONS 5700 5800 5810 5940 5930 5900 5400 5940 5410 5300...

Страница 2: ...allation To reverse this and have the handle positioned on the left connect the hose for cold water to the hot supply and the hose for hot water to the cold supply This will maintain the relationship...

Страница 3: ...rees to avoid hitting backsplash FIG 1 REDFORHOT BLUEFORCOLD OPTIONAL HOT COLD INDICATOR RING To reverse or remove Hot and Cold Indicator Ring unscrew the metal cap remove ring and flip Slide ring bac...

Страница 4: ...spray hose by holding knurled swivel B 3 Inspect remove and clean debris screen C in sprayer Once cleaned replace debris screen and reattach to swivel 4 Close faucet handle and turn on water supplies...

Страница 5: ...base and into plastic bottle Push down on spout to secure over white O rings Pump spout a few times to get soap or lotion flowing Fit dispenser body through 1 3 8 hole on counter or sink Noplumbersput...

Страница 6: ...g Slide air gap over cap nut and top clamp nut Be sure to have overflow holes F facing sink Slide small intake hose G over small connector Slide larger drainage hose H over large connector Tighten hos...

Страница 7: ...o clamp nuts to fit countertop thickness No plumbersputtyisrequired Screw cap nut back onto top of piping until snug Slide air gap over cap nut and top clamp nut Be sure to have overflow holes F facin...

Отзывы: