3
Quick Start up Guide
Make sure your TV/Monitor is ON and set to the appropriate AV channel if required
Switch the Power button located on the rear of the DVR after connecting a monitor and at least
one camera. The Power LED will illuminate Green. It takes approximately 10 to 15 seconds to
boot the system.
The images from all 4 cameras should now be displayed on your TV/Monitor
BEFORE BEGINNING TO RECORD YOU MUST
SET
the
DATE
and
TIME
on your DVR.
Setting the Date and Time
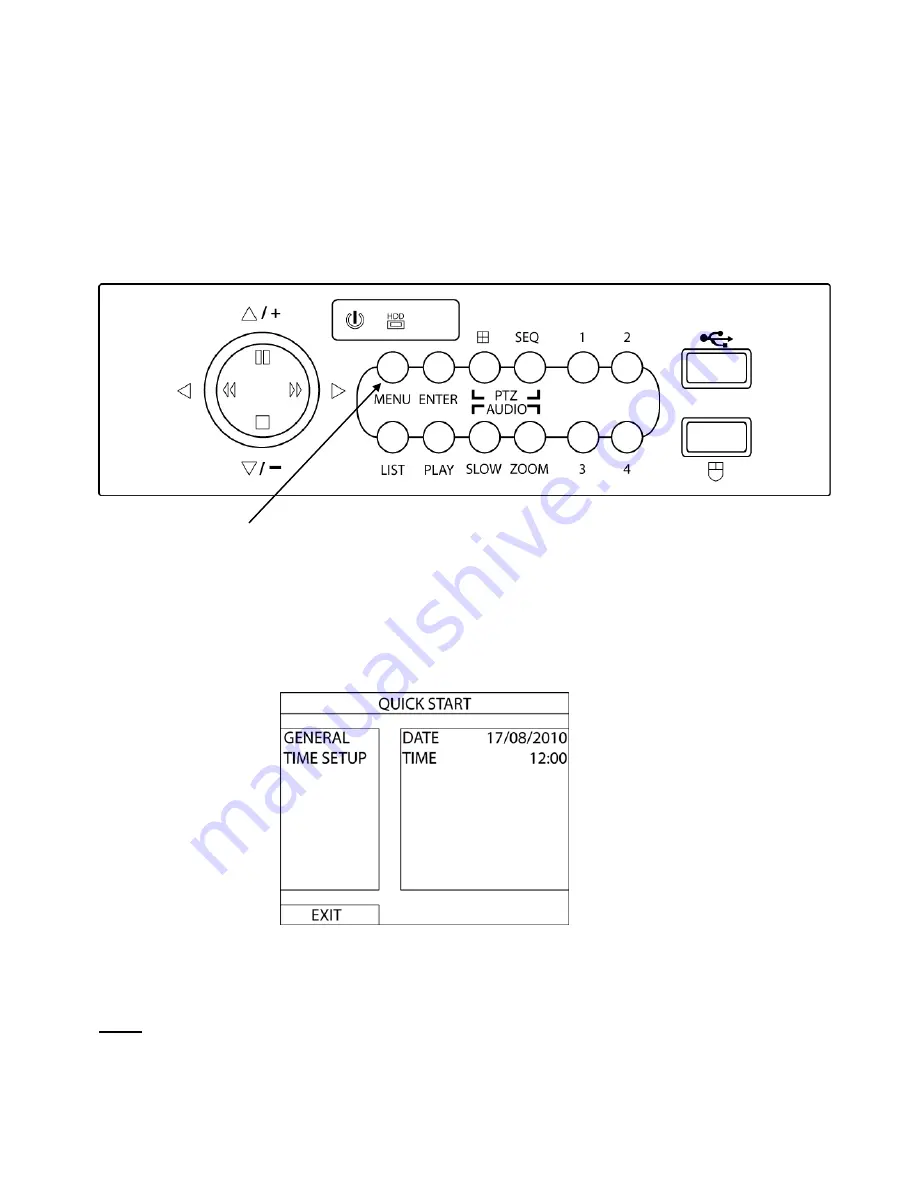
Press “MENU” on the DVR front panel to bring up the password dialogue box. Use the mouse to
enter the DVR admin password with the on-screen keypad.
The default admin password is 0000.
(Users can alter the password later. Please refer to the Advanced set up guide CD)
Press “MENU” on the DVR front panel to bring up the main menu. Select “QUICK START”
“TIME SETUP” to set the date and time
IMPORTANT NOTE
: Please DO NOT change the date or time on your DVR after the recording function is
activated. The recorded data will be disordered and you will not be able to find the recorded file to backup by time
search.
NOTE
: If users change the date or time accidentally when the recording function is activated, it’s recommended to
clear all HDD data, and start recording again.


