- 35 -
Once you have activated your account, log into the http://
www.dyndns.org
website using the username and password
you have created.
From the menu on the left:
Click
My Services
Click
My Hosts
Click
Dynamic DNS
From the page that loads:
Click
Add Host
From the form that loads:
Enter the a memorable name as the
Hostname
Select an appropriate
Domain Name
from the drop down list.
Click
Add Host
to submit the form
Once the next page loads, log out of the website.
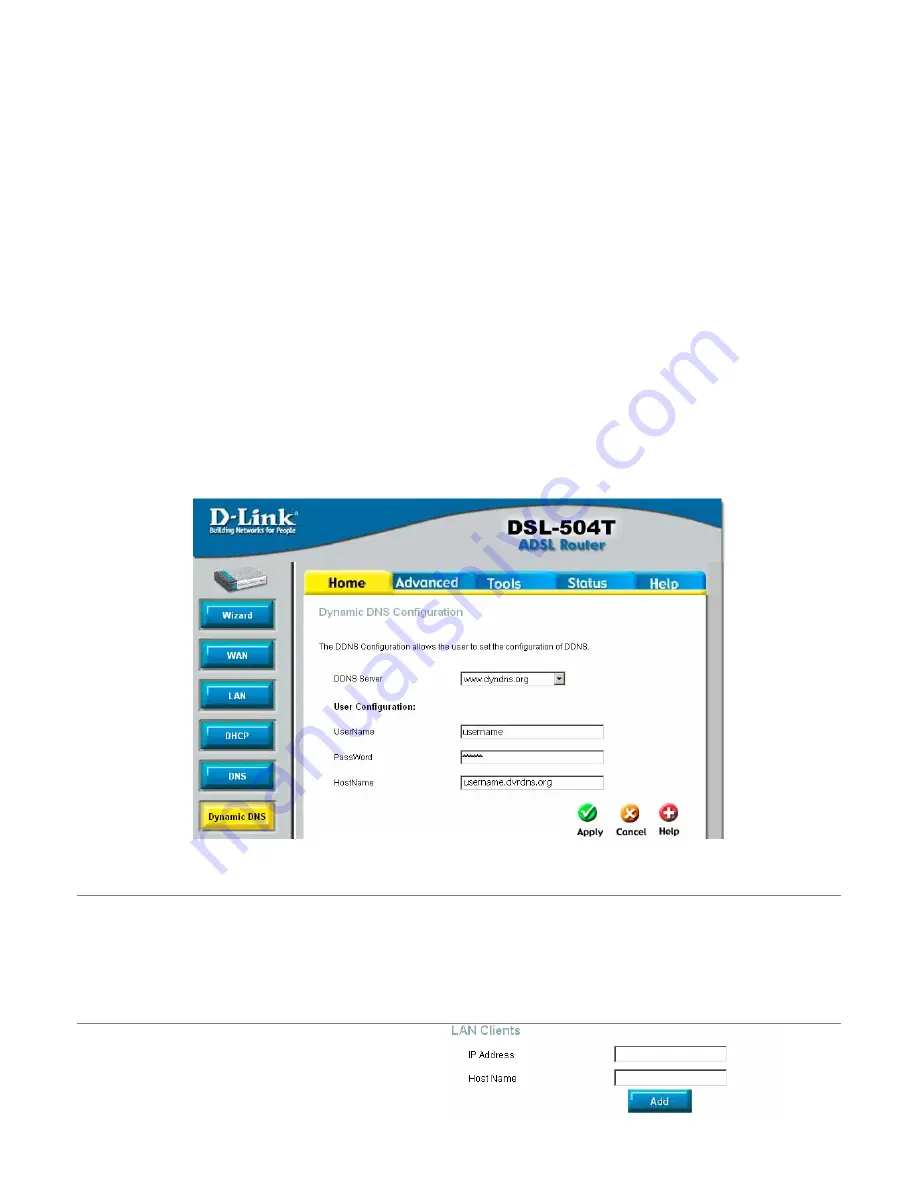
Log into the router and click on
Dynamic DNS
menu item.
Change
the
DDNS Server
to
www.dyndns.org
Enter the details for the
Username
,
Password
and
Host Name
as per the DynDNS account you created.
Save the settings:
Click
Apply
Click
the
Tools
tab
Click
the
System
menu item
Click
the
Save and Reboot
button and select OK when prompted to continue.
DVR IP Address
Following the instructions in page 14 of the manual, go to the
Advance > Network
section of the DVR menu, select static
and enter the following:
-
IP address :10.1.1.50
- Subnet
:255.0.0.0
-
Gateway
: Your routers IP address (Default : 10.1.1.1)
LAN Clients
Log into the router and click on the
Advanced
tab:
Click on the
LAN Clients
menu item
In the IP Address field enter
10.1.1.50
In the Host Name field enter
DVR
Press
the
Add
button


