4. ELECTRICAL CONNECTIONS
GROUNDING INSTRUCTIONS
This appliance must be grounded. In the event of
malfunction or breakdown, grounding provides a path
of least resistance for electric current to reduce the
risk of electric shock.
DANGER:
Improper connection of the equipment-
grounding conductor can result in a risk of electric
shock. Check with a qualified electrician or service-
man if you are in doubt as to whether the appliance
is properly grounded.
NOTE:
Disconnect electric power to disposer circuit
before installation. Turn the circuit breaker to the
OFF position or remove the fuse.
A.
Connect disposer to 110-120 Volt, 60 Hz AC
current only.
GROUNDING INSTRUCTIONS
This appliance must be connected to a grounded,
metal, permanent wiring system; or an equipment-
grounding conductor must be run with the circuit
conductors and connected to the equipment-grounding
terminal or lead on the appliance.
A.
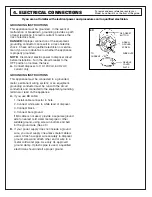
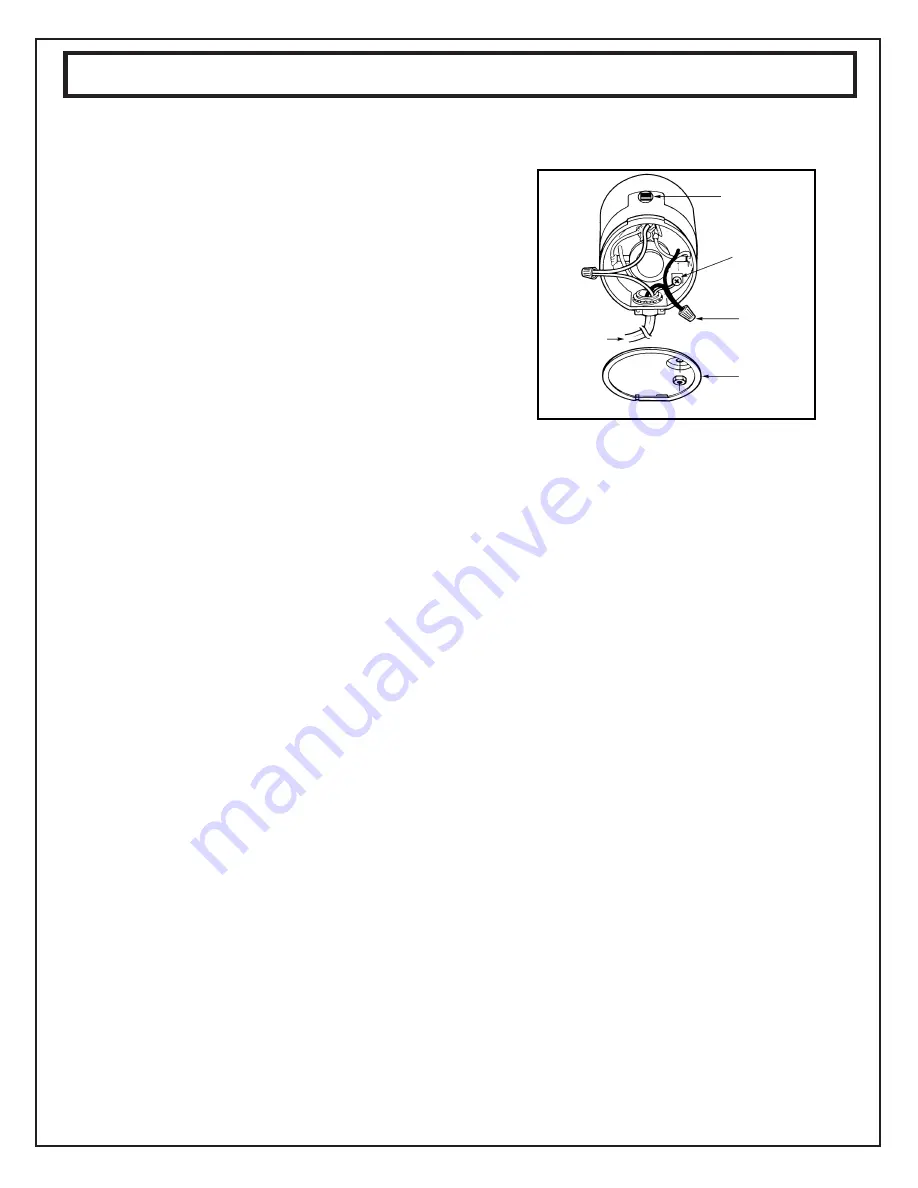
If you use BX cable:
1. Install cable connector in hole.
2. Connect white wire to white lead of disposer.
3. Connect black.
4. Connect bare ground.
If BX cable is not used, provide a separate ground
wire to nearest cold water metal pipe or other
suitable ground, using screw in bottom end bell
for the ground wire (See 4C).
B.
If your power supply does not include a ground
wire, you must supply one unless metal cable is
used. Attach a copper wire securely to disposer
ground screw and attach other end of wire to a
metal cold water pipe. Use only UL approved
ground clamp. If plastic pipe is used, a qualified
electrician should install a proper ground.
RED RESET
BUTTON
GREEN
GROUND
SCREW
WIRE NUTS
REMOVE
COVER
PLATE
4C
If you are not familiar with electrical power and procedures call a qualified electrician.
For quick and easy reference, record your
Model # and Serial # on the front of this guide.
TO
CURRENT


