Page 13
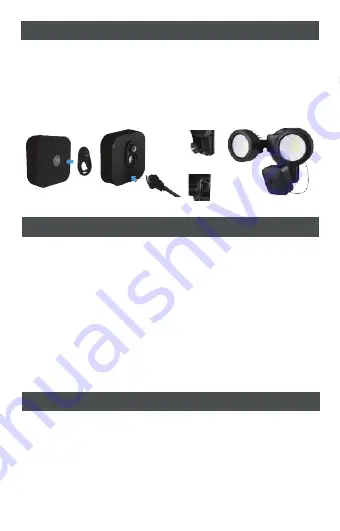
1. To charge your camera via the floodlight, plug in the USB cable at the
micro-USB port of the camera. Press in firmly.
2. Insert the Blink camera mount adapter.
3. Screw the camera onto the mount.
4. Open the USB port cap of the floodlight and connect the cable. Press in
firmly.
5. Adjust the camera to your preferred viewing angle.
Mounting Screw
Charging Port
Mounting Your Camera (Blink Outdoor & Blink XT2)
1. Assess where intruders are most likely to enter and the path they would take.
Most intruders enter homes through a back door, patio door, or garage
door. Therefore, it is advisable to place the floodlight near the entrances to
your home.
2. Mount the floodlight on walls that an intruder would walk alongside, such as
a narrow pathway. The motion sensor works best when movements are
detected parallel to the floodlight, not towards it.
3. You can also mount the floodlight beside your security camera to illuminate
the camera’s vision at night.
4. Although the floodlight is weatherproof, it is advisable to mount it to a wall
shaded from the rain and sunlight to maximize battery life.
5. Due to continuous product improvement, all App settings above are subject
to change without prior notice. Please always keep the App updated to the
latest version.
Important Tips
1. The smart floodlight will not turn on. What's going on?
There are several possibilities. Try the following steps.
FAQ
• Check your connection to the house’s power.
• Leave the area for 10 minutes to give time for the floodlight to reset
without you triggering it. Return and check the floodlight by turning off the
power for at least a minute, then turning it back on.
• Make sure you are testing the floodlight at night.
• Make sure the App is installed and paired with your smart floodlight
correctly.


